| Date: 04-04-2026 | |
| Number of Hours: 0 | |
| Manual Reference: no ref |
After finding and fixing a few more leaks I was getting closer again to being back in the air.
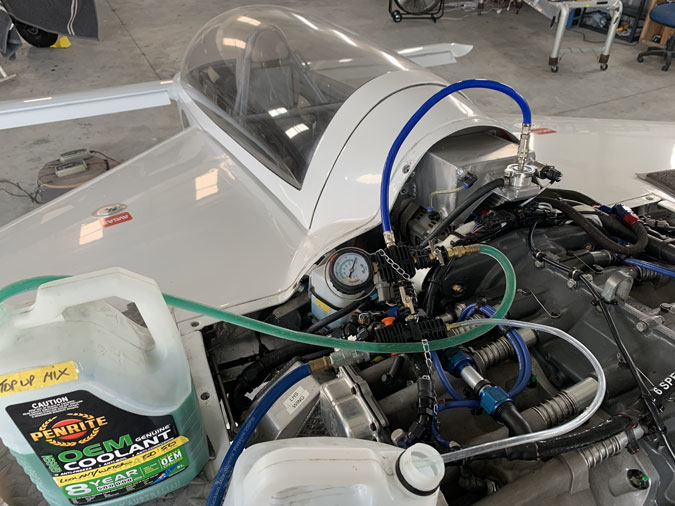
Its a bit of a process where I pull a vacuum and suck the coolant into the engine system hopefully with a minimum of trapped air pockets in all the twists and turns.
After ground runs as a part of the break in procedure there was a small oil leak. After 2 hours flying I found this rather disturbing oil leak had grown. It was a sort of sludge.
In my 2 hour first flight after the rings… I still had other issues. The oil temp was 239F at only 2300rpm and it would climb alarmingly as I went faster. My happy range would be between 180F and 220F probably on the hotter side to burn off all those nasty contaminates in the oil. What’s going on? I had installed a larger heat exchanger with great expenditure in time and money and it made no real difference.
My flap lock system, also a really big time spend just didn’t work. The flaps were still creeping open in flight. Not as often as before but it was still an issue. So lets call the new lock system a fail too. I also had a lot of oil in the cowls when I landed. Some was from the oil separator attachment which only needed a tighten but there was even more oil around the left side cylinder block at #1 cylinder. I also had heat in the cowl issues with the paint blistering, I need to at least rewrap the exhaust pipes.
Well I needed to fix the oil temps to have a usable plane. I went down a few rabbit holes and surfaced with a suggestion it might be the vernatherm. That’s a little device to open a path to the oil cooler at about 180F, before that you want to keep oil away from the cooler so you can get up to temperature quicker.
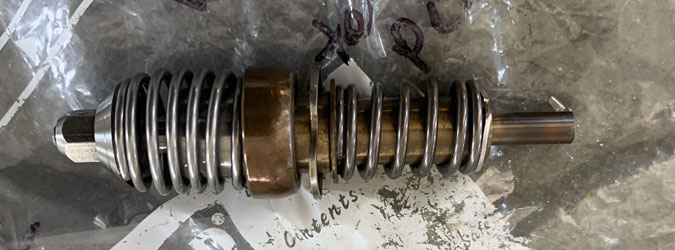
Here it is. Why are you seeing this? Well I took it out of the engine before it was installed. This was on very strong advice from the engine designer. He doesn’t like them for the liquid cooled engines, maybe so everything is regulated by the coolant temperature given I have a heat exchanger. I pushed back a bit on this but relented.
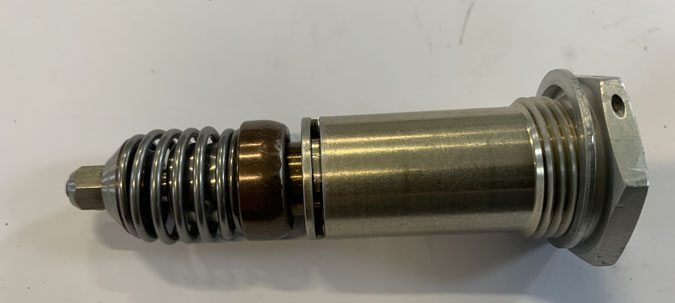
As you can see it fits into a housing and that’s what I installed in the engine without the guts of the unit. Now my assumption, and that of others I spoke to was that when you pull these things out the oil goes straight to the cooler and isn’t by passed. Well given my oil issues since first flight, and the heads up it might be related to this thing, I did some research.
DOH!!!!! No vernatherm means the oil NEVER goes to the cooler. I have been flying around without oil cooling. If you pull it out there is a device you are meant to put in so the plunger is always engaged. That engagement happens when it gets to a certain temperature so no plunger, and you have a full time bypass.
No problem, I just need to get the plug out, put the venatherm mechanism back in and reinstall. Yes I did first test it in very hot water to ensure it worked as advertised.
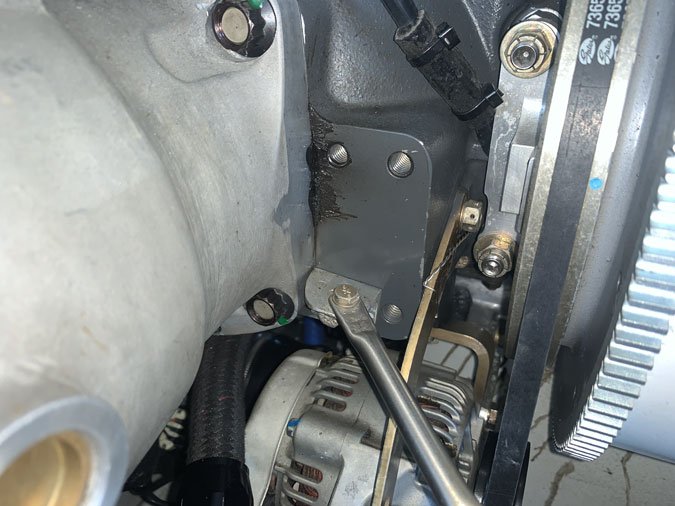
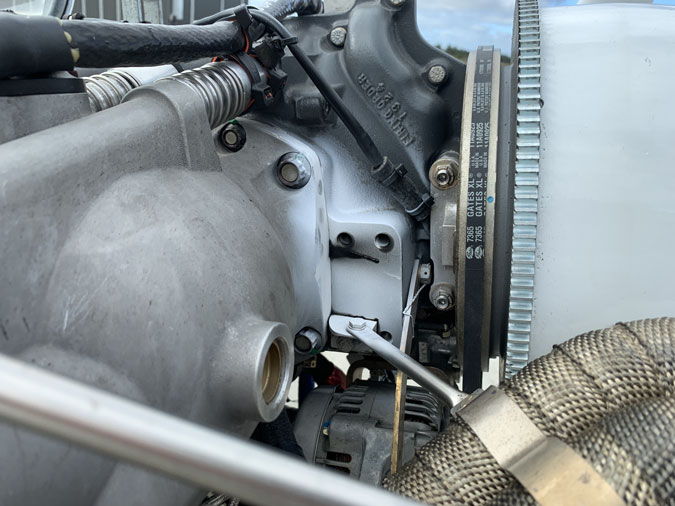
No worries, except you can’t put in back in as there isn’t enough room between the engine and the firewall.
So the engine came out again for the fourth time to do a 5 minute fitting of the venatherm. This time I did get lucky and got it back on the mounts on my own. Its pretty hard to do without pinching the large rubber Lord fittings.
I very carefully rewrapped the pipes as well for efficiency and well as heat reduction in the cowls. This is quite controversial, my plan is to remove, inspect and put new wrap on every couple of years. Some say this promotes rust and cracking, hence the inspection. It is said to be a performance enhancer by many automotive people and the engine designer likes wraps.
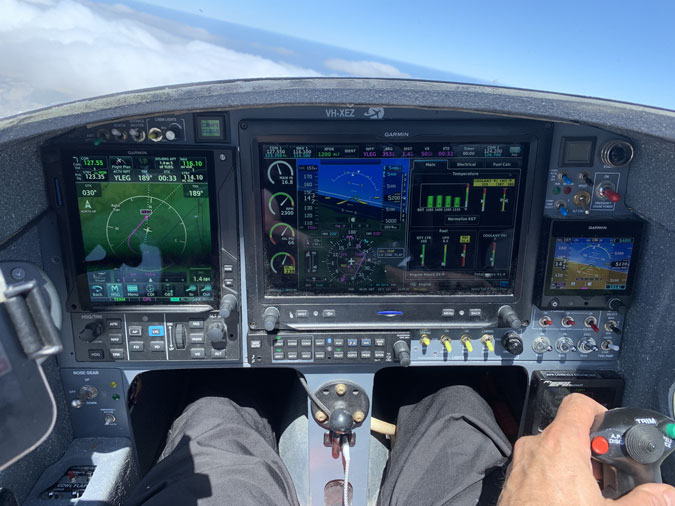
OK March 14th I’m back in the air for two hours. Just flying in circles near the airfield. Yes I am a little cautious at this stage of the game.
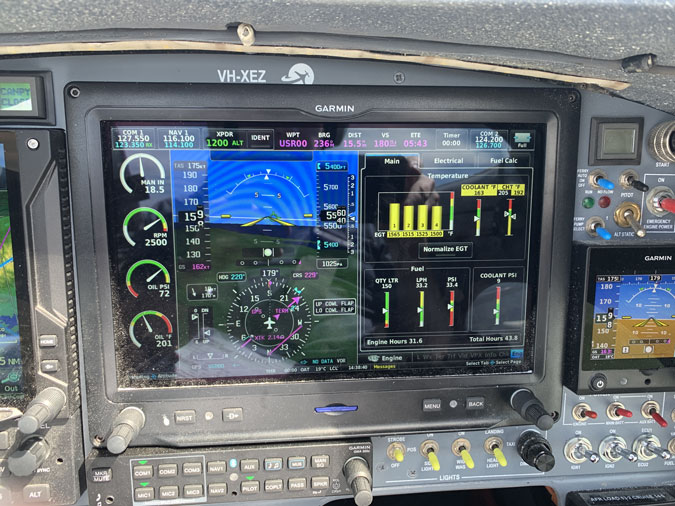
The numbers… Oil temps, fantastic. 201F is really good. It seems if I have a working oil cooler that problem is solved. Coolant temps, also excellent. The numbers that matter are those coming out of the engine, 205F and 192F (the label CHT is just what was on the G3X its a coolant temp) the other number tells me how much effect the radiators have had. So 163F gives me a DeltaT of 42F, very effective. Usually the two cylinder banks have very similar numbers, now we have 13F difference, that means something as you will see.
EGT’s seem high until I had discussions with Andy (engine designer). At a calculated stoichiometric 14.7:1 I can expect around 1600F to 1650F based on my flight numbers for this installation. EGT is about the trend and a heads up if one cylinder is very different to others. If my oil temp/pressure and coolant temps are good and the AFR is where it should be, all is well whatever the EGT’s really. So I have reset where the yellow band is on the G3X.
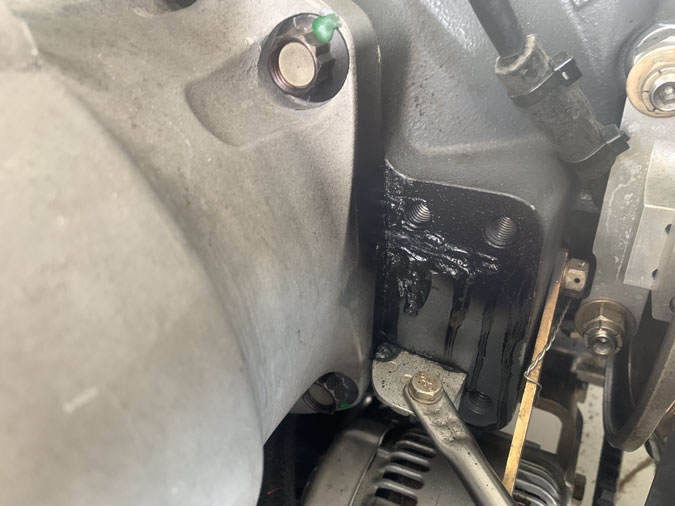
Now the not so good news. That oil leak is significant. I have a problem. That might explain the coolant temperature difference one side to the other too.
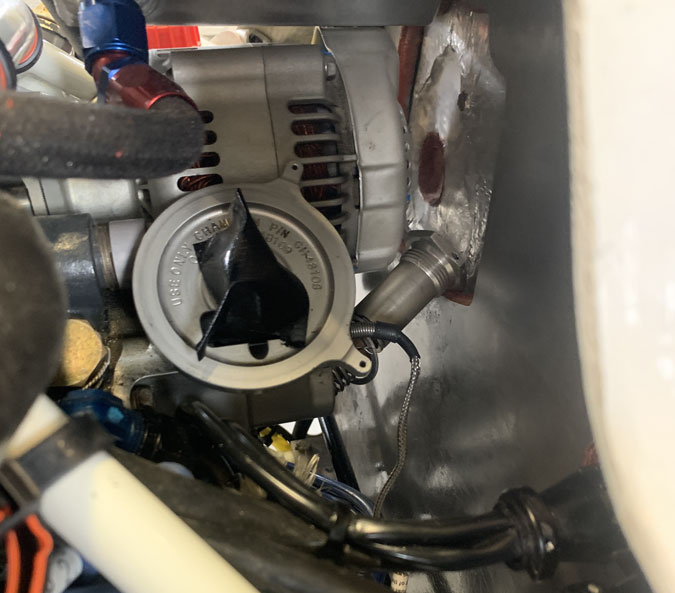
Above the oil leak I had a LOT of heat. It took out the flap lock solenoid too. That’s the charred area. I was get occasional flap opening, so the locks don’t work. They must shake loose until they are reset, but it became very frequent later in the flight. I assume after the heat built up. I was also getting a low sump warning, that might be an airlock in the vent that I need to see about. Maybe it needs burping from low kneeing to nose up. Yet to be solved.
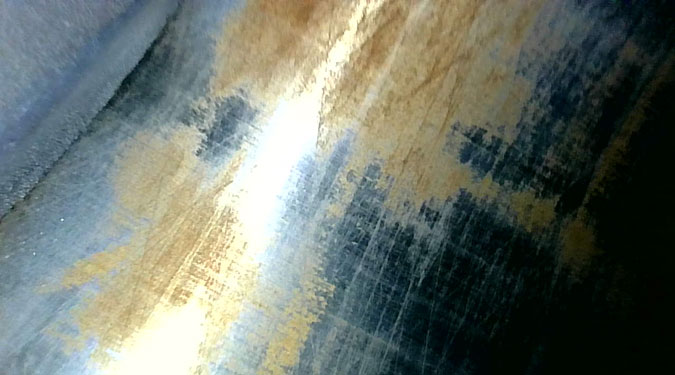
I got in touch with the guys who installed the rings and they suggested a ground run with white developer on the cleaned surface to see the leak in action.
This is a 3 minute ground run reduced to a few seconds which shows the leak pretty well. I think it might be a crushed O ring but it may be something else.
The next issue was checking in the Andy again. The engine builders suggested torque to be 60lbs/ft for the 1/2″ cylinder base nuts. Andy tells me 42lbs/ft and 35lbs/ft for the 3/8″ studs. Lycoming says 50lbs/ft for the 1/2″! OK so this is about clamping pressure. I have aluminium cylinders with steel inserts NOT steel on steel. When the engine warms up aluminium expands a LOT more than steel. So the clamping pressure warm starting at 42lbs/ft ends up around 50lbs/ft in practice.
The next thing was the metal gaskets on my engine. Andy says to leave them out and use ThreeBond 1102 Yellow for assembly. This fills any imperfections and the rest squeezes out. I don’t think this relates to the current issues but might head off problems down the track.
Ok now we get to the return of rust! I ‘borescoped’ the cylinders and found fresh rust in all of them.
The engine had preservative but despite this I have rust after 3 months inactivity. Given there is rust in every cylinder, I don’t think the heads are cracked. It would need a leak in all four. However I will do some dye penetration tests when they are off. I have sprayed more preservative and reinstalled the silica gel sparkplugs on top. I suspect once I am flying regularly and using CamGuard and 20/50 oil I might be OK. I did build a dehumidifier but it doesn’t work with the antisplat system I have.
- I need to fix/redesign the flap lock system
- The engine oil leak at the cylinder block must be solved
- The first annual on the plane is now due as is my Instrument rating renewalSo I’m grounded again.