• Home
  • Flying
    • First Flight
  • Build by Chapter
    • Ch 3 Education
    • Ch 4 Fuselage Bulkheads
    • Ch 5 Fuselage Sides
    • Ch 6 Fuselage Assembly
    • Ch 7 Fuselage Exterior
    • Ch 8 Roll Over/Seat Belts
    • Ch 9 Main Gear/Landing Brake
    • Ch 10 Canard
    • Ch 11 Elevators
    • Ch 12 Canard Installation
    • Ch 13 Nose and Nose Gear
    • Ch 14 CenterSection Spar
    • Ch 15 Firewall and Accessories
    • Ch 16 Control System
    • Ch 17 Roll/Pitch Trim System
    • Ch 18 Canopy
    • Ch 19 Wings, Alierons
    • Ch 20 Winglets/Rudders
    • Ch 21 Strakes – Fuel/Baggage
    • Ch 22 Electrical System
    • Ch 23 Engine Installation
    • Ch 24 Covers/Consoles
    • Ch 25 Finishing
    • Ch 26 Upholstry
  • Build Mods
    • Liquid Cooling, Numbers, Weights and Flow
    • Cooling
      • Solving Ground Cooling 1
      • Solving Ground Cooling 2
      • Solving Ground Cooling 3
      • Solving Ground Cooling 4
      • Solving Ground Cooling 5
      • Solving Ground Cooling 6
      • Solving Ground Cooling7 – Test Data
      • Solving Ground Cooling 8 – Flap Building
      • Solving Ground Cooling 9 – Hinges
      • Solving Ground Cooling 10 – Lower Flaps
      • Solving Ground Cooling 11 – Upper Flaps
      • Solving Ground Cooling 12 – Completed
      • Cooling the Beast 1
      • Cooling the Beast 2 – Lower Cowl Expansion
      • Cooling the Beast 3 – KW Oil Cooler Diffuser
    • EVS (Enhanced Vision System)
    • Cowl Keeper
    • Rudder Gust Locks
    • Wing Fences
    • Post Cure
    • Hinge Upgrade
    • RAM Air & Hellhole Cover
    • Main Gear Beef Up
    • Pilot Side Windows
    • Baggage Pods
    • Winglet Intersection Fairings
    • Titanium Rollover
    • Nose Gear Doors
    • Wheel Pants/Gear Leg Fairing
    • Cabin heating System
    • Fuel System
    • Roll and Pitch Trim
    • Oxygen System
    • The Ferry Tank
    • Cruise Angle Indicator
    • Fire Extinguisher Install
  • Round the World
    • RTW Route East #12 rev1
    • Survival Equipment
    • Training Flights
  • Other Stuff
    • Blog
    • Around the World: RAAUS Sport Pilot Issue 110
    • Taxi Tests
    • Summary Feb ’24 from an SAAA Meeting
    • AOPA Pilot 27th Sept 2019
    • Build Tests
    • Flying Stories
      • A Long Easy Dream ’06
      • Townsville ’07
      • Cairns ’08
      • Albany ’08
      • East Coast ’08
      • Brisbane ’09
      • Cairns ’10
      • Perth ’10
    • Non Build Mods
      • F16 Scoop for JZE
      • Ram Air Box for JZE
      • Strange Tips
    • Milestones
    • Links
  • Contact

Blog

Home
Blog
Wheel Pants a Second Fit #4

Wheel Pants a Second Fit #4

6 years ago
Dave Berenholtz
Blog, Build Mods, Wheel Pants/Gear Leg Fairing
Date:  07-30-2019
Number of Hours:  34
Manual Reference:  no ref

I’ve been about a week on this part of the pant refit. While I was also working on the canopy fit this was the main task every day.

The back half of the pants being only two ply weigh very little. They also tend to oil can and will not be strong enough. I decided to use the technique from the Chapter 3 Education section of the plans. This has a bit of foam glassed in place that becomes amazingly strong.

I started just making up a foam wedge as you see above, They are so light a breeze will blow them away. I did one side, let it cure and then turned them over and did the second ‘strips’.

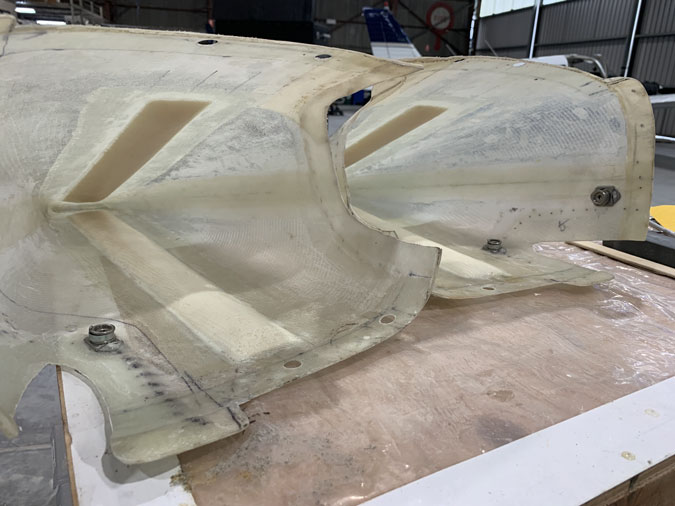
After microing these in place and after that cure I covered them with two plies of BID. I probably could have just used one ply in retrospect. Wow suddenly I have very strong rear wheel pants.

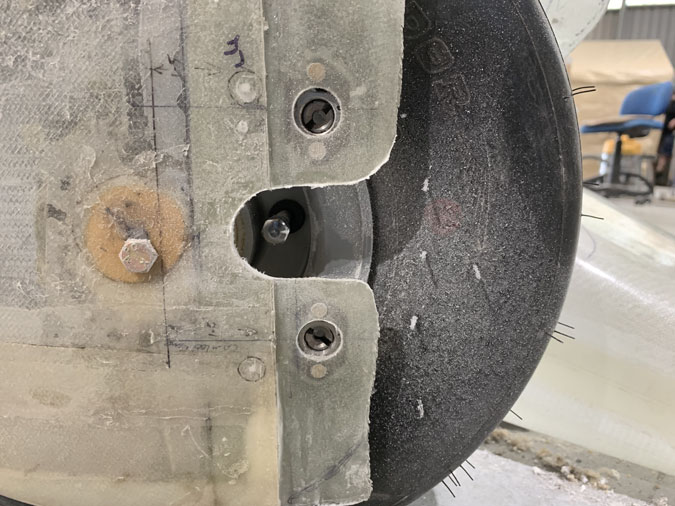
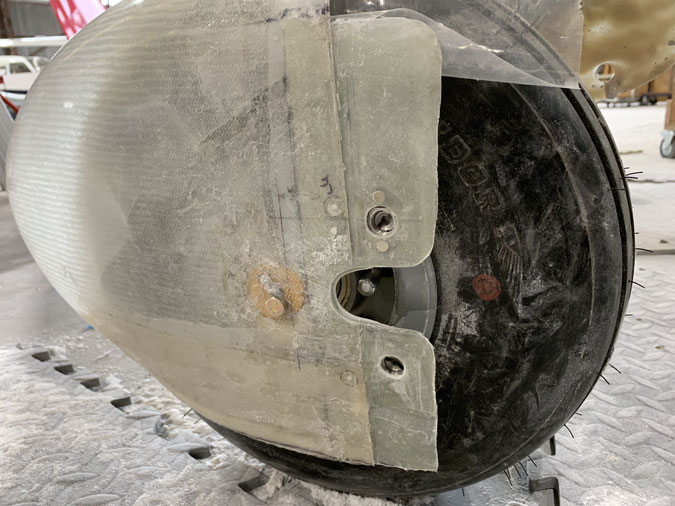
The next issue I knew was coming. As I am insisting on the rear pant section being the ones that come off and on with camlocs. Guess what? I just miss out on easy access to the tire valve by about half an inch. I could get a filler head in there but it is tough. I made a cutout for access. Easy, except I now have a hole in my pants. Yuk yuk… not all that funny.

Here’s the problem better illustrated. Of course this is all part of the plan.

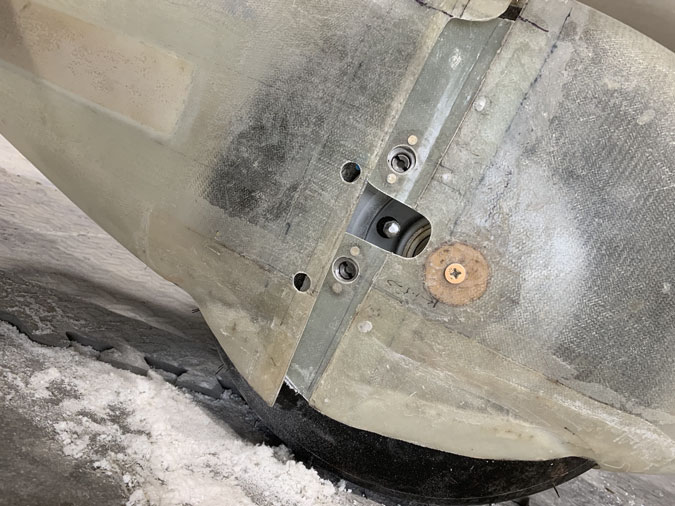
Meanwhile I had to fix another problem. Where I had added glass for the camloc lip right at the bottom it had set about .25″ inboard. This is exactly where the pant and tire are close,  I lopped off the offending glass and added more plies sitting correctly to both pants. At the same time I added glass on the inside of that cutout to make a lip.

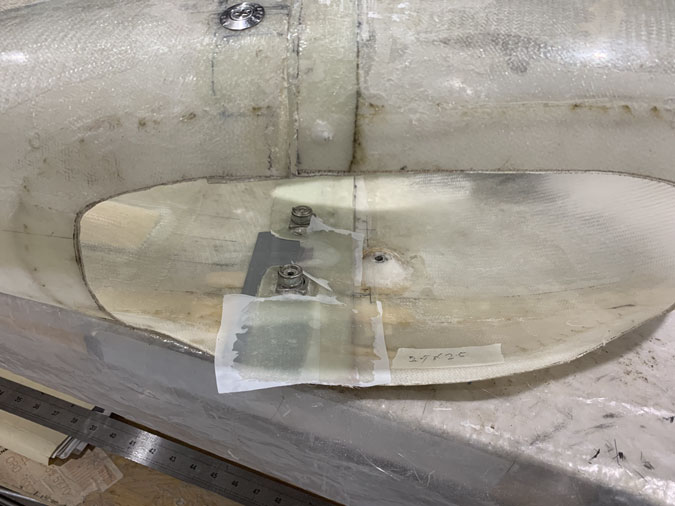
This might be easier to see, extra new glass on the bottom of the pant and a whole lot of lip glass in the middle. That lip is needed for the next outside ‘tab’ layup.

Here’s the outside tab that will sit in the lip.

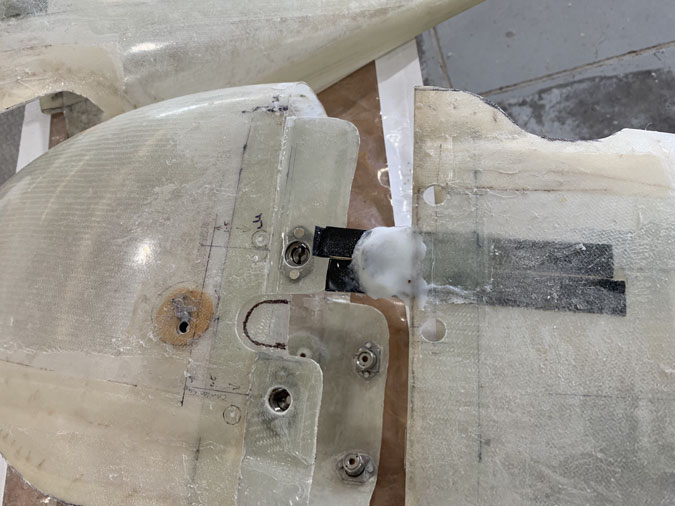
Yes its a mess. I also added to the ‘tab’ outside with some extra flox so I could get the shape more exact. That initial tab layup was three plies underneath and one on top to make a sandwich.

Clear as mud? Well here’s the lip around the tire stem cutout after some cleaning up.

Here’s the tab after a bit of a clean up as well. It will be ‘pretty’ very soon, I promise.

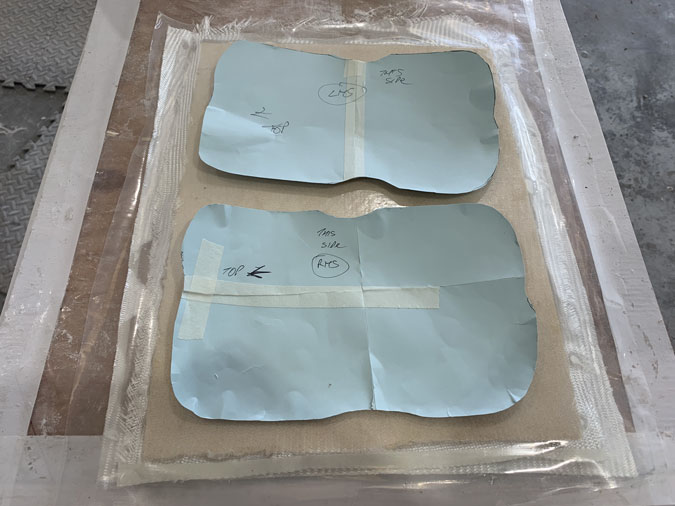
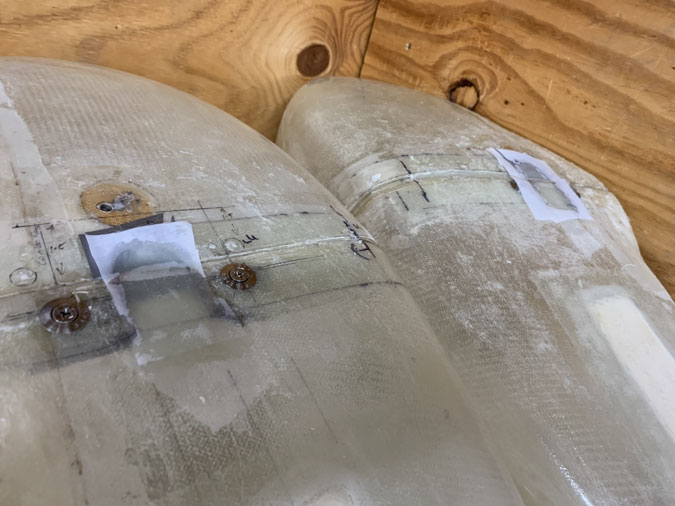
Meanwhile back in the rear of the pants, more was needed. I made up a slab of foam with just one ply a side and that has had a few days to cure. The concept here is that I need to close off the rear pant about 2.5″ back from the lip cutout. This is so that it doesn’t fill with mud and FOD or even snow from less that ideal runways.

Above is the slab of glassed foam and paper cutouts I made of the pant openings a couple of inches in.

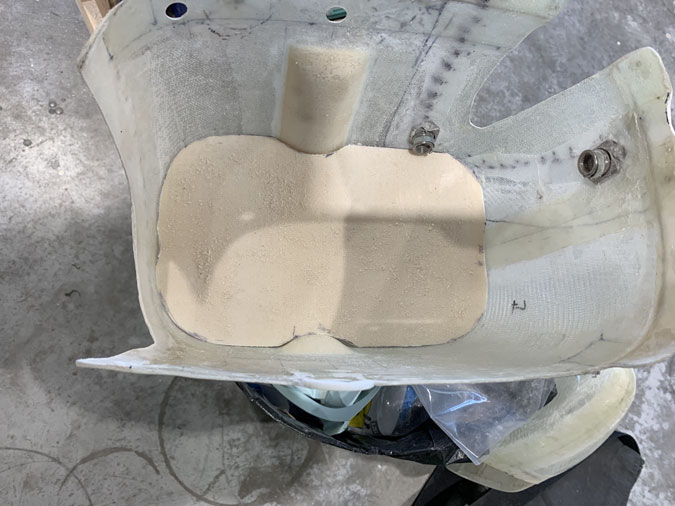
After a bit of trimming you can see I’m on the way to a good fit.

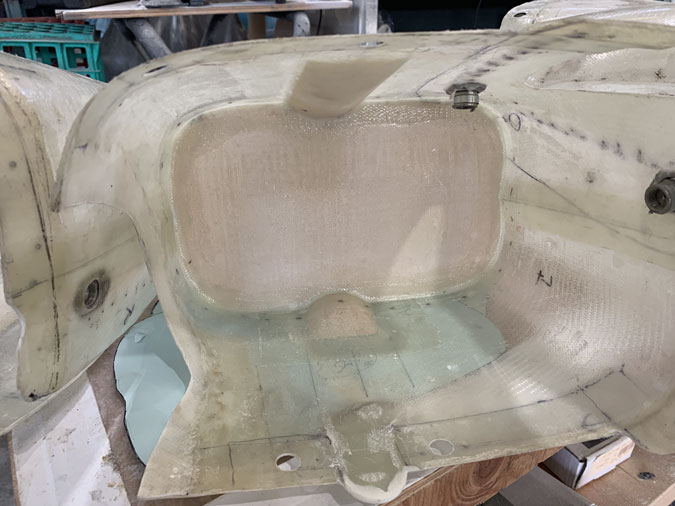
After more trimming I microed the baffles in place. After that cured I added one ply 1″ tapes to finish off. Wow those back halves are rock solid and still not too heavy.

Lots more to do yet on these wheel pants. I spent a couple of hours fitting them and opening up the tire area. Now I’m not happy with what I just had to cut away to get the necessary clearances. Of course I have a plan to correct this.


Previous Post
Canopy Latch Safety Catch
Next Post
Canopy Edge Work

Leave a Reply Cancel reply

Your email address will not be published. Required fields are marked *

Fill out this field
Fill out this field
Please enter a valid email address.

CategoryLogsHours
All157617079
Uncategorized135
Ch 3 Education220
Ch 4 Fuselage Bulkheads25231
Ch 5 Fuselage Sides32283
Ch 6 Fuselage Assembly30270
Ch 7 Fuselage Exterior14140
Ch 8 Roll Over/Seat Belts990
Ch 9 Main Gear/Landing Brake71642
Ch 10 Canard28287
Ch 11 Elevators36298
Ch 12 Canard Installation12102
Ch 13 Nose and Nose Gear1291097
Ch 14 CenterSection Spar57525
Ch 15 Firewall and Accessories448
Ch 16 Control System27237
Ch 17 Roll/Pitch Trim System654
Ch 18 Canopy70502
Ch 19 Wings, Alierons1271090
Ch 20 Winglets/Rudders71528
Ch 21 Strakes - Fuel/Baggage65437
Ch 22 Electrical System591031
Ch 23 Engine Installation961152
Ch 24 Covers/Fairings/Consoles25202
Ch 25 Finishing561084
Ch 26 Upholstry340
Fuel System46310
Rollover1050
Cabin heating System60331
The Ferry Tank335
Blog2694182
Build Mods2252513
Nose Gear Doors856
Wheel Pants/Gear Leg Fairing40473
Oxygen System762
Roll and Pitch Trim964
Winglet Intersection Fairings445
Baggage Pods11104
Pilot Side Windows437
RAM Air & Hellhole Cover15177
Main Gear Beef Up322
Post Cure124
Fire Extinguisher16
Wing Fences13
EVS (Enhanced Visual System)130
Hinge Upgrade115
Cowl Keeper110
Rudder Gust Locks19
Cooling20607
Taxi Tests42
Flying10

Complete the Test Flight Program

2025/6/30 10:26:01

Round Australia in Four Flights

2026/4/1 10:26:01

Round the World Departure

2026/8/22 10:26:01

Rough River Flyin, Sept 23, 2026

2026/9/23 10:26:01

© Copyright 2025 Dave Berenholtz