| Date: 01-17-2021 | |
| Number of Hours: 40 | |
| Manual Reference: 22 |
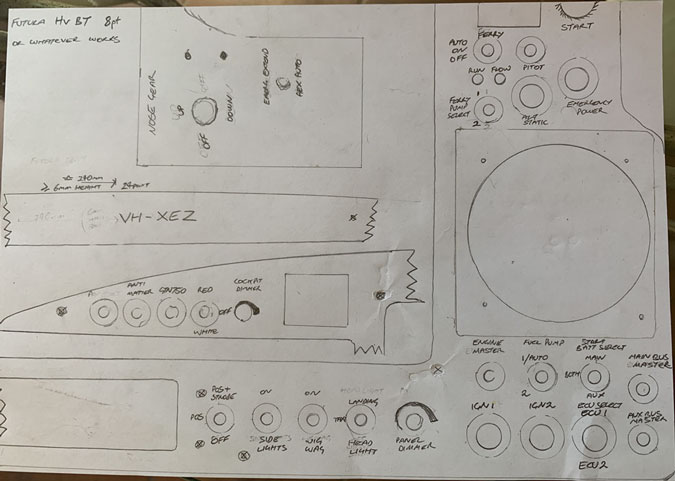
This Panel lettering has been an epic over a couple of months after literally years of thinking about it. I fielded a lot of ideas, tried various methods and came up with Futura fonts and the concept of dry transfer rub-on letters.
I found a company in Canada that you could send a pdf to and back would come a sheet of whatever you gave them. I thought I had all the wording sorted out so I went ahead.
Most of the letters went on ‘OK’. Maybe because they were small there was very little adhesive on the back so the transfer was challenging.
I had to press really hard to get the lettering off the plastic sheet. That sheet was really quite thick so it tended to distort and that meant some letters were crooked and had to be saved from breaking up all together. They weren’t exactly straight either.
I’d give my work here 6/10 at best.

It’s a little boring too and after a chat with my electrical installer, Simon, he pointed out a number of things that could have been better in the lettering department at explaining switch functions.
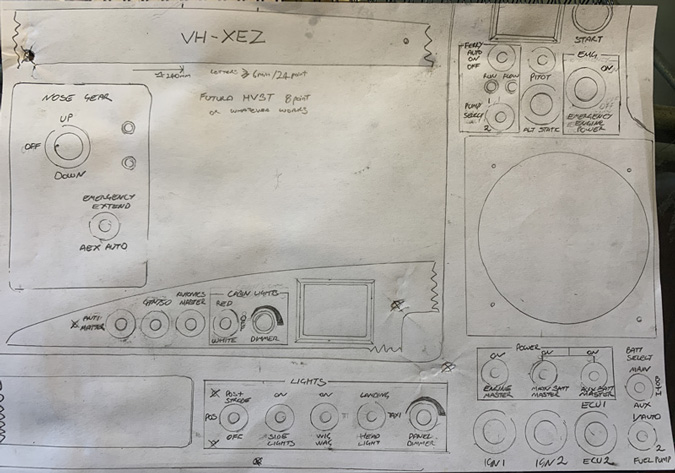
Sometimes you just have to bite the bullet and go again. Into the sand blaster went my finished panel! I then again painted with the grey primer and did a 2K matt finish on top.
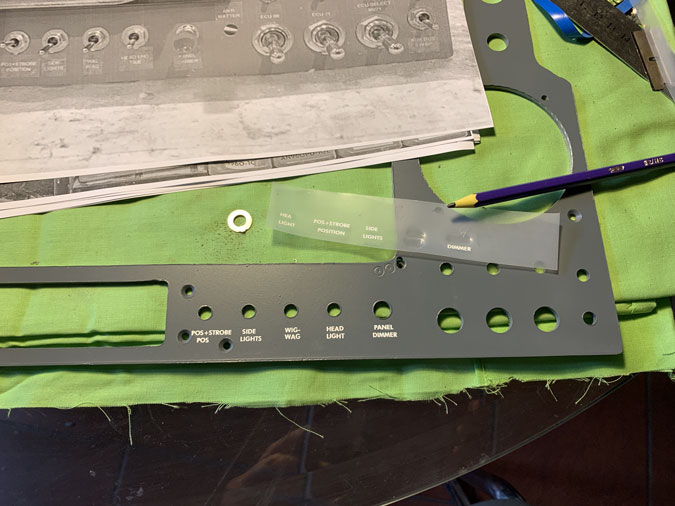
Here’s the next draft. A sketch was required for proper screen printers to now do the work. They do the artwork and I took the panel down to them explained the job and got an acceptable quote. You can see I’ve put washers around the holes. Maybe I should have outline the bezels too as I did for the G5 instrument.
I did yet another sketch as I’m now going with a side metal panel face plate for the nose gear switches.
Simon then gave more excellent input. You can see things are better grouped here. The printers use Arial Narrow which was indistinguishable from my Futura HV BT in the small sizes. I went with that. NASA use the Futura which is fun but it is not enough reason to make life harder.
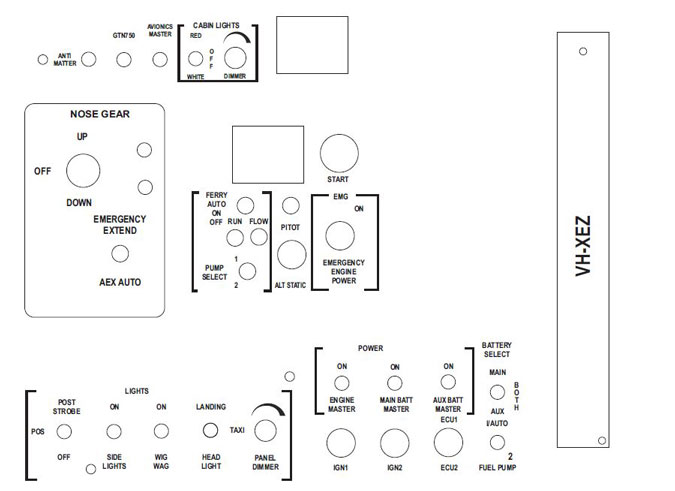
This came back from the printers for approval. They did a great job. Its in CorelDraw. However there were issues. Because the panel is so tight allowances need to be made for the size of washers around the switches. I did draw that in my sketch but it got lost in translation.
Another critical thing is that the bezels from the instruments extend well past the cutouts so you could not do what is in that first draft. Much of the lettering and borders would be covered up! I could have made that clearer with my instructions although I did supply the above picture and others
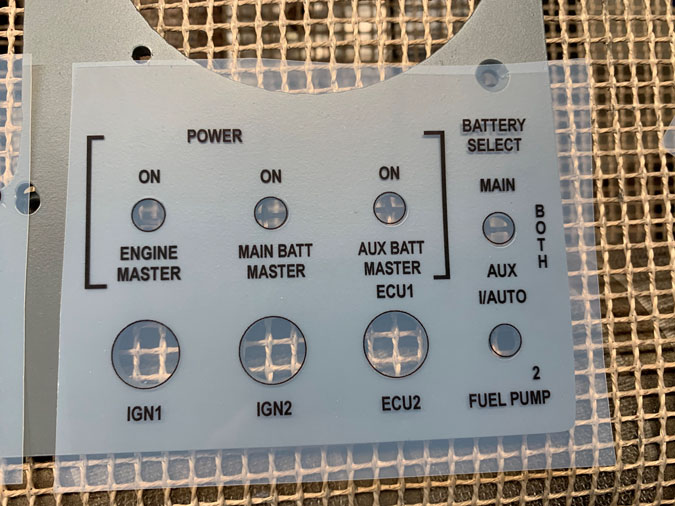
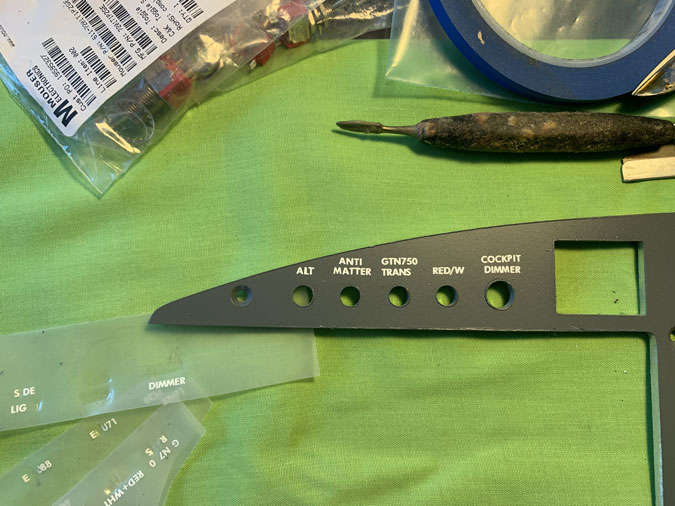
Luckily they sent me these transparency’s against the panel for approval. Its a great way to check out how it will look. If you check out the previous picture you might see that the word ‘POWER’ would be completely covered. ‘ECU1’ would have been partly covered by the switch washer too. We are talking very small tolerances.
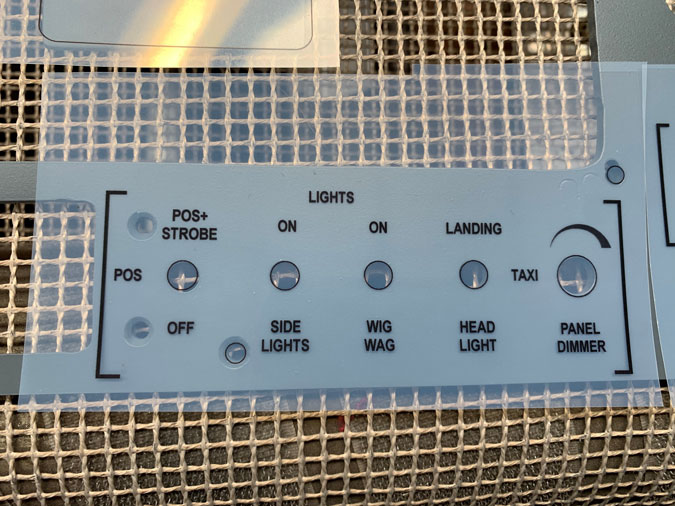
Here again the bottom of the G3X would cover the ‘LIGHTS’ word and bump into the top border bracket. The left side border would be completely covered by the audio panel.
The printers did a great job, I’m pointing out how very tricky a tight panel can be in case YOU are doing one. You also probably need to be an avionics installer to pick all the possible problems. 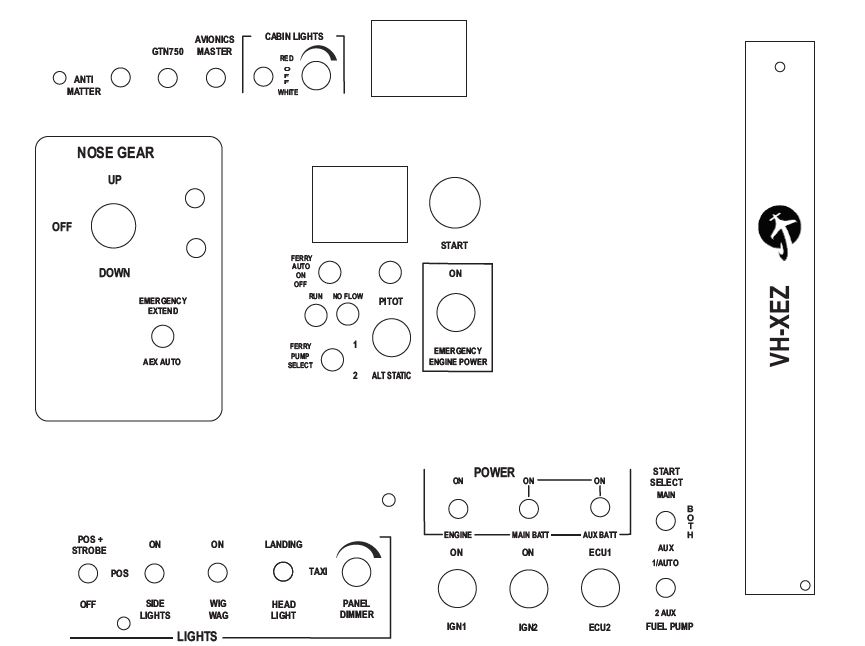
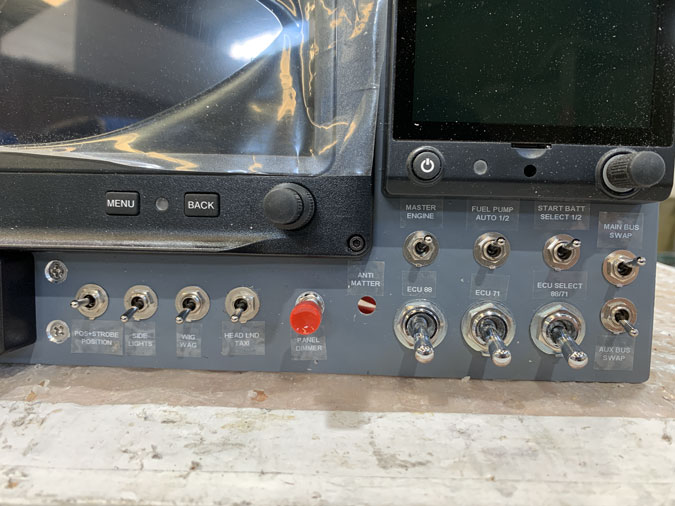
I was worried about setting up the initial file to be the exact right size. Particularly if I had to buy and learn a software package just for this one job. That’s why I went the dry transfer route initially. In the end tweaking the printers work myself in the software they use was the perfect solution.
I downloaded an evaluation copy of CorelDraw which is good for 14 days. Corel seem quite OK with doing this for a one time project. The package was easy to work just to change things. The hard part being the initial setup which the printers had done. I just altered the existing ,cdr file they gave me.
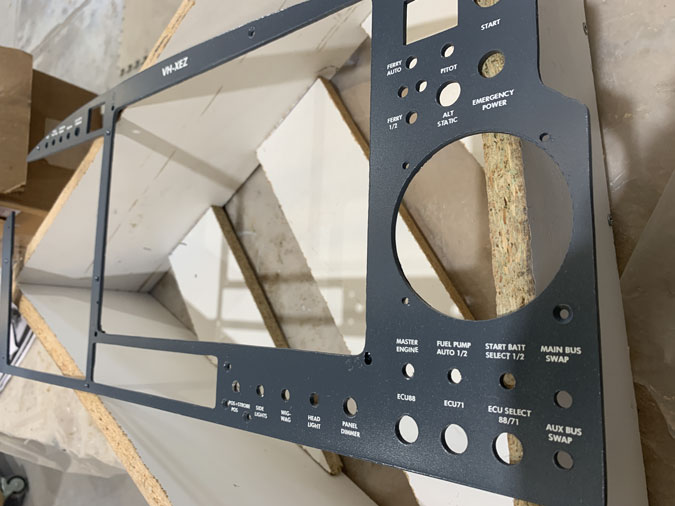
The version pictured above I think is AOK. I spent several days tweaking versions. You can convert the .cdr file to a pdf to print out actual size so I could check with switch washers. I guessed with the bezels using photos. The differences are small but I hope it will all work. Another chat with Simon had yet again a few minor changes right at the end of the process. Other things were done with the words and switch positions just to make it all fit. I stuck my logo in as well.
For now I’m waiting to hear that the job is done. If I stuffed up its off to the sandblasting cabinet again.