• Home
  • Flying
    • First Flight
  • Build by Chapter
    • Ch 3 Education
    • Ch 4 Fuselage Bulkheads
    • Ch 5 Fuselage Sides
    • Ch 6 Fuselage Assembly
    • Ch 7 Fuselage Exterior
    • Ch 8 Roll Over/Seat Belts
    • Ch 9 Main Gear/Landing Brake
    • Ch 10 Canard
    • Ch 11 Elevators
    • Ch 12 Canard Installation
    • Ch 13 Nose and Nose Gear
    • Ch 14 CenterSection Spar
    • Ch 15 Firewall and Accessories
    • Ch 16 Control System
    • Ch 17 Roll/Pitch Trim System
    • Ch 18 Canopy
    • Ch 19 Wings, Alierons
    • Ch 20 Winglets/Rudders
    • Ch 21 Strakes – Fuel/Baggage
    • Ch 22 Electrical System
    • Ch 23 Engine Installation
    • Ch 24 Covers/Consoles
    • Ch 25 Finishing
    • Ch 26 Upholstry
  • Build Mods
    • Liquid Cooling, Numbers, Weights and Flow
    • Cooling
      • Solving Ground Cooling 1
      • Solving Ground Cooling 2
      • Solving Ground Cooling 3
      • Solving Ground Cooling 4
      • Solving Ground Cooling 5
      • Solving Ground Cooling 6
      • Solving Ground Cooling7 – Test Data
      • Solving Ground Cooling 8 – Flap Building
      • Solving Ground Cooling 9 – Hinges
      • Solving Ground Cooling 10 – Lower Flaps
      • Solving Ground Cooling 11 – Upper Flaps
      • Solving Ground Cooling 12 – Completed
      • Cooling the Beast 1
      • Cooling the Beast 2 – Lower Cowl Expansion
      • Cooling the Beast 3 – KW Oil Cooler Diffuser
    • EVS (Enhanced Vision System)
    • Cowl Keeper
    • Rudder Gust Locks
    • Wing Fences
    • Post Cure
    • Hinge Upgrade
    • RAM Air & Hellhole Cover
    • Main Gear Beef Up
    • Pilot Side Windows
    • Baggage Pods
    • Winglet Intersection Fairings
    • Titanium Rollover
    • Nose Gear Doors
    • Wheel Pants/Gear Leg Fairing
    • Cabin heating System
    • Fuel System
    • Roll and Pitch Trim
    • Oxygen System
    • The Ferry Tank
    • Cruise Angle Indicator
    • Fire Extinguisher Install
  • Round the World
    • RTW Route East #12 rev1
    • Survival Equipment
    • Training Flights
  • Other Stuff
    • Blog
    • Around the World: RAAUS Sport Pilot Issue 110
    • Taxi Tests
    • Summary Feb ’24 from an SAAA Meeting
    • AOPA Pilot 27th Sept 2019
    • Build Tests
    • Flying Stories
      • A Long Easy Dream ’06
      • Townsville ’07
      • Cairns ’08
      • Albany ’08
      • East Coast ’08
      • Brisbane ’09
      • Cairns ’10
      • Perth ’10
    • Non Build Mods
      • F16 Scoop for JZE
      • Ram Air Box for JZE
      • Strange Tips
    • Milestones
    • Links
  • Contact

Blog

Home
Ch 21 Strakes - Fuel/Baggage
Strake Lining Prep

Strake Lining Prep

7 years ago
Dave Berenholtz
Ch 21 Strakes - Fuel/Baggage
Date:  06-13-2018
Number of Hours:  8
Manual Reference:  no ref

The last two days have been strake prep. I spent a lot of yesterday reviewing ALL the strake notes I had from other builders and forums. I have been a little conflicted on how to do the final prep work. In the early days guys got a couple of pots of epoxy, splashed it onto the inside called it good and that worked. Maybe… Other people have done this and got fish eyes… or areas where the epoxy just sagged away and had to do a lot of sanding to fix the problem. One of our gurus says no peel ply, add more thin glass instead to support a rich layers of epoxy.

Well after consideration I’m going multiple layers of epoxy, (no more cloth), not too thick and peel ply for each layer. This is a pretty big job and I think all the peel ply will need to be cut to fit for each application. That’s 80 pieces of peel ply cut to size! Yes 240 pieces for three layers. Did I mention the sanding also required?

Oh well, quit complaining and get on with it I tell myself.

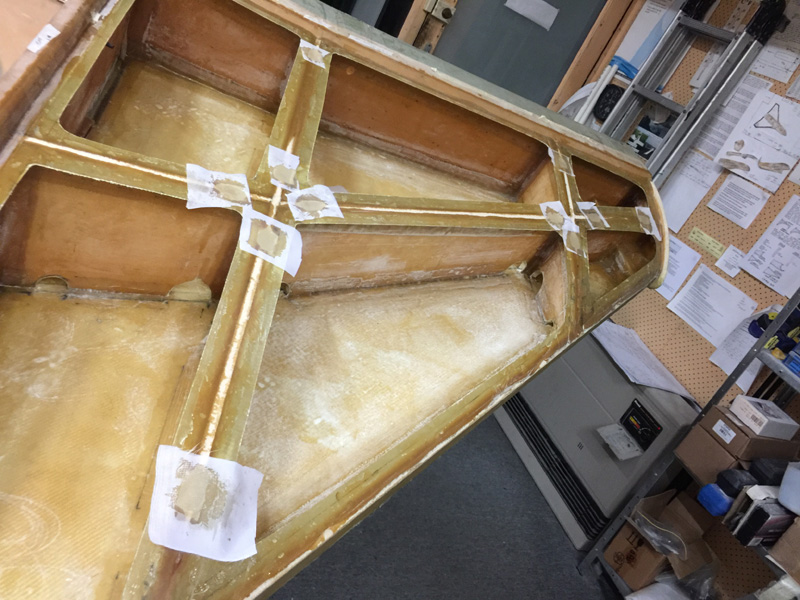
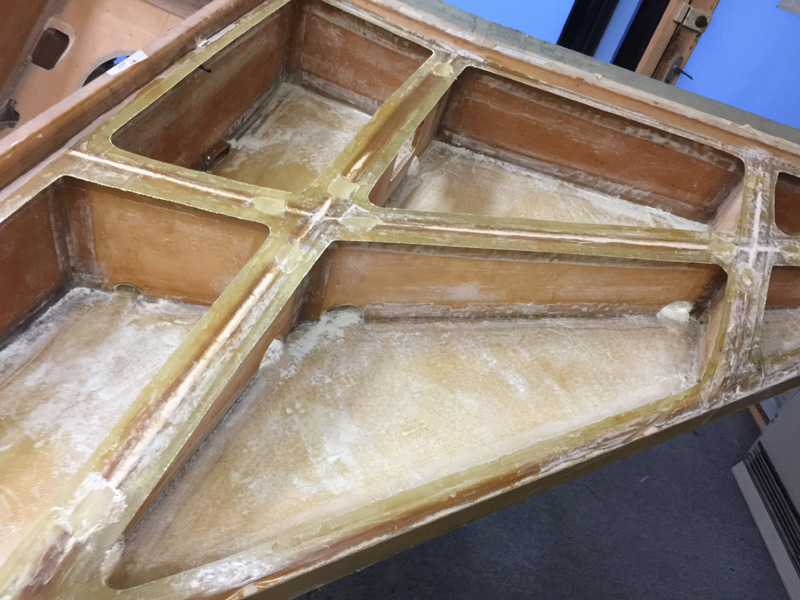
As I prepared for sanding there were still a few jobs along the way.  After cutting out the upper mouse hole exits post the hat top lips, I had all these holes. My thinking is that when it comes time to flox the top on I’d have to be careful not to let any flox fall in the gaps or worse come loose and make there way around the tank for a month before trying to block off or reduce my fuel outlet.

An easy answer was a single ply of BID over the holes as you see above, peel plied of course. Now I can run the flox full length without concern when that happy day arrives.

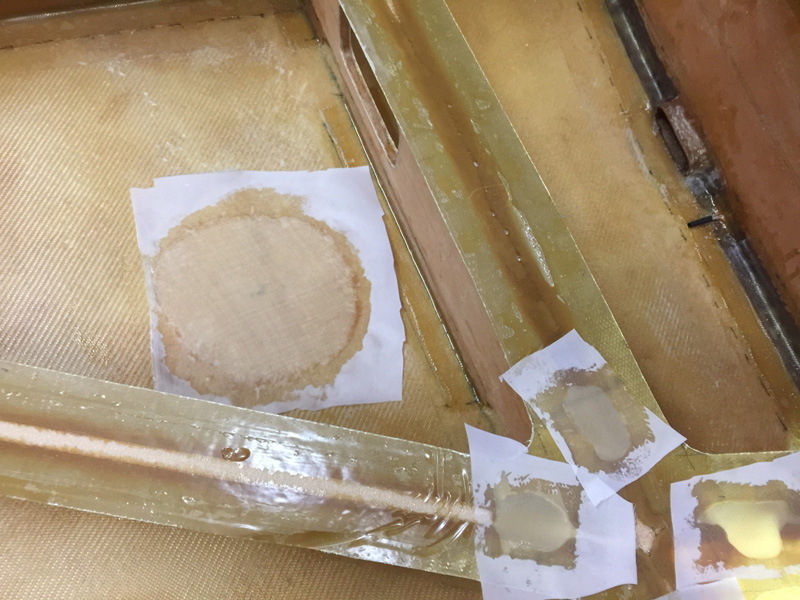
Another issue is fuel cap placement. I’ve chosen inboard and nearer the middle than plans. Yes my cap will be in the prop arc if it comes loose so I will make all reasonable provision so this will never happen. Secondly I want my cap at the high point of the tank so for the day of the Pacific Ocean crossing I can get ALL the fuel possible in the tanks. For regular filling nose down I can still get an awful lot in and can always use the nose lift to add more if the tank cap opening needs to be higher.

This all relates to that circle of cloth you see above. That’s a piece of Innegra which is tough like Kevlar but friendlier to cut and work with. You still want a WHY? OK what if some guy is fueling my plane when I’m not there supervising or even if I am and he or she sticks the fuel nozzle in too far into our 9″ deep tanks (8″ for you plans only people). Bang! It would be catastrophic if the strake was damaged so this is a little insurance for that unlikely event.

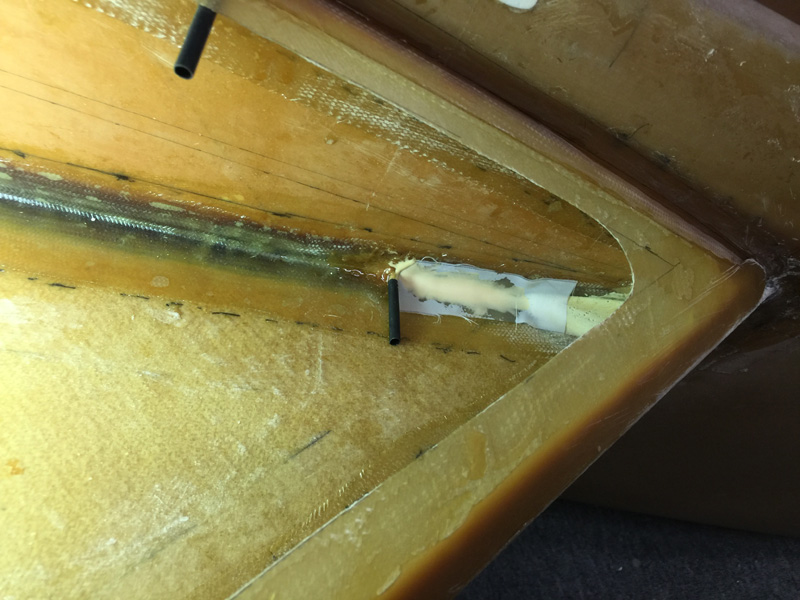
Drain hole slope. I tested what I have with water and each side just needed a little more micro in that corner as you see above. Otherwise the drain is working very well. I will test again before closing the strakes.

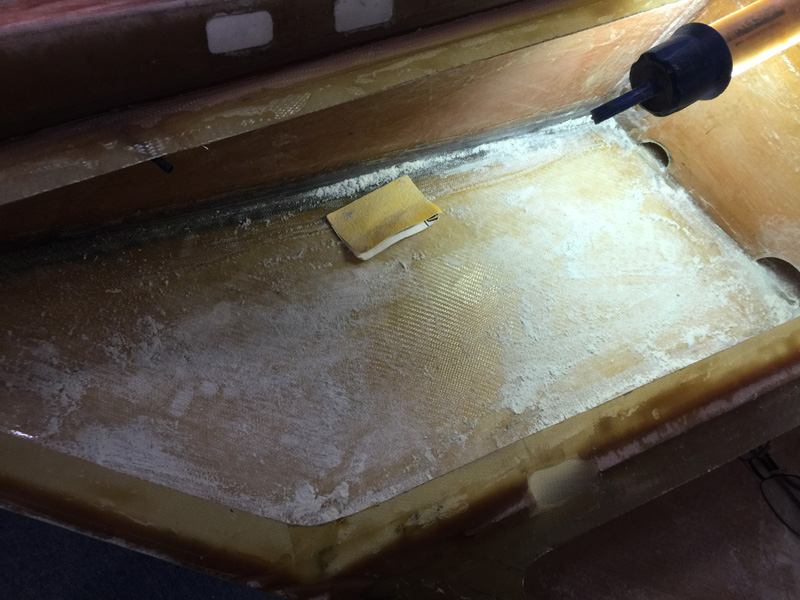
Now to the sanding. I’m using that trouble light, a vibration sander and 80 grit sand paper. While I’m not going for 100% matt I am wanting say 80% non shinny before applying the first lot of epoxy inside coating. Its not like a structural bond where 100% is necessary. I’m doing this to fill in possible pin holes and as a way of going over the glass work and treating any air bubbles or anything else I find. Someone said you need your best work here, so its extra effort. I do not want to be fixing leaks! I’ll do my reasonable best and see how it goes.

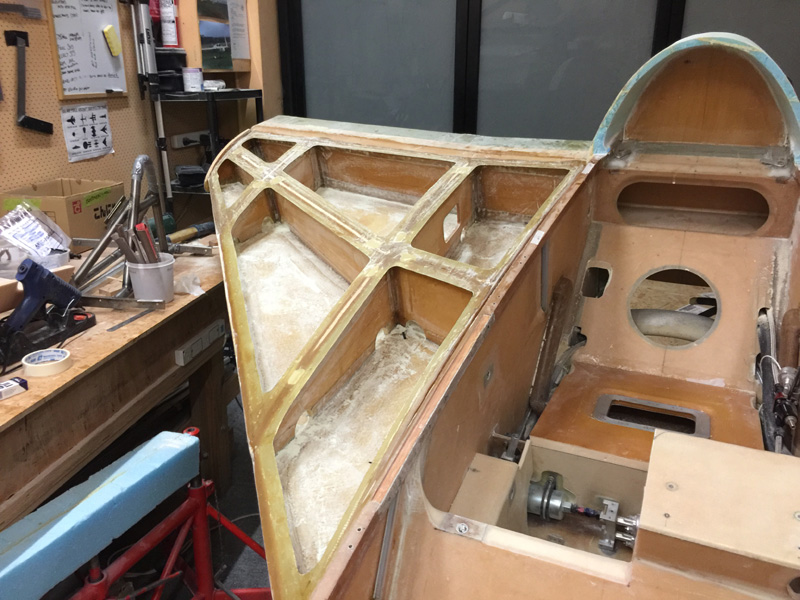
Right side just about sanded.

Left side just about sanded.

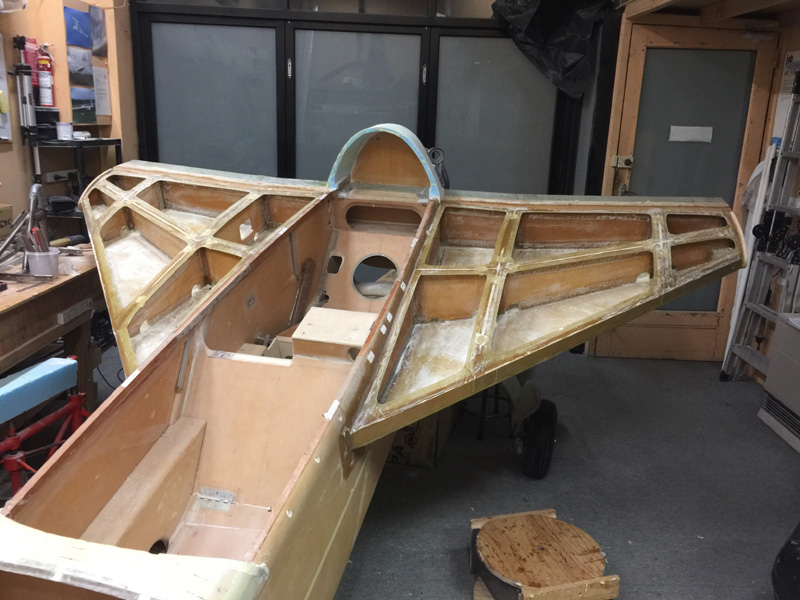
Both sides just about sanded. I liked this picture so bloggers rights to include it. More sanding and clean up tomorrow and I’ll make a start with the peel ply and lay down some epoxy. I have 12 compartments to do per side and I’ll just go in stages with small batches.


Previous Post
Fuel Gauges 3
Next Post
More Strake Interior Prep

Leave a Reply Cancel reply

Your email address will not be published. Required fields are marked *

Fill out this field
Fill out this field
Please enter a valid email address.

CategoryLogsHours
All157617079
Uncategorized135
Ch 3 Education220
Ch 4 Fuselage Bulkheads25231
Ch 5 Fuselage Sides32283
Ch 6 Fuselage Assembly30270
Ch 7 Fuselage Exterior14140
Ch 8 Roll Over/Seat Belts990
Ch 9 Main Gear/Landing Brake71642
Ch 10 Canard28287
Ch 11 Elevators36298
Ch 12 Canard Installation12102
Ch 13 Nose and Nose Gear1291097
Ch 14 CenterSection Spar57525
Ch 15 Firewall and Accessories448
Ch 16 Control System27237
Ch 17 Roll/Pitch Trim System654
Ch 18 Canopy70502
Ch 19 Wings, Alierons1271090
Ch 20 Winglets/Rudders71528
Ch 21 Strakes - Fuel/Baggage65437
Ch 22 Electrical System591031
Ch 23 Engine Installation961152
Ch 24 Covers/Fairings/Consoles25202
Ch 25 Finishing561084
Ch 26 Upholstry340
Fuel System46310
Rollover1050
Cabin heating System60331
The Ferry Tank335
Blog2694182
Build Mods2252513
Nose Gear Doors856
Wheel Pants/Gear Leg Fairing40473
Oxygen System762
Roll and Pitch Trim964
Winglet Intersection Fairings445
Baggage Pods11104
Pilot Side Windows437
RAM Air & Hellhole Cover15177
Main Gear Beef Up322
Post Cure124
Fire Extinguisher16
Wing Fences13
EVS (Enhanced Visual System)130
Hinge Upgrade115
Cowl Keeper110
Rudder Gust Locks19
Cooling20607
Taxi Tests42
Flying10

Complete the Test Flight Program

2025/6/30 10:26:01

Round Australia in Four Flights

2026/4/1 10:26:01

Round the World Departure

2026/8/22 10:26:01

Rough River Flyin, Sept 23, 2026

2026/9/23 10:26:01

© Copyright 2025 Dave Berenholtz