• Home
  • Flying
    • First Flight
  • Build by Chapter
    • Ch 3 Education
    • Ch 4 Fuselage Bulkheads
    • Ch 5 Fuselage Sides
    • Ch 6 Fuselage Assembly
    • Ch 7 Fuselage Exterior
    • Ch 8 Roll Over/Seat Belts
    • Ch 9 Main Gear/Landing Brake
    • Ch 10 Canard
    • Ch 11 Elevators
    • Ch 12 Canard Installation
    • Ch 13 Nose and Nose Gear
    • Ch 14 CenterSection Spar
    • Ch 15 Firewall and Accessories
    • Ch 16 Control System
    • Ch 17 Roll/Pitch Trim System
    • Ch 18 Canopy
    • Ch 19 Wings, Alierons
    • Ch 20 Winglets/Rudders
    • Ch 21 Strakes – Fuel/Baggage
    • Ch 22 Electrical System
    • Ch 23 Engine Installation
    • Ch 24 Covers/Consoles
    • Ch 25 Finishing
    • Ch 26 Upholstry
  • Build Mods
    • Liquid Cooling, Numbers, Weights and Flow
    • Cooling
      • Solving Ground Cooling 1
      • Solving Ground Cooling 2
      • Solving Ground Cooling 3
      • Solving Ground Cooling 4
      • Solving Ground Cooling 5
      • Solving Ground Cooling 6
      • Solving Ground Cooling7 – Test Data
      • Solving Ground Cooling 8 – Flap Building
      • Solving Ground Cooling 9 – Hinges
      • Solving Ground Cooling 10 – Lower Flaps
      • Solving Ground Cooling 11 – Upper Flaps
      • Solving Ground Cooling 12 – Completed
      • Cooling the Beast 1
      • Cooling the Beast 2 – Lower Cowl Expansion
      • Cooling the Beast 3 – KW Oil Cooler Diffuser
    • EVS (Enhanced Vision System)
    • Cowl Keeper
    • Rudder Gust Locks
    • Wing Fences
    • Post Cure
    • Hinge Upgrade
    • RAM Air & Hellhole Cover
    • Main Gear Beef Up
    • Pilot Side Windows
    • Baggage Pods
    • Winglet Intersection Fairings
    • Titanium Rollover
    • Nose Gear Doors
    • Wheel Pants/Gear Leg Fairing
    • Cabin heating System
    • Fuel System
    • Roll and Pitch Trim
    • Oxygen System
    • The Ferry Tank
    • Cruise Angle Indicator
    • Fire Extinguisher Install
  • Round the World
    • RTW Route East #12 rev1
    • Survival Equipment
    • Training Flights
  • Other Stuff
    • Blog
    • Around the World: RAAUS Sport Pilot Issue 110
    • Taxi Tests
    • Summary Feb ’24 from an SAAA Meeting
    • AOPA Pilot 27th Sept 2019
    • Build Tests
    • Flying Stories
      • A Long Easy Dream ’06
      • Townsville ’07
      • Cairns ’08
      • Albany ’08
      • East Coast ’08
      • Brisbane ’09
      • Cairns ’10
      • Perth ’10
    • Non Build Mods
      • F16 Scoop for JZE
      • Ram Air Box for JZE
      • Strange Tips
    • Milestones
    • Links
  • Contact

Blog

Home
Ch 25 Finishing
Strake Fill 1

Strake Fill 1

7 years ago
Dave Berenholtz
Ch 25 Finishing
Date:  11-22-2018
Number of Hours:  30
Manual Reference:  25-6

I knew the stakes were going to be tough to fill to get the profile nice and clean. I had a lot of trouble with the blended airfoils that we did. If you have endured this long on a reading journey you might remember I had a herculean struggle with the tops and there were a few dips and valleys not to plan. The bottoms seemed to work out a lot better.

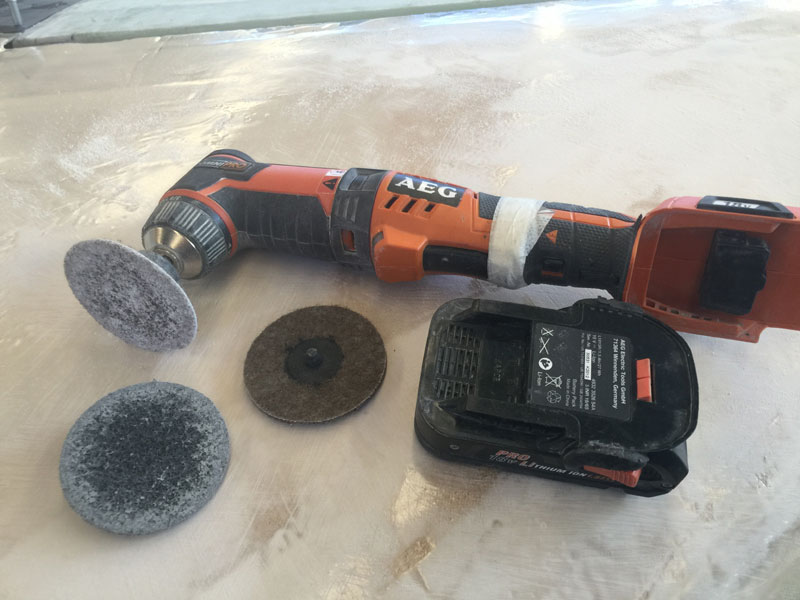
This is an electric drill attachment on my cordless multi-tool. The discs are a course type of Scotch-Brite material. The idea is that the low speed and this material will allow me to take off the shine from raw glass without doing too much damage to the glass fiber. I’ve already done the strakes upper and lower. In between filler cures, I am getting the top surface of the wings done.

It is many many slow hours. If I’d peel plied the lot, this step would largely be omitted. If you are building, save yourself a few weeks of being up close and personal with the whole plane, inch by inch.

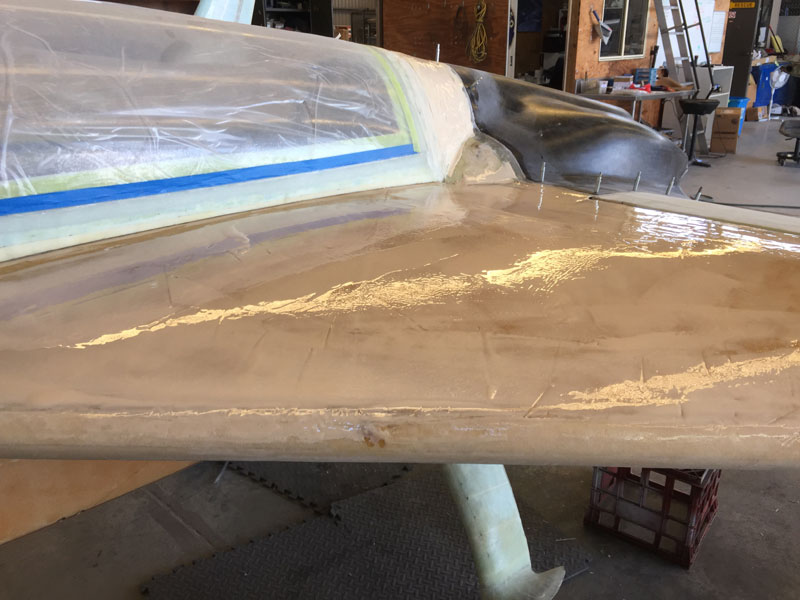
Once ‘sanded’ I gave the strakes a coat of pure epoxy and then cleaned off as much as I could with paper towels. Then the first and followed by another dozen or so coats of West epoxy and 410 filler in a very thick mix.

My thinking is that a thick mix will be lighter than a runny mix after its all sanded and perfect. This seems like some time in the misty distant future.

Every angle I take has dips and faults. I’m yet to find a way to do this. A part of the answer is to just start. I know what I want in the end and have to be patient for the magic unknown that is the middle part.

I’m sanding the surface dull between filler applications where I haven’t done sanding work.

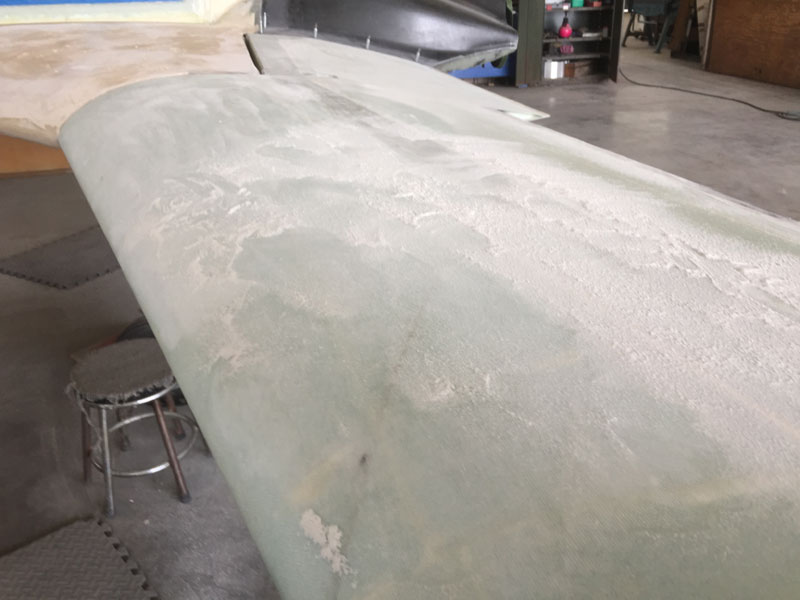
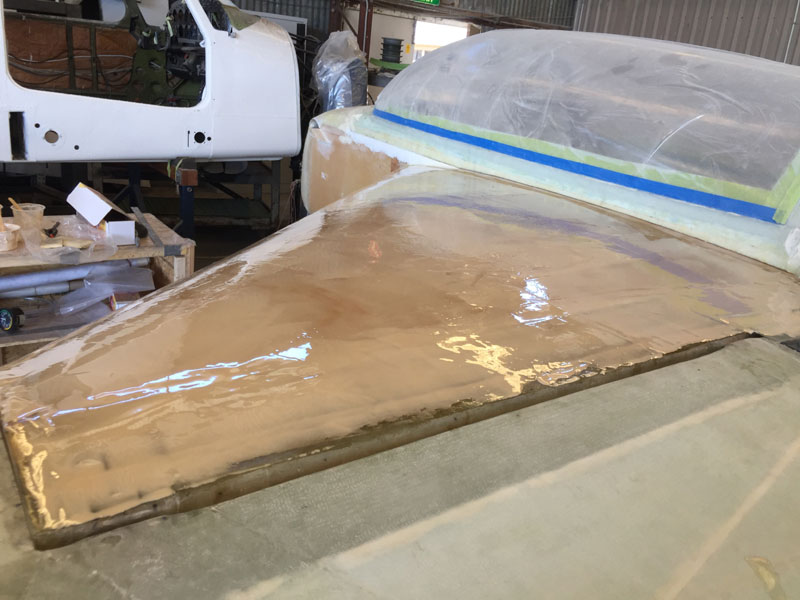
Here’s the left wing which I’m doing a bit of every day.

I’ve tried several types of sanding sticks so far. 40 grit contact glued to plastic electrical conduit is my favorite. I’ve made a bunch of things of different lengths and thicknesses.

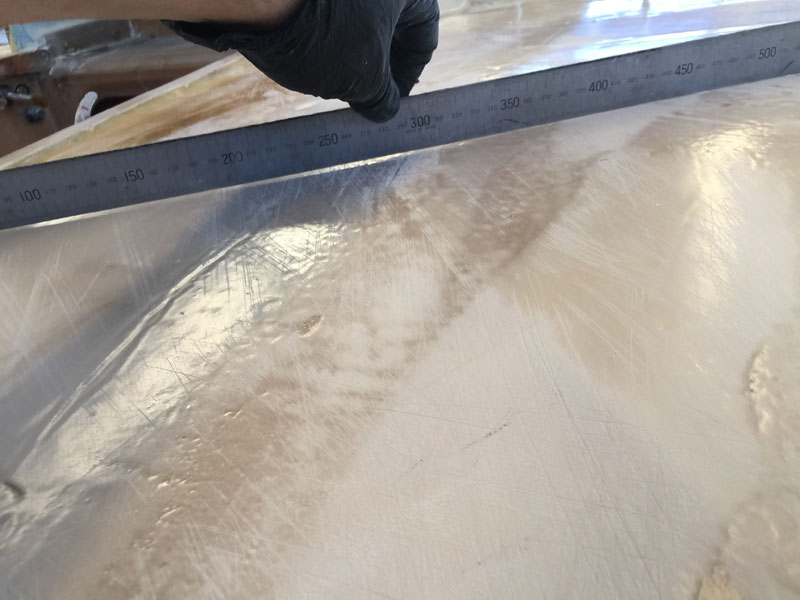
The key to this picture is that it shows a sanding system. I had a chat with ‘Greg’ in the hangar who is a real metal working craftsman and does glass work as well. We concluded that I need a repeatable system to deal with the undulating compound curves that the blended airfoils and some imperfect work have produced.

I also thought a lot about how the particles of air are traveling and the relative wind over the strakes, assuming I’m not slipping or skidding.

I ended up with going for a sweep from parallel to the strake leading edge and back to the spar to wing join. The pic below gives the idea. I’m ignoring to some degree right next to the canopy where there is a slight rise and then at the other outboard side where we must join with the wing.

The wings themselves in contrast are really good. Very straight and consistent across the profile. They shouldn’t need much filler at all.

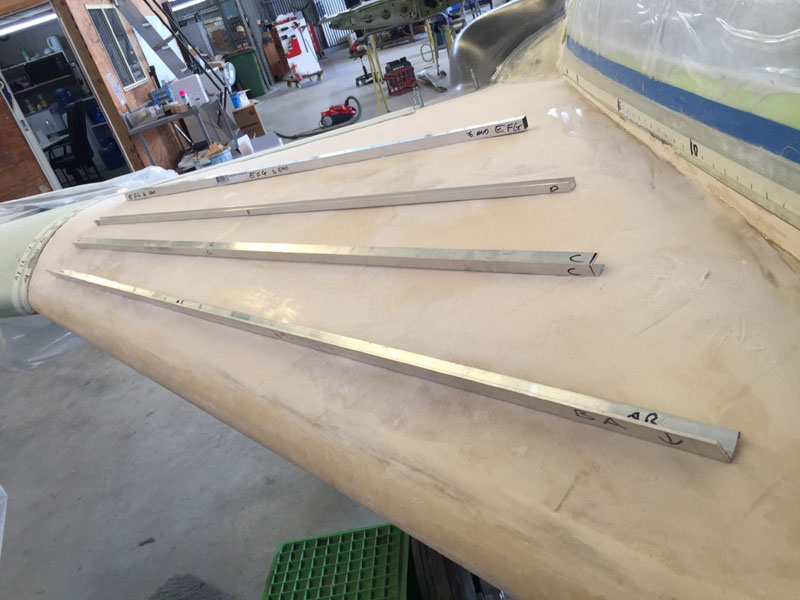
The sanding system in the last two pics is on the sides. I have A to G marked out to get my fan pattern and matching straight edges of length that works in the middle of the strake. I don’t need the edges to be perfect as I want to blend to the extremities but I do want to have a pretty flat ‘fan area’.

The idea is to match say the A to A line with the A length straight edge (which also does the B datum) and fill underneath it until its close. After that I’ll be ready to sand. I want a lot of filler on and then I’ll take it nearly to the glass at the high points. I hope this will be the most efficient method.

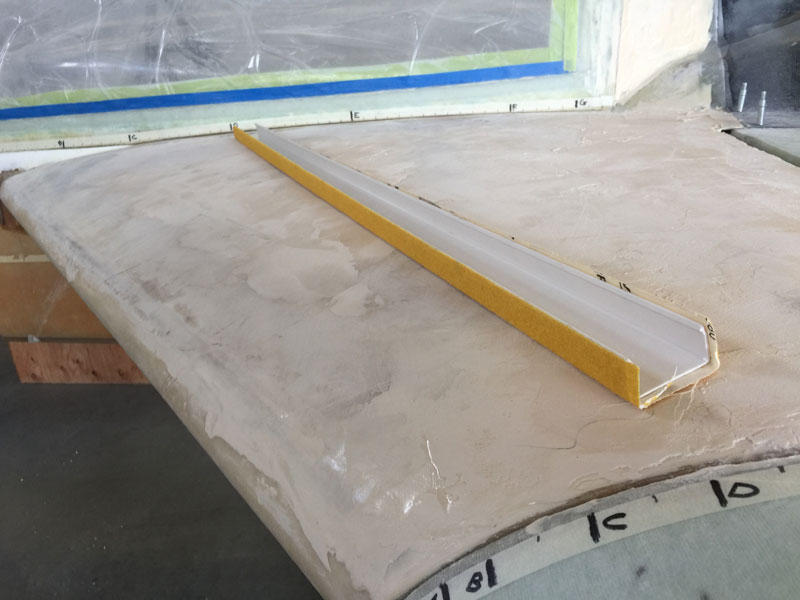
Today produced a new technique for me. After scuffing the strake I went for the biggest ugliest fill area, covered it with plastic and then used the A-A straight edge to smooth it out. It seems to have worked.

I’ll scuff it up tomorrow and do more until its looking good under the ‘edge’. I’m planning to do the entire strake this way before I go for the profile sanding. Its only that front part that seems to need heaps of filler further back is a lot better.

Hopefully its only these strakes tops that are so difficult. The rest of the plane seems pretty good, or so I keep telling myself.


Previous Post
Strake Sanding Prep
Next Post
Strake Fill 2

Leave a Reply Cancel reply

Your email address will not be published. Required fields are marked *

Fill out this field
Fill out this field
Please enter a valid email address.

CategoryLogsHours
All157617079
Uncategorized135
Ch 3 Education220
Ch 4 Fuselage Bulkheads25231
Ch 5 Fuselage Sides32283
Ch 6 Fuselage Assembly30270
Ch 7 Fuselage Exterior14140
Ch 8 Roll Over/Seat Belts990
Ch 9 Main Gear/Landing Brake71642
Ch 10 Canard28287
Ch 11 Elevators36298
Ch 12 Canard Installation12102
Ch 13 Nose and Nose Gear1291097
Ch 14 CenterSection Spar57525
Ch 15 Firewall and Accessories448
Ch 16 Control System27237
Ch 17 Roll/Pitch Trim System654
Ch 18 Canopy70502
Ch 19 Wings, Alierons1271090
Ch 20 Winglets/Rudders71528
Ch 21 Strakes - Fuel/Baggage65437
Ch 22 Electrical System591031
Ch 23 Engine Installation961152
Ch 24 Covers/Fairings/Consoles25202
Ch 25 Finishing561084
Ch 26 Upholstry340
Fuel System46310
Rollover1050
Cabin heating System60331
The Ferry Tank335
Blog2694182
Build Mods2252513
Nose Gear Doors856
Wheel Pants/Gear Leg Fairing40473
Oxygen System762
Roll and Pitch Trim964
Winglet Intersection Fairings445
Baggage Pods11104
Pilot Side Windows437
RAM Air & Hellhole Cover15177
Main Gear Beef Up322
Post Cure124
Fire Extinguisher16
Wing Fences13
EVS (Enhanced Visual System)130
Hinge Upgrade115
Cowl Keeper110
Rudder Gust Locks19
Cooling20607
Taxi Tests42
Flying10

Complete the Test Flight Program

2025/6/30 10:26:01

Round Australia in Four Flights

2026/4/1 10:26:01

Round the World Departure

2026/8/22 10:26:01

Rough River Flyin, Sept 23, 2026

2026/9/23 10:26:01

© Copyright 2025 Dave Berenholtz