• Home
  • Flying
    • First Flight
  • Build by Chapter
    • Ch 3 Education
    • Ch 4 Fuselage Bulkheads
    • Ch 5 Fuselage Sides
    • Ch 6 Fuselage Assembly
    • Ch 7 Fuselage Exterior
    • Ch 8 Roll Over/Seat Belts
    • Ch 9 Main Gear/Landing Brake
    • Ch 10 Canard
    • Ch 11 Elevators
    • Ch 12 Canard Installation
    • Ch 13 Nose and Nose Gear
    • Ch 14 CenterSection Spar
    • Ch 15 Firewall and Accessories
    • Ch 16 Control System
    • Ch 17 Roll/Pitch Trim System
    • Ch 18 Canopy
    • Ch 19 Wings, Alierons
    • Ch 20 Winglets/Rudders
    • Ch 21 Strakes – Fuel/Baggage
    • Ch 22 Electrical System
    • Ch 23 Engine Installation
    • Ch 24 Covers/Consoles
    • Ch 25 Finishing
    • Ch 26 Upholstry
  • Build Mods
    • Liquid Cooling, Numbers, Weights and Flow
    • Cooling
      • Solving Ground Cooling 1
      • Solving Ground Cooling 2
      • Solving Ground Cooling 3
      • Solving Ground Cooling 4
      • Solving Ground Cooling 5
      • Solving Ground Cooling 6
      • Solving Ground Cooling7 – Test Data
      • Solving Ground Cooling 8 – Flap Building
      • Solving Ground Cooling 9 – Hinges
      • Solving Ground Cooling 10 – Lower Flaps
      • Solving Ground Cooling 11 – Upper Flaps
      • Solving Ground Cooling 12 – Completed
      • Cooling the Beast 1
      • Cooling the Beast 2 – Lower Cowl Expansion
      • Cooling the Beast 3 – KW Oil Cooler Diffuser
    • EVS (Enhanced Vision System)
    • Cowl Keeper
    • Rudder Gust Locks
    • Wing Fences
    • Post Cure
    • Hinge Upgrade
    • RAM Air & Hellhole Cover
    • Main Gear Beef Up
    • Pilot Side Windows
    • Baggage Pods
    • Winglet Intersection Fairings
    • Titanium Rollover
    • Nose Gear Doors
    • Wheel Pants/Gear Leg Fairing
    • Cabin heating System
    • Fuel System
    • Roll and Pitch Trim
    • Oxygen System
    • The Ferry Tank
    • Cruise Angle Indicator
    • Fire Extinguisher Install
  • Round the World
    • RTW Route East #12 rev1
    • Survival Equipment
    • Training Flights
  • Other Stuff
    • Blog
    • Around the World: RAAUS Sport Pilot Issue 110
    • Taxi Tests
    • Summary Feb ’24 from an SAAA Meeting
    • AOPA Pilot 27th Sept 2019
    • Build Tests
    • Flying Stories
      • A Long Easy Dream ’06
      • Townsville ’07
      • Cairns ’08
      • Albany ’08
      • East Coast ’08
      • Brisbane ’09
      • Cairns ’10
      • Perth ’10
    • Non Build Mods
      • F16 Scoop for JZE
      • Ram Air Box for JZE
      • Strange Tips
    • Milestones
    • Links
  • Contact

Blog

Home
Ch 21 Strakes - Fuel/Baggage
Rib Grid Layout, BL23(Left) and BL45(Right)

Rib Grid Layout, BL23(Left) and BL45(Right)

7 years ago
Dave Berenholtz
Ch 21 Strakes - Fuel/Baggage
Date:  04-18-2018
Number of Hours:  12
Manual Reference:  21-3

Over three days I’ve laid out a strake rib grid and got the first two of the four glassed in place. Finding where ‘in place’ is was the first task. I’ll put a little detail here as this was working quite differently to the plans method.

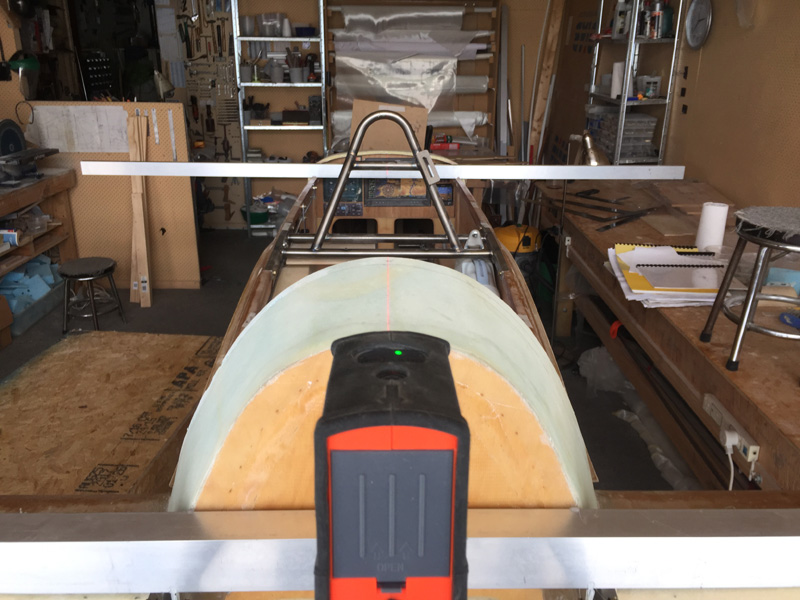
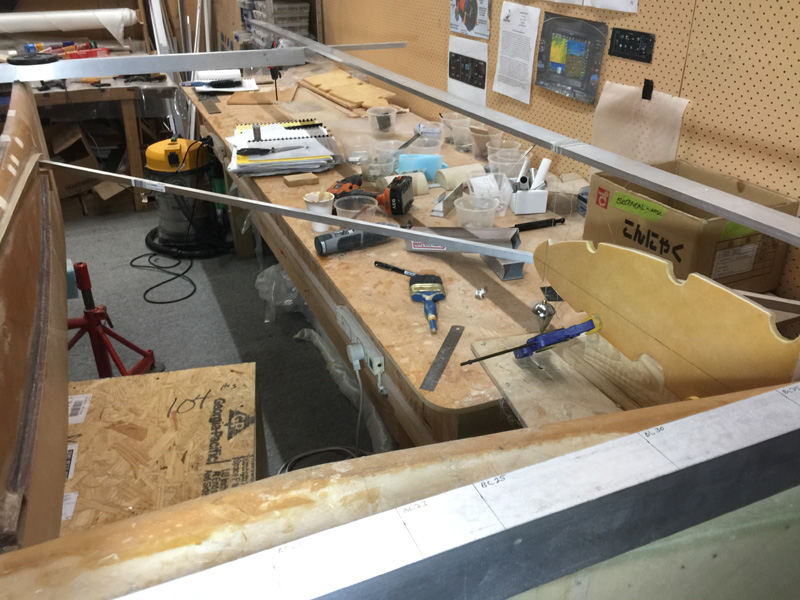
First up I reestablished the center-line with a laser. This was really just a check as I have lines marked already. I wanted a beam forward and aft so that I could get the 4 ribs parallel relative to the aircraft center or B.L.0

Once my beams were in place, just some box aluminium, I marked out the butt lines in 5″ intervals with an extra one at BL23. This and BL45 are where the ribs go.


I spent a bit of time on this and proof that I was at least square was found by putting a builders square in the corners. I was about .1″ out which seems to be my usual tolerance on this build. For once I wandered around and tweaked the positions until I had 100% square all round. I then checked and rechecked various angles and finally called it good. Of course my fuselage was already leveled side to side and front to back.

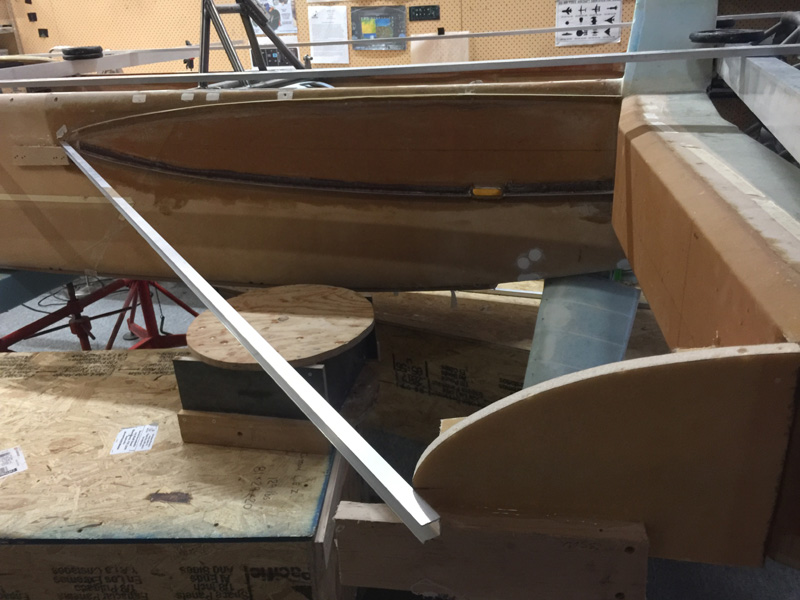
Note the cross beam in the pic above.

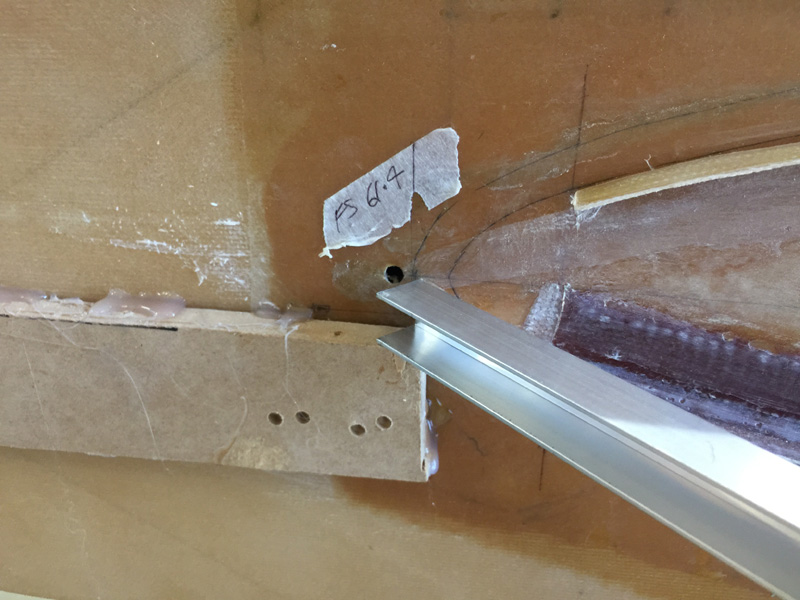
This cross beam is my leading edge point for the strakes. It comes from the fuselage where I’m above the W.L. 17.4 and then blends back to it at the wing.

I just set a block up so my beam sits at the right height and horizontal location. Hot glue yet again did the job.

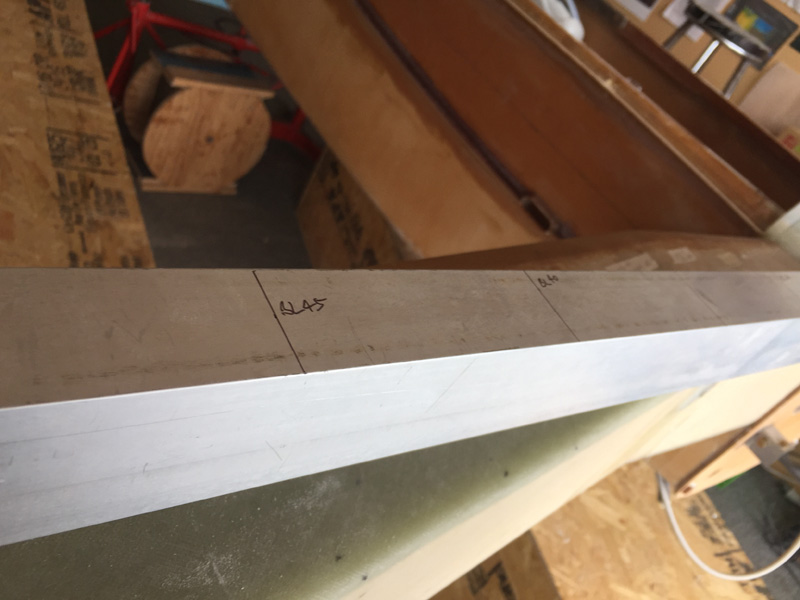
Here’s the outboard edge. That outer point, on the outside of that wing rib is exactly where the wing sits.  I’m having thoughts about the plans fairing block and I rather like a clean angle change here rather than a blend over a few inches. I believe that this sharp change is better in terms of less drag. I will do a little checking with the ‘experts’ before deciding.

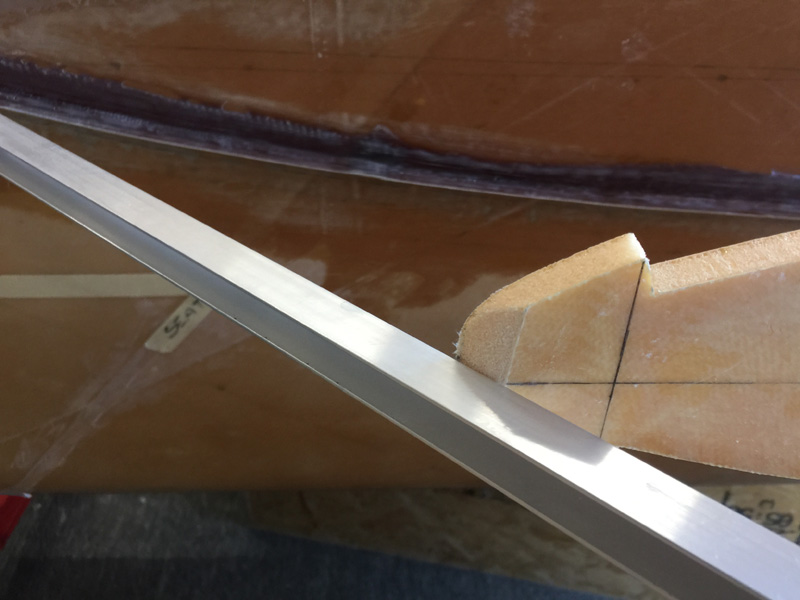
I had to angle the rib tips for it all to work.

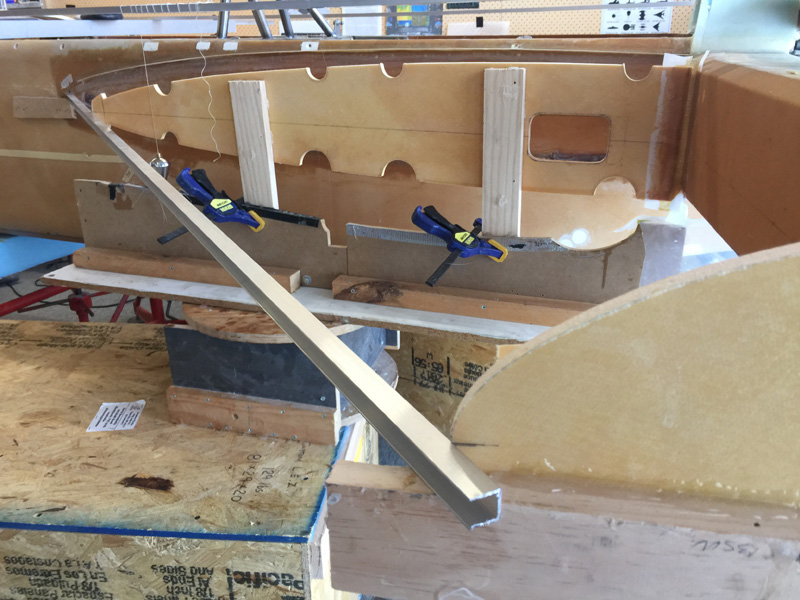
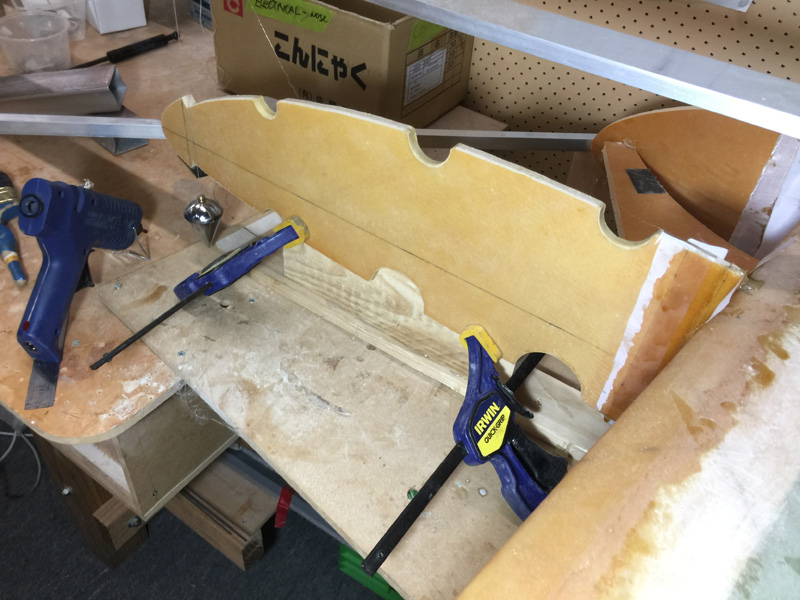
Here’s the left BL23 rib in place. I just used what was at hand. I had the canopy box. On top of that a stool I made which is just handy around the workshop. On top of that were a part of the forms I made when putting the wings onto the spar and finally a bit of timber clamped in place. Whatever works.

I did run around with my hot glue to secure it all. I used the usual two ply of BID tapes at 45 degree bias, the fuel safe epoxy and some peel ply. All these plies are a little bit wetter than I normally do. This is taking a bit of getting used to! I know I’ll need ‘wet plies’ later on.

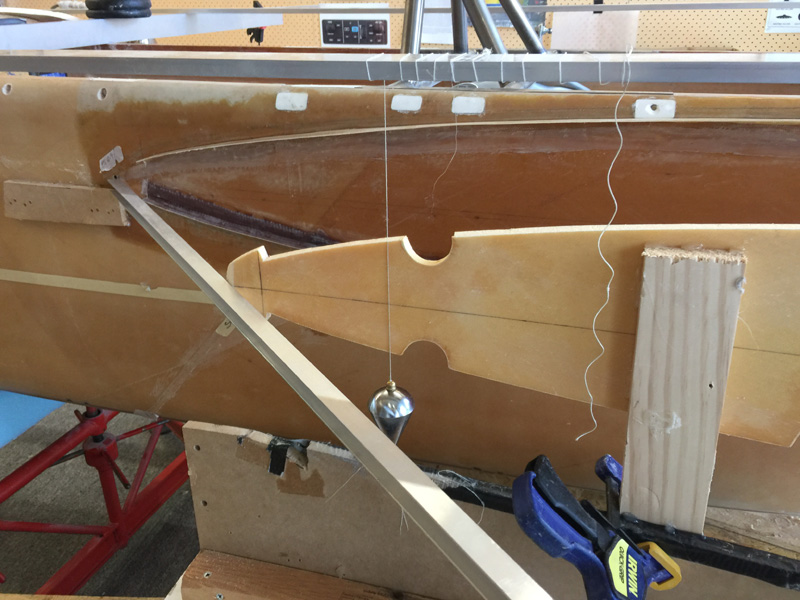
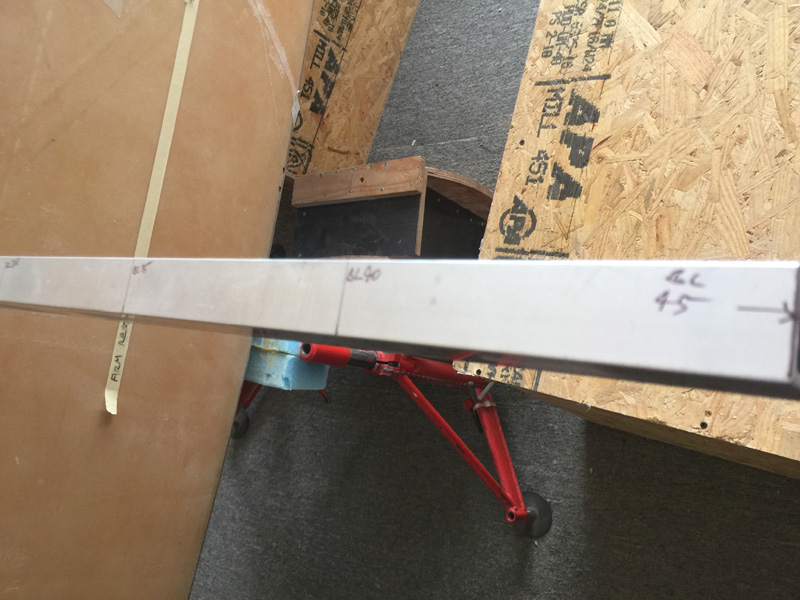
This is a close up of the job showing the plumb bob in use. I had a line on the fuselage for BL23, then I’m using the beam the ensure the datum is carried forward to the front of the plane’s cross beam and of course that I remain right in line with it (plumb bob) all the way to the tip of the strake which is where the cross beam lies.

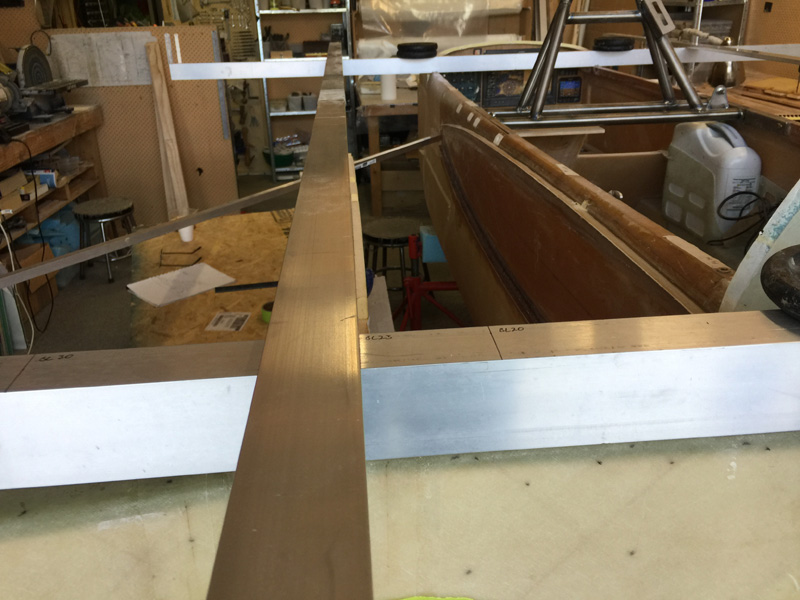
This might give a better idea of what I’m saying about being in line with the BL23 marked out on the grid of aluminium beams.

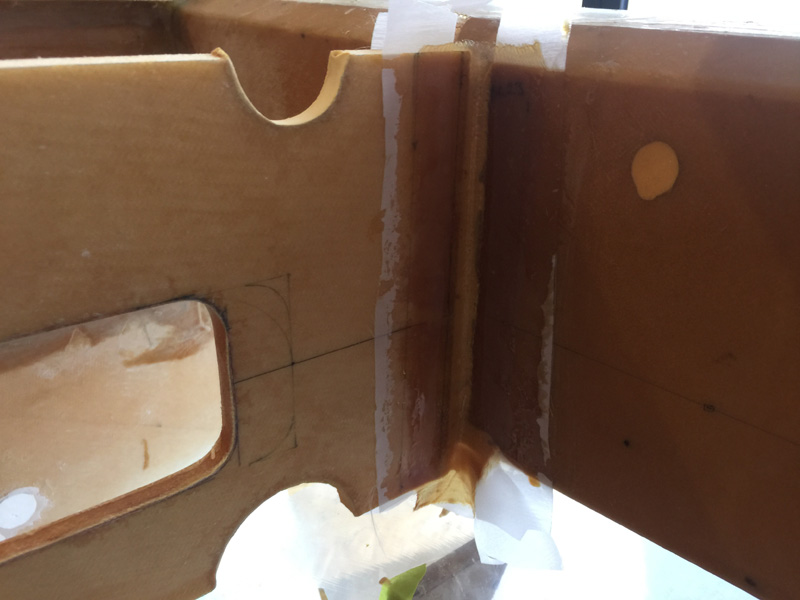
Here’s my corner work. I’m going to have to be extremely careful with this join for now. Once the floor is on it will be well supported. Until then I don’t want to ‘delam’ it with a careless bump! I will be putting temporary stringers in to reduce the load here.

With BL23 done I knew that the BL45 on the other side was quite achievable today, even though the sun has long since set. It just so happens there is a workbench under that Butt line. Well nearly… All I had to do was screw a bit of board on to extend that point and I had an instant table.

I grabbed a bit of wood, hot glued a base and added a couple of clamps to have my ‘rib holding system’ good to go.

After I was happy and everything prepped, all the bits got the hot glue treatment except where the epoxy and glass goes of course.

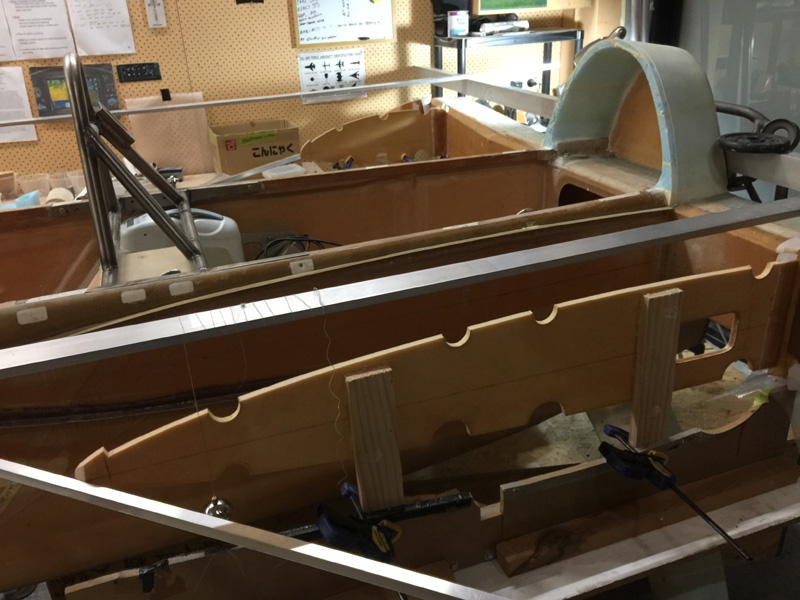
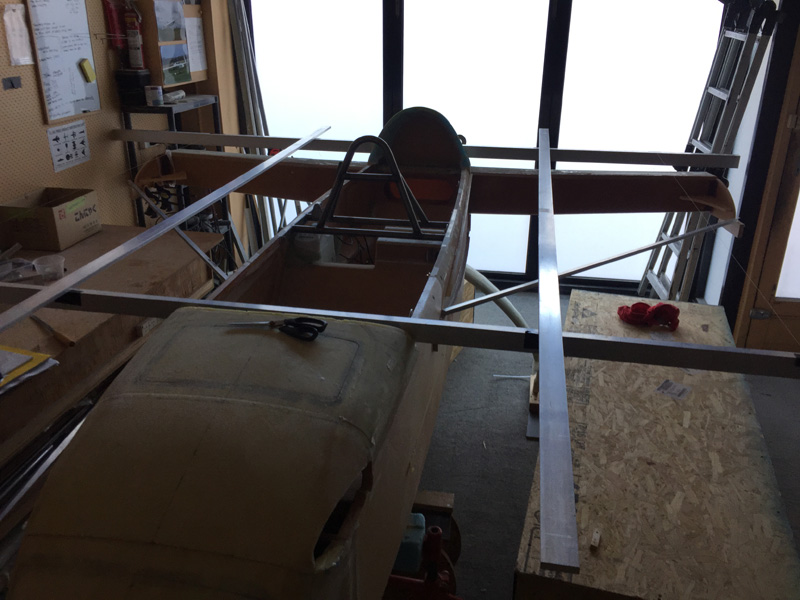
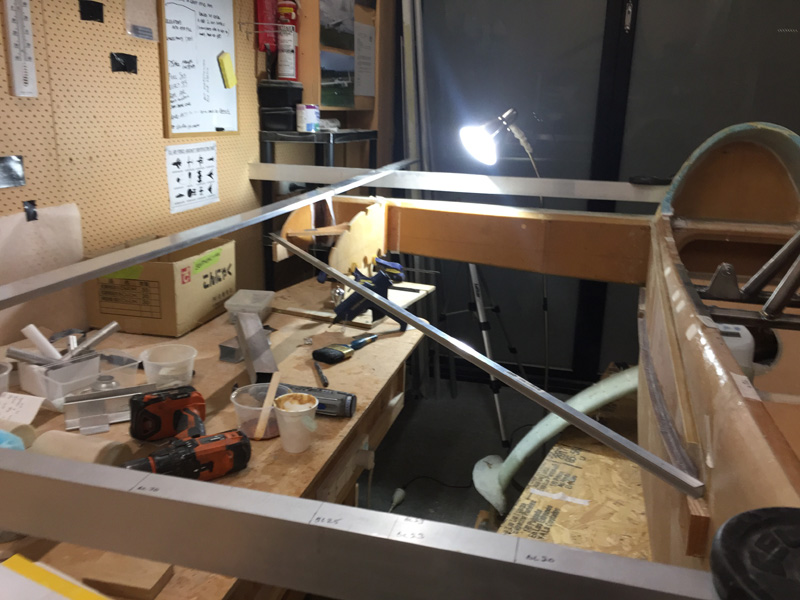
Here are the two ribs set up. Two down, two to go tomorrow. Then we will look at the cross bracing.

Previous Post
BL23 Sight Windows
Next Post
Rib Grid Layout, BL23(Right) and BL45(Left)

Leave a Reply Cancel reply

Your email address will not be published. Required fields are marked *

Fill out this field
Fill out this field
Please enter a valid email address.

CategoryLogsHours
All157617079
Uncategorized135
Ch 3 Education220
Ch 4 Fuselage Bulkheads25231
Ch 5 Fuselage Sides32283
Ch 6 Fuselage Assembly30270
Ch 7 Fuselage Exterior14140
Ch 8 Roll Over/Seat Belts990
Ch 9 Main Gear/Landing Brake71642
Ch 10 Canard28287
Ch 11 Elevators36298
Ch 12 Canard Installation12102
Ch 13 Nose and Nose Gear1291097
Ch 14 CenterSection Spar57525
Ch 15 Firewall and Accessories448
Ch 16 Control System27237
Ch 17 Roll/Pitch Trim System654
Ch 18 Canopy70502
Ch 19 Wings, Alierons1271090
Ch 20 Winglets/Rudders71528
Ch 21 Strakes - Fuel/Baggage65437
Ch 22 Electrical System591031
Ch 23 Engine Installation961152
Ch 24 Covers/Fairings/Consoles25202
Ch 25 Finishing561084
Ch 26 Upholstry340
Fuel System46310
Rollover1050
Cabin heating System60331
The Ferry Tank335
Blog2694182
Build Mods2252513
Nose Gear Doors856
Wheel Pants/Gear Leg Fairing40473
Oxygen System762
Roll and Pitch Trim964
Winglet Intersection Fairings445
Baggage Pods11104
Pilot Side Windows437
RAM Air & Hellhole Cover15177
Main Gear Beef Up322
Post Cure124
Fire Extinguisher16
Wing Fences13
EVS (Enhanced Visual System)130
Hinge Upgrade115
Cowl Keeper110
Rudder Gust Locks19
Cooling20607
Taxi Tests42
Flying10

Complete the Test Flight Program

2025/6/30 10:26:01

Round Australia in Four Flights

2026/4/1 10:26:01

Round the World Departure

2026/8/22 10:26:01

Rough River Flyin, Sept 23, 2026

2026/9/23 10:26:01

© Copyright 2025 Dave Berenholtz