• Home
  • Flying
    • First Flight
  • Build by Chapter
    • Ch 3 Education
    • Ch 4 Fuselage Bulkheads
    • Ch 5 Fuselage Sides
    • Ch 6 Fuselage Assembly
    • Ch 7 Fuselage Exterior
    • Ch 8 Roll Over/Seat Belts
    • Ch 9 Main Gear/Landing Brake
    • Ch 10 Canard
    • Ch 11 Elevators
    • Ch 12 Canard Installation
    • Ch 13 Nose and Nose Gear
    • Ch 14 CenterSection Spar
    • Ch 15 Firewall and Accessories
    • Ch 16 Control System
    • Ch 17 Roll/Pitch Trim System
    • Ch 18 Canopy
    • Ch 19 Wings, Alierons
    • Ch 20 Winglets/Rudders
    • Ch 21 Strakes – Fuel/Baggage
    • Ch 22 Electrical System
    • Ch 23 Engine Installation
    • Ch 24 Covers/Consoles
    • Ch 25 Finishing
    • Ch 26 Upholstry
  • Build Mods
    • Liquid Cooling, Numbers, Weights and Flow
    • Cooling
      • Solving Ground Cooling 1
      • Solving Ground Cooling 2
      • Solving Ground Cooling 3
      • Solving Ground Cooling 4
      • Solving Ground Cooling 5
      • Solving Ground Cooling 6
      • Solving Ground Cooling7 – Test Data
      • Solving Ground Cooling 8 – Flap Building
      • Solving Ground Cooling 9 – Hinges
      • Solving Ground Cooling 10 – Lower Flaps
      • Solving Ground Cooling 11 – Upper Flaps
      • Solving Ground Cooling 12 – Completed
      • Cooling the Beast 1
      • Cooling the Beast 2 – Lower Cowl Expansion
      • Cooling the Beast 3 – KW Oil Cooler Diffuser
    • EVS (Enhanced Vision System)
    • Cowl Keeper
    • Rudder Gust Locks
    • Wing Fences
    • Post Cure
    • Hinge Upgrade
    • RAM Air & Hellhole Cover
    • Main Gear Beef Up
    • Pilot Side Windows
    • Baggage Pods
    • Winglet Intersection Fairings
    • Titanium Rollover
    • Nose Gear Doors
    • Wheel Pants/Gear Leg Fairing
    • Cabin heating System
    • Fuel System
    • Roll and Pitch Trim
    • Oxygen System
    • The Ferry Tank
    • Cruise Angle Indicator
    • Fire Extinguisher Install
  • Round the World
    • RTW Route East #12 rev1
    • Survival Equipment
    • Training Flights
  • Other Stuff
    • Blog
    • Around the World: RAAUS Sport Pilot Issue 110
    • Taxi Tests
    • Summary Feb ’24 from an SAAA Meeting
    • AOPA Pilot 27th Sept 2019
    • Build Tests
    • Flying Stories
      • A Long Easy Dream ’06
      • Townsville ’07
      • Cairns ’08
      • Albany ’08
      • East Coast ’08
      • Brisbane ’09
      • Cairns ’10
      • Perth ’10
    • Non Build Mods
      • F16 Scoop for JZE
      • Ram Air Box for JZE
      • Strange Tips
    • Milestones
    • Links
  • Contact

Blog

Home
Ch 13 Nose and Nose Gear
Pitot Installation 1

Pitot Installation 1

7 years ago
Dave Berenholtz
Ch 13 Nose and Nose Gear
Date:  07-25-2018
Number of Hours:  4
Manual Reference:  13-10

Finally the pitot installation. Yaaaa!!  I have been dithering about this for years. Yes I need a heated pitot for IFR flying and the issues have been where to put it because my light is in the way.  I also wanted to use an anti ice glider type but there is no room!

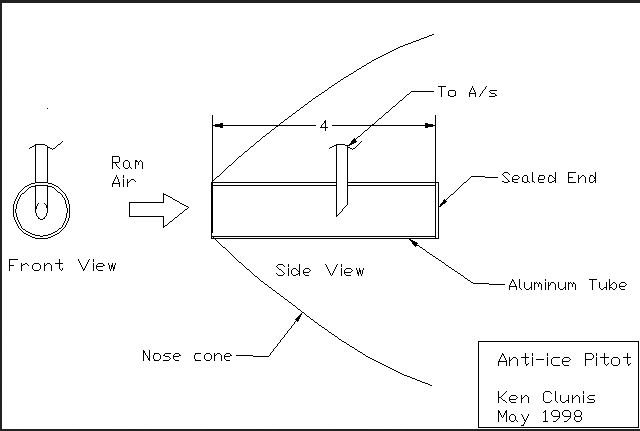
Here’s the concept. Nothing sticking out of the nose. The pickup tube faces the back wall too. The opening is so large that it is unlikely that ice will form over the whole thing. IF the pickup tube, the pitot itself, does ice up then this part is heated in my take on this old idea.

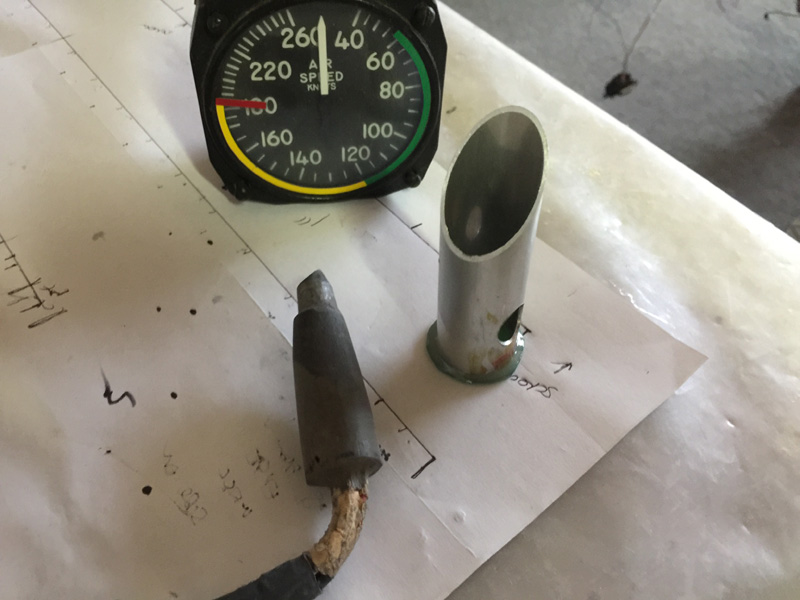
Here’s my version. I’ve had to make the main tube a lot shorter than 4″ AND it is not exactly in the middle point of maximum pressure in the nose. It will go slightly above that so that it clears the main front light. The angle is to fit the curve of the nose just above center. It also give the tube a very slight incline which will tend to allow any melted ice to dribble out. Probably over my light! That said, the light in that area also introduces a bit of heat.

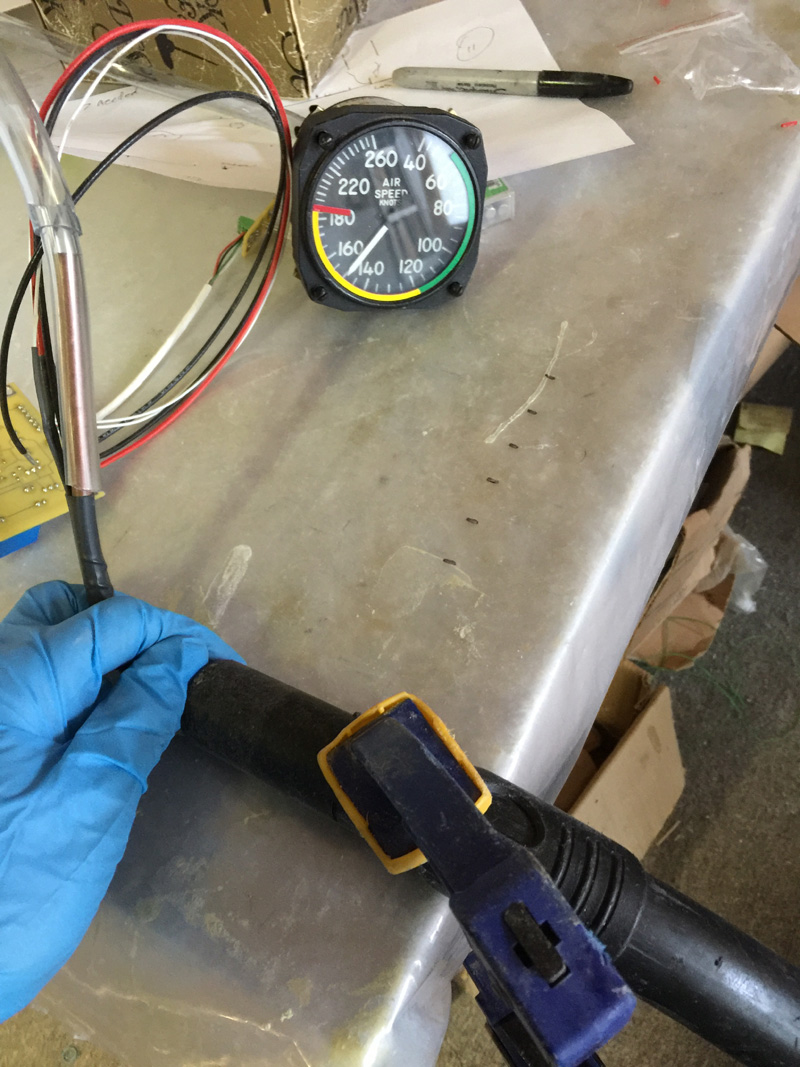
I have ‘modified’ the pitot to fit into a hole in the side of the tube. Similar to the glider pitot design. So this excellent heated pitot I have butchered to fit.

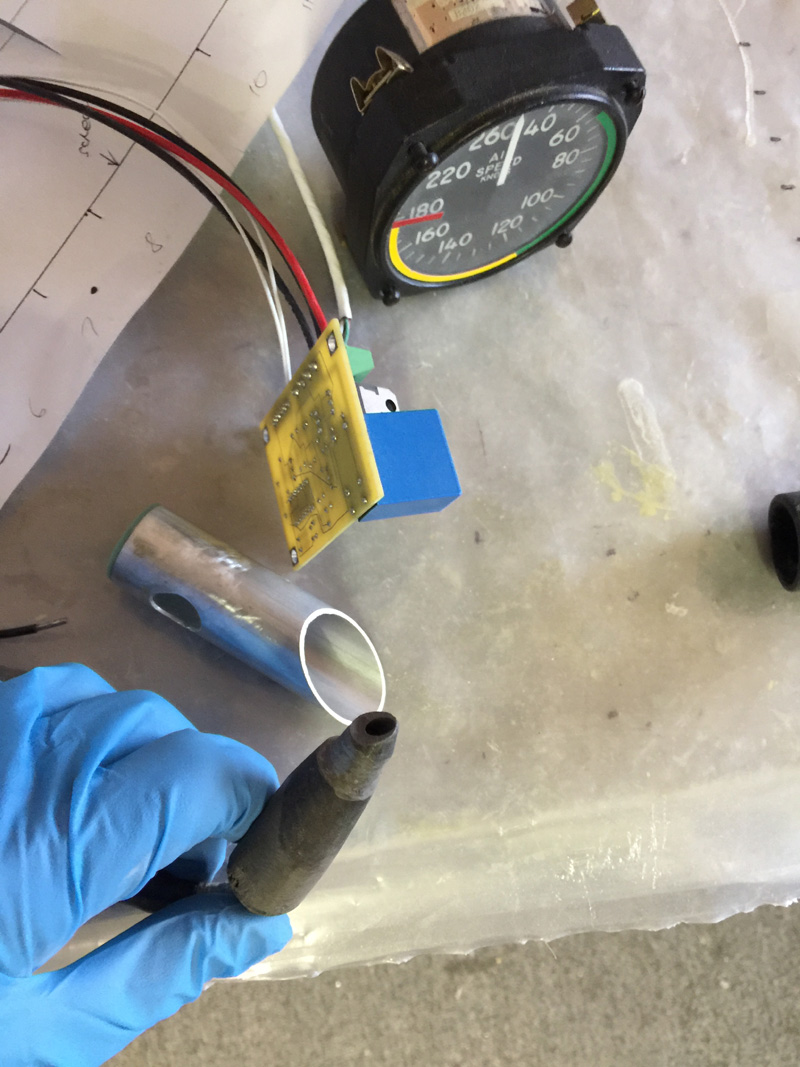
I was given mine by the manufacturer which I am very grateful for and I owe them some installation pics.  You can get details here if you want one. Gretz Aero GA-1000 Heated Pitot tubes. The electronics sense when the pitot is cold and apply heat. When it warms up the heat is removed so its not pulling the big amps all the time if its on like the old school type.

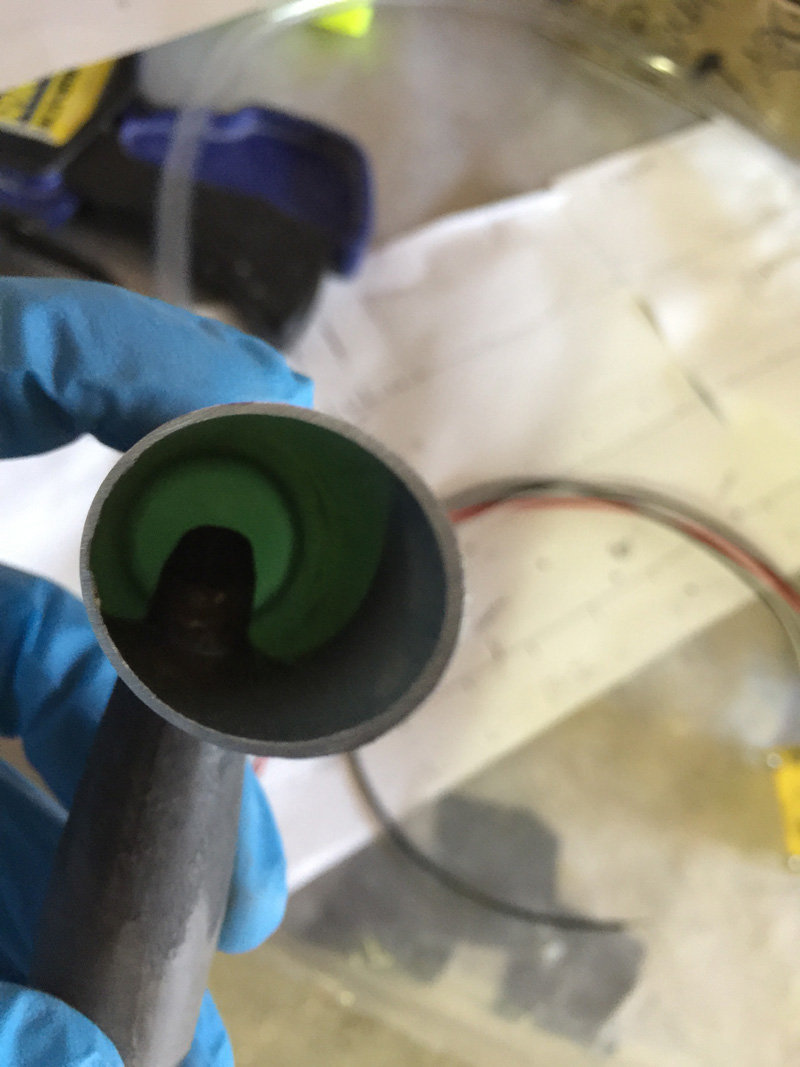
I’ve made a cap for the back of the tube out of Garalite and epoxied it in place. It has a slight step which greatly increase the gluing surface and the time it took to make. This pic shows how the pitot will sit in the tube.

I did some more testing to confirm that the tube idea was a go. Again the shop vac came into play. It sucks or blows! Very handy.

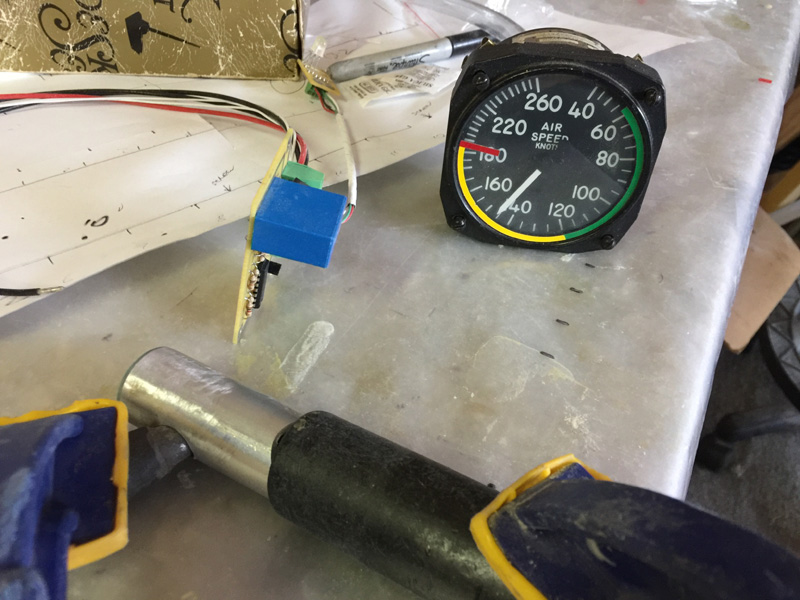
I tried various configurations with and without the tube. Enough to say having the tube didn’t seem to make much difference which is what I wanted to see. It is not very accurate testing but I’m happy enough to move forward with the concept. If this whole thing is an epic fail I’ll go a Garmin heated pitot placed under the canard. I hope it doesn’t come to that!

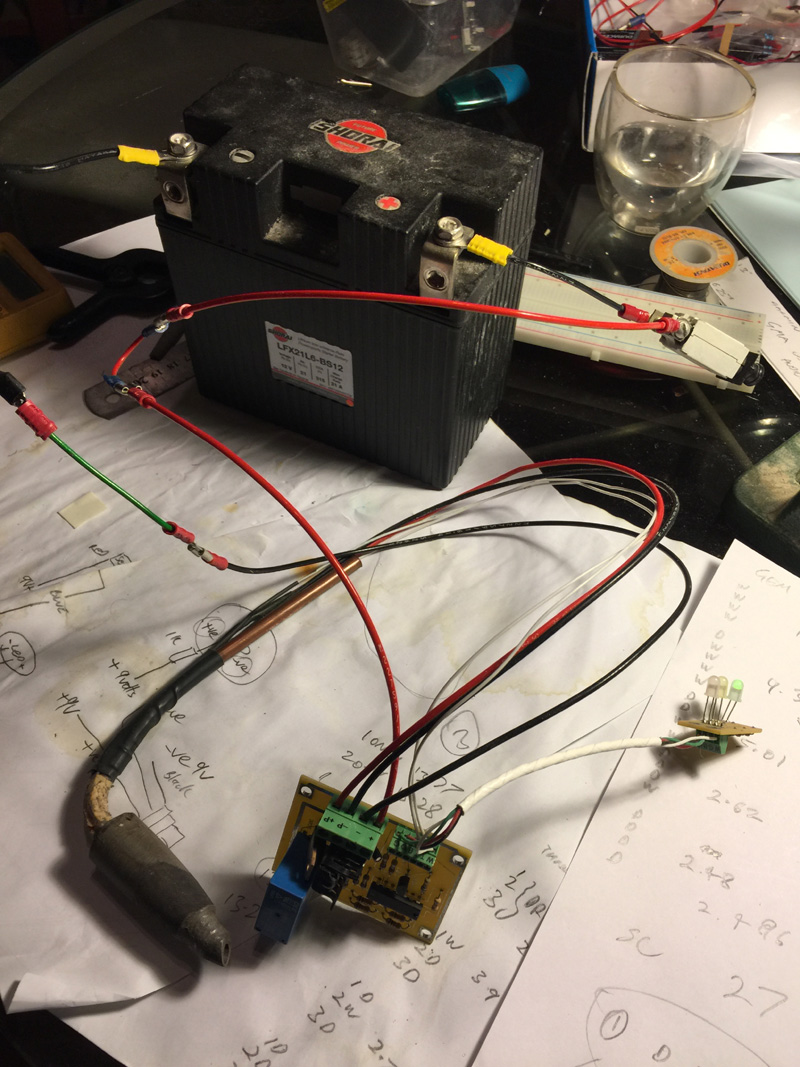
Here’s a bit of due diligence. The unit comes with a three LED row that indicates the units function. I started with a cold pitot which was quickly heated up showing the middle light and then the green light came on and the heat was turned off.

So I haven’t broken anything and its good for installing in the plane. You might notice I have a fuse on the power supply. That was pointed out by my build buddy in the USA, Wade Parton… after I told him I had ‘let the smoke out of the wires’ on some other testing when I hadn’t bothered with a fuse. Hey it was only 12 volts   …WRONG!  Yes a fuse on all my test rigs has become mandatory. The little bit of smoke was …painfully expensive.


Previous Post
New Nose Gear Strut Cover
Next Post
Pitot Installation 2 and Nose Reinforcement

Leave a Reply Cancel reply

Your email address will not be published. Required fields are marked *

Fill out this field
Fill out this field
Please enter a valid email address.

CategoryLogsHours
All157617079
Uncategorized135
Ch 3 Education220
Ch 4 Fuselage Bulkheads25231
Ch 5 Fuselage Sides32283
Ch 6 Fuselage Assembly30270
Ch 7 Fuselage Exterior14140
Ch 8 Roll Over/Seat Belts990
Ch 9 Main Gear/Landing Brake71642
Ch 10 Canard28287
Ch 11 Elevators36298
Ch 12 Canard Installation12102
Ch 13 Nose and Nose Gear1291097
Ch 14 CenterSection Spar57525
Ch 15 Firewall and Accessories448
Ch 16 Control System27237
Ch 17 Roll/Pitch Trim System654
Ch 18 Canopy70502
Ch 19 Wings, Alierons1271090
Ch 20 Winglets/Rudders71528
Ch 21 Strakes - Fuel/Baggage65437
Ch 22 Electrical System591031
Ch 23 Engine Installation961152
Ch 24 Covers/Fairings/Consoles25202
Ch 25 Finishing561084
Ch 26 Upholstry340
Fuel System46310
Rollover1050
Cabin heating System60331
The Ferry Tank335
Blog2694182
Build Mods2252513
Nose Gear Doors856
Wheel Pants/Gear Leg Fairing40473
Oxygen System762
Roll and Pitch Trim964
Winglet Intersection Fairings445
Baggage Pods11104
Pilot Side Windows437
RAM Air & Hellhole Cover15177
Main Gear Beef Up322
Post Cure124
Fire Extinguisher16
Wing Fences13
EVS (Enhanced Visual System)130
Hinge Upgrade115
Cowl Keeper110
Rudder Gust Locks19
Cooling20607
Taxi Tests42
Flying10

Complete the Test Flight Program

2025/6/30 10:26:01

Round Australia in Four Flights

2026/4/1 10:26:01

Round the World Departure

2026/8/22 10:26:01

Rough River Flyin, Sept 23, 2026

2026/9/23 10:26:01

© Copyright 2025 Dave Berenholtz