| Date: 02-02-2024 | |
| Number of Hours: 25 | |
| Manual Reference: 23 |
With the right side radiator back from ‘Rod the radiator guy’ I can have a look at how I’m going to mount it.
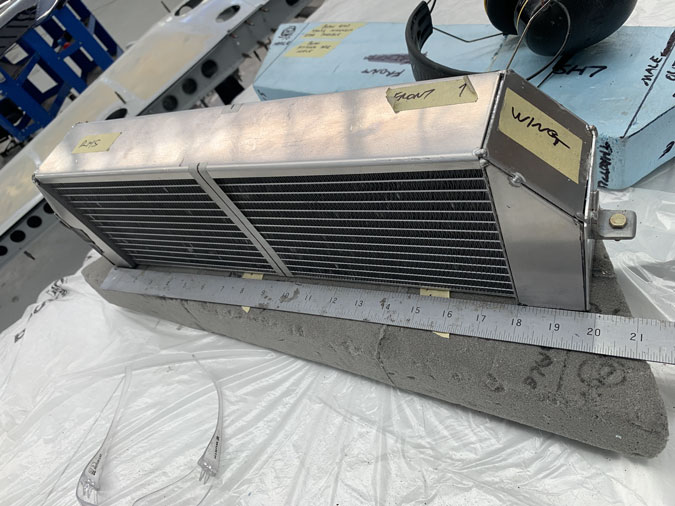
This time the AN-16 and AN-12 fittings which are on the front side have had the end tanks reduced to the minimum possible size. Once the core arrived, although slightly shorter than ordered by 1cm, we then only need the tanks for the fittings. This gives me an inch or two to play with up or down in the cowl/engine space.
You can see the fittings are just tack welded on as are the tanks for now. Working with Rod I have learnt that this build is a fluid thing with minimal clearances. So it is better to go gently into ‘final’ positioning.
The line on the bit of tape is the longitudinal center of the tank or the optimum place for trying to get an even spread of air. One of the challenges is that its only 4″ or so away which is not enough space to use a full KW trumpet duct. I’m going to have to get creative.
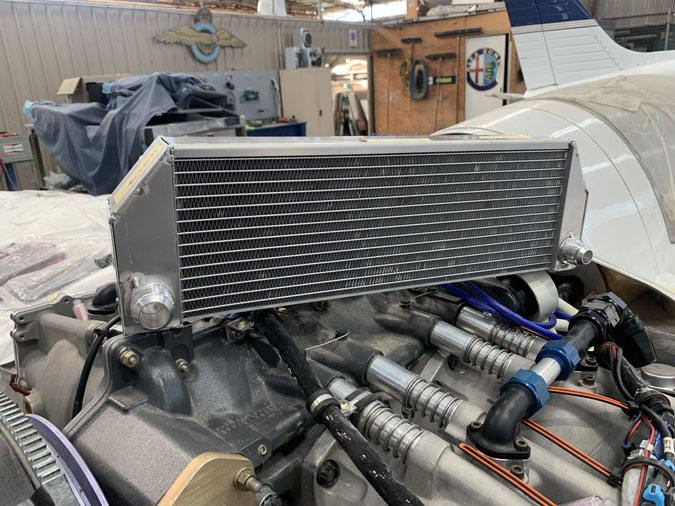
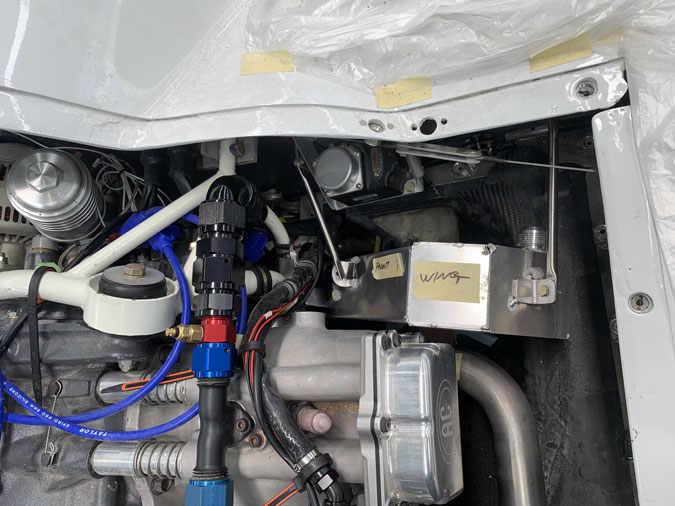
This is where the radiator has to go. It sort of hangs in mid air in the middle of nowhere.
This has led me to some new ‘tech’ or rather a new method of fixing for me and a new material to work with, again, new for me. Old news for everyone else. I like to think its another arrow in my methods quiver.
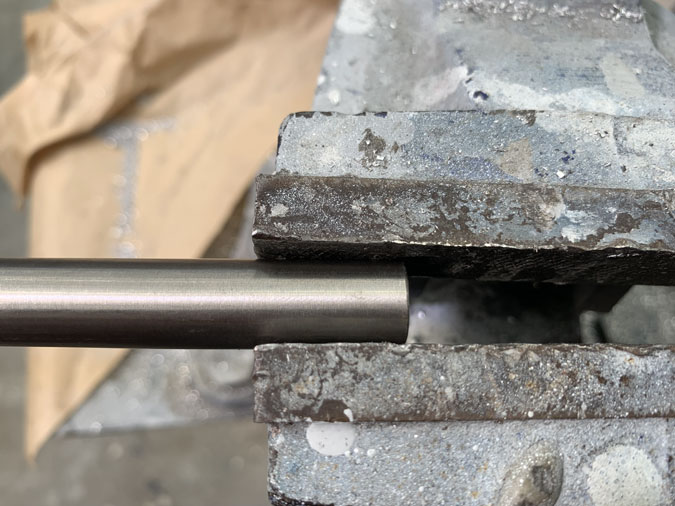
Sure, this is not new to everyone else. Its just stainless steel pipe and squashing the ends to make fixing points.
The pipe I started with was a bit large in diameter and it took a lot of squishing.
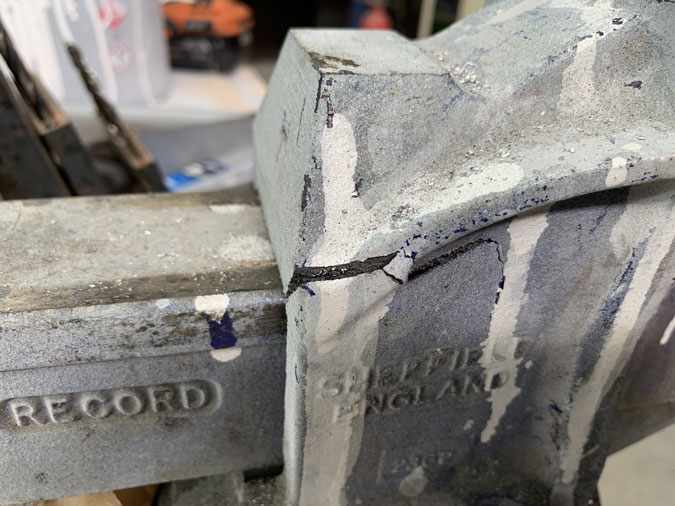
In fact it required so much force that I broke the vice! Was it my new exercise regime or had I applied the law of the lever from the Greek scholar Archimedes? I’d like to think the former but I suspect a long bit of pipe over the vice arm had a bit to do with it. I bent the vice arm as well.
Needless to say I’m now using a bigger vice with smaller pipe and a few days after this ‘incident’ I have replaced the old vice with a nice new one in my hired corner of the hangar. It wasn’t my vice to break.
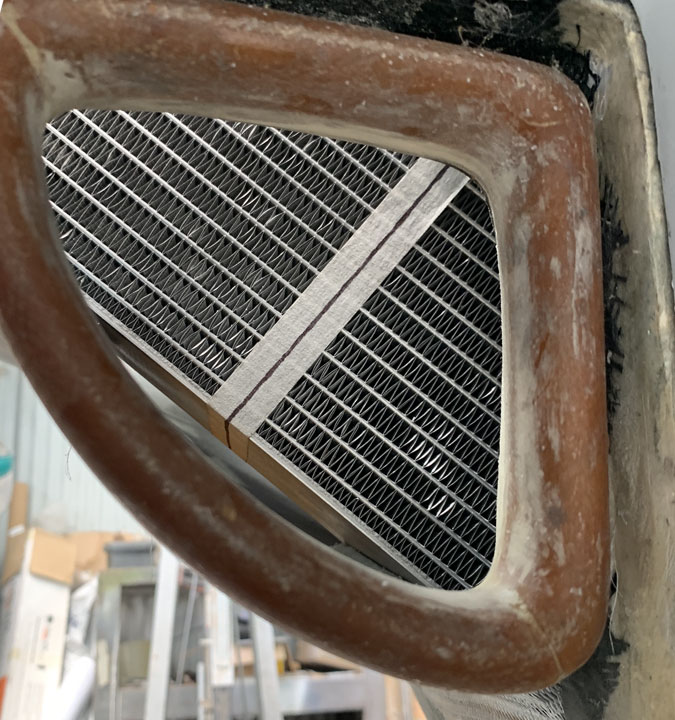
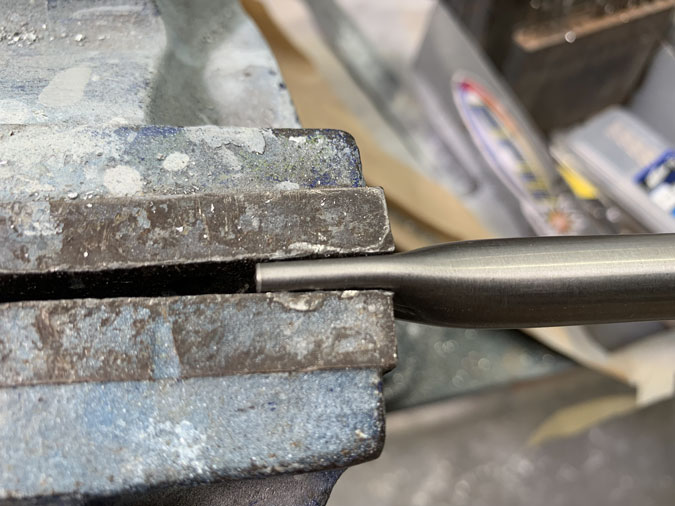
This is the ‘tech’ I’m using. I first tried it on securing my exhaust pipes which is another post. This however is very applicable to ‘hanging’ the radiators.
My initial try on securing the exhaust pipe ends. The first pipe shown was just bigger than necessary. The new tube is lighter and easier to crush. It is still awful to drill. This stuff is amazingly strong and you have to be careful not to work harden it as the drill bits don’t like that at all. Yeah, everyone else but me knew this.

After a lot of thought I’ve decided that the radiators must hang from the spar and the engine mount. Items that don’t move. If I hang from the engine I will be in a world of hurt.
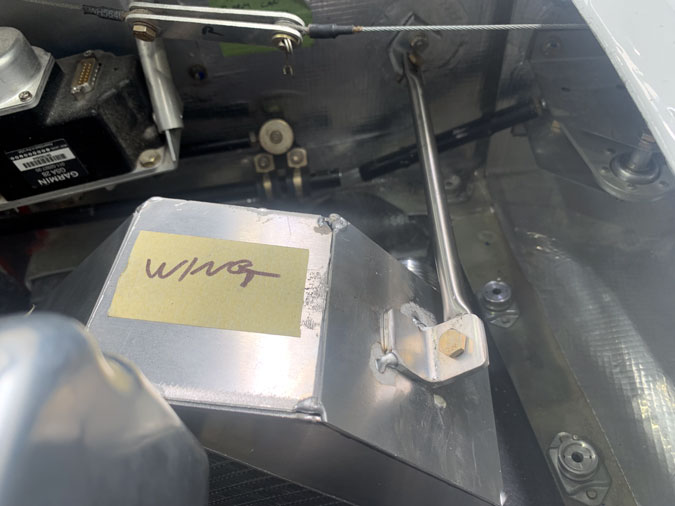
Here you can see I’ve mounted a simple click bond which will become one end of a stainless steel support rod.
I did have an issue with the quick release of the aileron arm and the autopilot connection. Lets just say this gobbled up the best part of a day unnecessarily. However I did find a penny washer that brushes against the wing root side and I’m addressing that. These things have to get fixed. Every time I find some anomaly it takes a lot of effort to resolve but I do get a deeper insight into very subtle methodologies specific just to this plane.
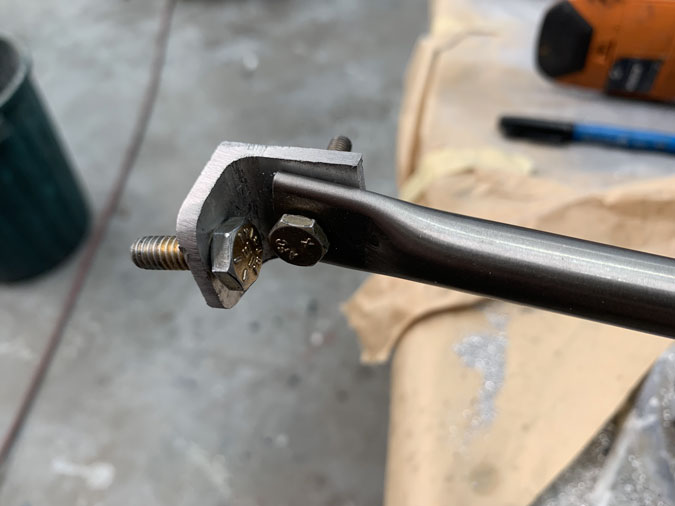
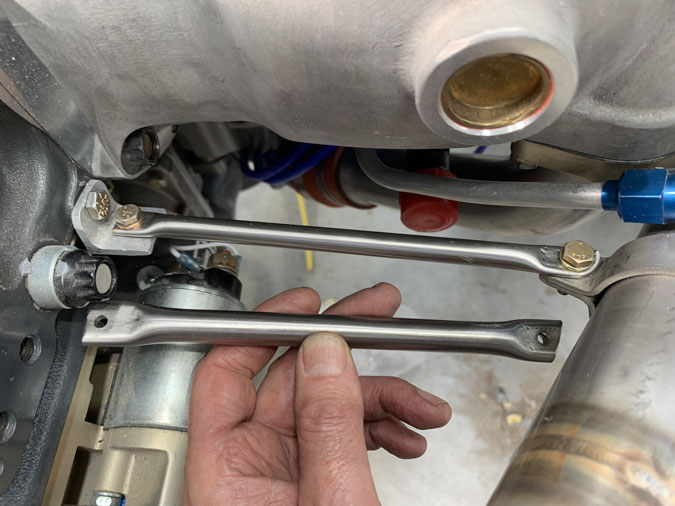
Here you see the first support arm in place. I got lucky and had the airport welder just tack on the bracket for me. This saves going to my welding guy and back again and probably losing a couple of days. I hope the local guy has time for several of these as I go along. Note that one flattened end is at 90 degrees to the other. This is a great way to have an easy direction change.
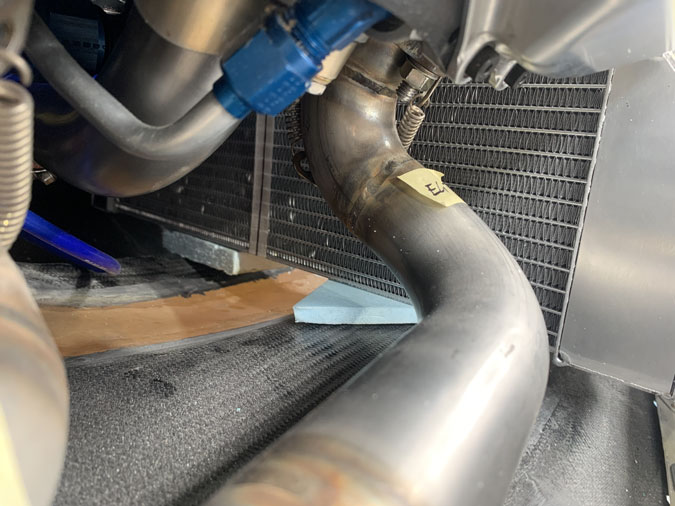
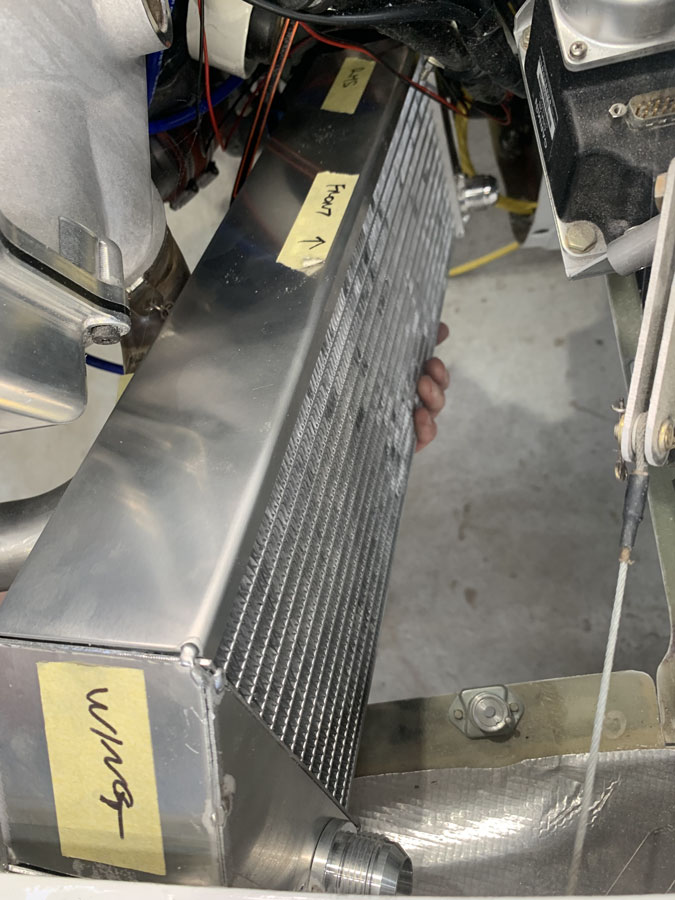
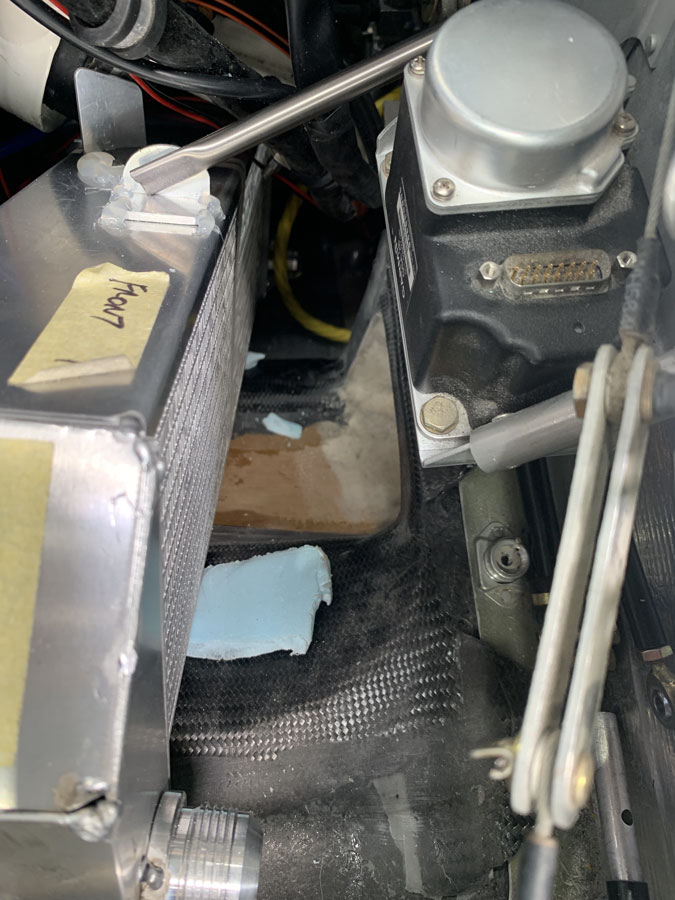
Getting the radiator in position requires little pieces of foam with the bottom cowl on to ensure that I have clearance all around. Each time I move something I have to set it all up again. It really is hanging in the middle of nowhere.
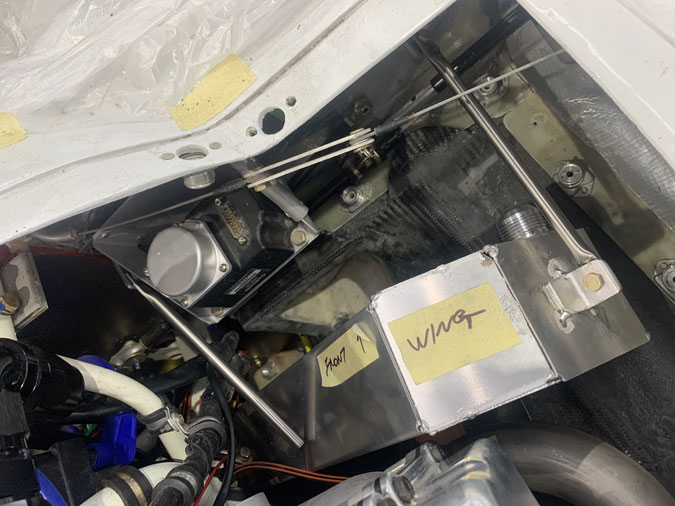
Here you can see me working on the second support arm. I’ve made a bracket that spans two of the servo clickbonds and then bolted the stainless arm to that. Now we just need a bracket welded to the radiator.
Here’s the bracket position.
This is another view. You might see I am trying to ‘triangulate’ where possible. If the angle of the flattened piece isn’t quite perfect…I get to make another arm. Its a good thing the stainless pipe is cheap.
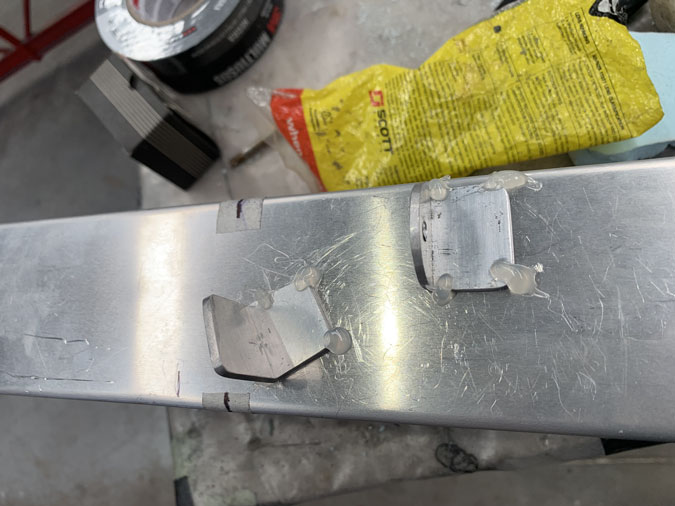
The second bracket above will attach to a P-clamp (aviation standard, not the hardware store type) on the engine mount. They are hot glued on for now with scratches to help positioning for the tack welds. I hope to get those done in a couple of days. The positions are critical of course. I’ve done these two on the edges to help with stabilizing the radiator left to right. There will be at least one more fitting down the end onto the engine mount. At that point I will see if it needs anything else to secure it. It’s very much shake it and see. I want a rock solid mounting.