| Date: 05-18-2018 | |
| Number of Hours: 6 | |
| Manual Reference: no ref |
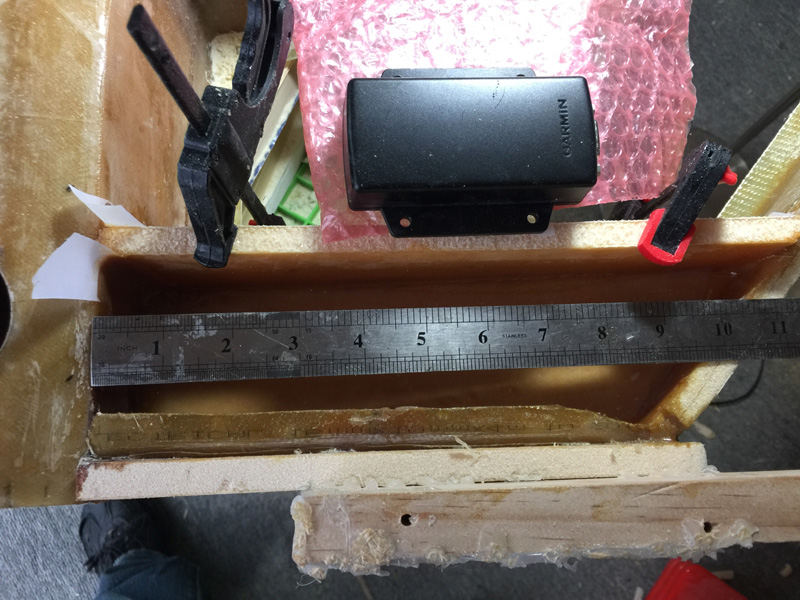
In correspondence with guys in the Garmin experimental division, ‘Steve’ pointed out that I had missed the significant length of the GMU11. He didn’t say anything about my work, just sent me the relevant pages in the install manual. That manual is only 839 pages long and I didn’t know the GMU 11 was covered. I had looked at a previous version magnetometer install and just assumed the connectors were pretty standard. Oh no they are not. My carefully made pocket was about .5″ too short.
I could have cut into the D nose section in the LE but then it would have been a bit thin in that spot. Hey, I had the heads up early, time to bite the bullet.
Yes I removed all the previous pocket work which took a couple of hours. Like a band-aid, best to just rip it off. I like mistakes in the rear vision mirror so best to get the correction done straight away. Then with a clean slate I measured for a while only to find to get the extra length comfortably, I’d be within an inch of the back wall. Might as well go all the way and eliminate a ‘back’ to the pocket. I could instead use the spar.
Structurally it made sense to do another rib type of addition. My pocket will be about 1.5″ longer than needed but overall I think this is a more elegant solution. I soon had a couple of pieces cut and fitted from my left over glassed foam. This was from when the baffles were cut out.
Here after using plenty of flox I added internal glass BID tapes and a bit of peel ply. The main work will be on the outside tapes. It they fail or have ‘pin holes’ this internal layup should prevent any leaking.
Here are the measurements. The docs say I need 6.31 inches absolute minimum for the magnetometer. So I have a bit of wiggle room to set it up. Some space also to bringing in a wire conduit with drama.
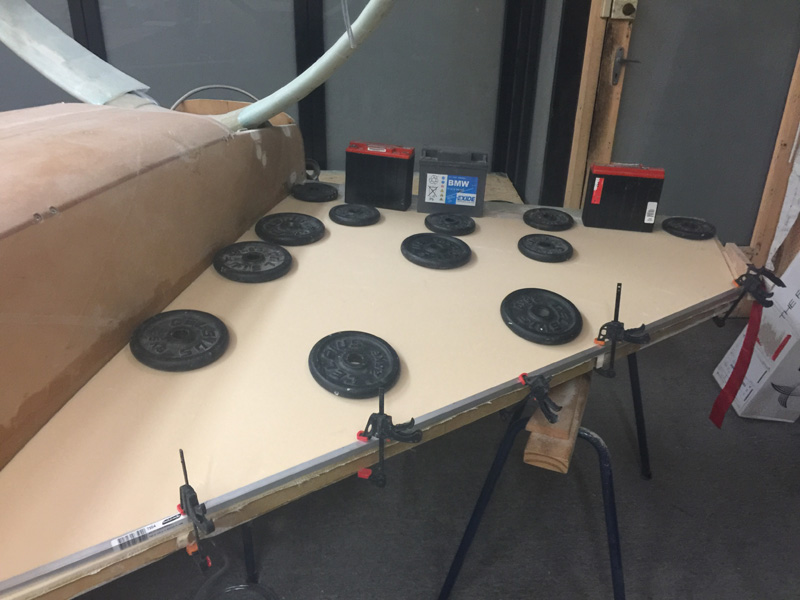
The next few hours were playing around with the ribs and baffles. I ensured all the mouse holes were smooth and that all the sides were sanded and cleaned. Above is a trial fitting of the ‘bottom’ right skin. It takes a bit of clamping but it does sit in place without doing any slits in the foam. I need a bit more fine tuning at the edges but I’m pretty close to floxing this guy in place. Maybe tomorrow.


