• Home
  • Flying
    • First Flight
  • Build by Chapter
    • Ch 3 Education
    • Ch 4 Fuselage Bulkheads
    • Ch 5 Fuselage Sides
    • Ch 6 Fuselage Assembly
    • Ch 7 Fuselage Exterior
    • Ch 8 Roll Over/Seat Belts
    • Ch 9 Main Gear/Landing Brake
    • Ch 10 Canard
    • Ch 11 Elevators
    • Ch 12 Canard Installation
    • Ch 13 Nose and Nose Gear
    • Ch 14 CenterSection Spar
    • Ch 15 Firewall and Accessories
    • Ch 16 Control System
    • Ch 17 Roll/Pitch Trim System
    • Ch 18 Canopy
    • Ch 19 Wings, Alierons
    • Ch 20 Winglets/Rudders
    • Ch 21 Strakes – Fuel/Baggage
    • Ch 22 Electrical System
    • Ch 23 Engine Installation
    • Ch 24 Covers/Consoles
    • Ch 25 Finishing
    • Ch 26 Upholstry
  • Build Mods
    • Liquid Cooling, Numbers, Weights and Flow
    • Cooling
      • Solving Ground Cooling 1
      • Solving Ground Cooling 2
      • Solving Ground Cooling 3
      • Solving Ground Cooling 4
      • Solving Ground Cooling 5
      • Solving Ground Cooling 6
      • Solving Ground Cooling7 – Test Data
      • Solving Ground Cooling 8 – Flap Building
      • Solving Ground Cooling 9 – Hinges
      • Solving Ground Cooling 10 – Lower Flaps
      • Solving Ground Cooling 11 – Upper Flaps
      • Solving Ground Cooling 12 – Completed
      • Cooling the Beast 1
      • Cooling the Beast 2 – Lower Cowl Expansion
      • Cooling the Beast 3 – KW Oil Cooler Diffuser
    • EVS (Enhanced Vision System)
    • Cowl Keeper
    • Rudder Gust Locks
    • Wing Fences
    • Post Cure
    • Hinge Upgrade
    • RAM Air & Hellhole Cover
    • Main Gear Beef Up
    • Pilot Side Windows
    • Baggage Pods
    • Winglet Intersection Fairings
    • Titanium Rollover
    • Nose Gear Doors
    • Wheel Pants/Gear Leg Fairing
    • Cabin heating System
    • Fuel System
    • Roll and Pitch Trim
    • Oxygen System
    • The Ferry Tank
    • Cruise Angle Indicator
    • Fire Extinguisher Install
  • Round the World
    • RTW Route East #12 rev1
    • Survival Equipment
    • Training Flights
  • Other Stuff
    • Blog
    • Around the World: RAAUS Sport Pilot Issue 110
    • Taxi Tests
    • Summary Feb ’24 from an SAAA Meeting
    • AOPA Pilot 27th Sept 2019
    • Build Tests
    • Flying Stories
      • A Long Easy Dream ’06
      • Townsville ’07
      • Cairns ’08
      • Albany ’08
      • East Coast ’08
      • Brisbane ’09
      • Cairns ’10
      • Perth ’10
    • Non Build Mods
      • F16 Scoop for JZE
      • Ram Air Box for JZE
      • Strange Tips
    • Milestones
    • Links
  • Contact

Blog

Home
Ch 21 Strakes - Fuel/Baggage
Leak Testing 6

Leak Testing 6

7 years ago
Dave Berenholtz
Ch 21 Strakes - Fuel/Baggage
Date:  08-04-2018
Number of Hours:  8
Manual Reference:  21-5

After finding a couple of leaks with the aircon sniffer method, I went to work that night to plug them. While looking for these leaks I also found that the sensitive skin just above my lip and below the nose could detect air being forced out of the strakes. Once the sniffer identified the spot this was a secondary method for getting the exact leak position. It was best at 10-14″ of pressure. Below 8″ it was not noticeable.

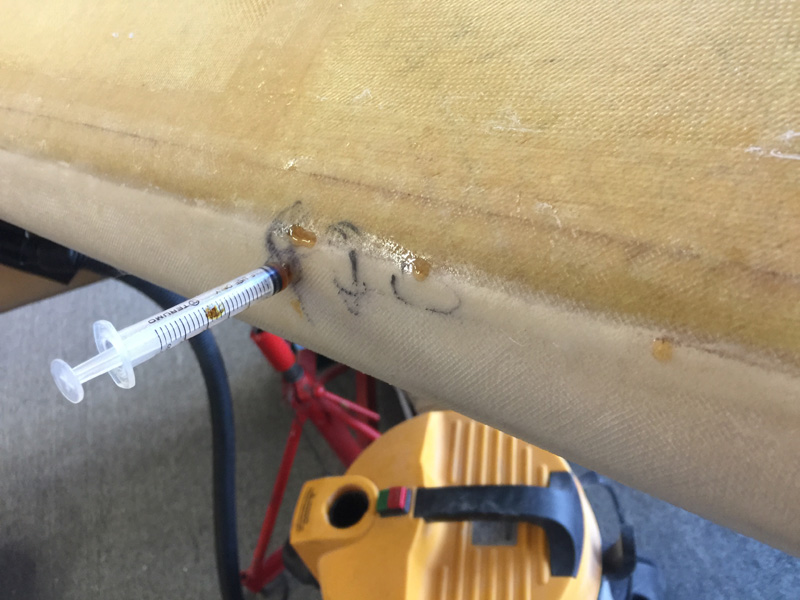
I started with a fine needle and ended up with just a hole the size of the syringe. What seems to have happened is that I’ve had a leak somewhere between the outermost baffle and that leading edge I added later. So it was internal. This leading edge has a channel in it for the magnetometer wire. Escaping air got into the wire covering and traveled down that to a few locations on its merry way.

As you see above I’m pumping in epoxy. This is getting into the conduit and traveling along it. To encourage the flow, I’ve pulled out the drain hole stopper and have positioned my vacuum cleaner hose in such a way that it pulls about 10″ of negative pressure. This will help suck the glue into the leaking hole.

I put a LOT of glue in that hole. It came to the surface in two other places but I just held my glove over these and kept pumping in the epoxy. My next step was to use wet flox in the syringe and keep feeding it.

Where that black ring is was a secondary location. That got the same treatment.

It took a few more days and yet another aircon guy with a state of the art sniffer to find the subsequent leak that was still evident after all the work. It was very slow but I knew I still had an issue. I might mention it was with some concern too as the leak needed to be 100% resolved. No compromises here.

Well as you might expect the final leak was really hard to find. A lot of the problem was getting the testing gear and all the hoses 100% sealed so we didn’t get any more false readings. The final leak was…… at the drain hole plug. It wasn’t tight enough! My bad. The other leaks were real, this one was builder induced. Believe me, I paid for this.

That said, they two guys who helped out were fantastic. A big shout of to John M. who made several visits and Geoff E. who did the final sniffer search today. They understood that we had to get a result and it was refreshing to find professionals who were all about getting the right result and caring about the work itself.

My fall back position was to start deconstructing the strakes, starting with the leading edge. A seriously big job that fortunately was not required.

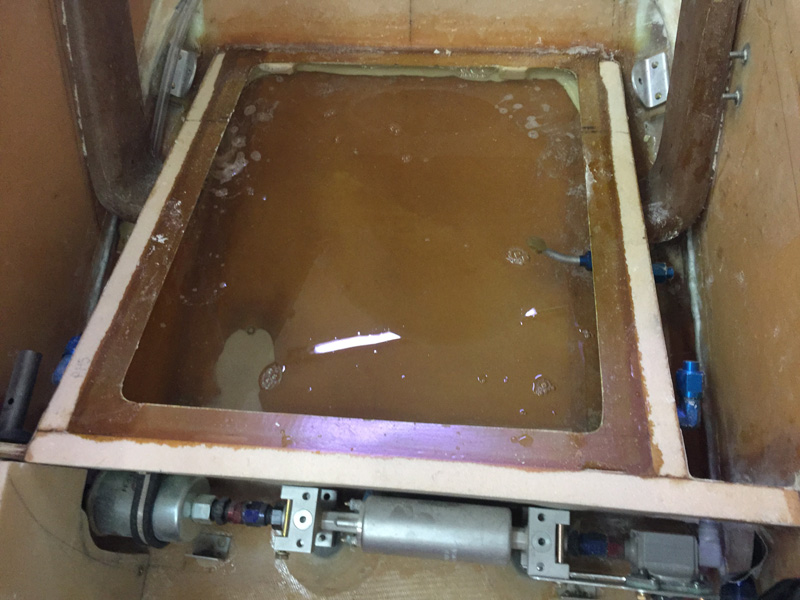
I did several hours more testing of course with my manometer and finally called the left strake good. The right one you might remember was good from the beginning. Next up was to open up the feed pipes in the sump, do a clean up and then fill it with soapy water.

I have no leaks on the bottoms and sides of the sump, or things would have been wet on the outside. Easy. Next will be a clean up and some plumbing followed by finally gluing/floxing on the sump top.

As a most relevant aside I used this test to determine the volume of the sump. I filled it to the back edge with the nose down. That water was measured as it came out as 16.8 liters. The sump could not be filled completely with the top off of course. I did some measurements and came up with my sump volume which would have to be pretty close to correct.  My numbers gave me 19.6 liters which were a little conservative in the measuring. So I’m calling it 20 liters for now and it might be 20.1 or 20.2 in reality.

Sump Volume is 20 liters.


Previous Post
Leak Testing 5
Next Post
Installing the Sump Lid 1

Leave a Reply Cancel reply

Your email address will not be published. Required fields are marked *

Fill out this field
Fill out this field
Please enter a valid email address.

CategoryLogsHours
All157617079
Uncategorized135
Ch 3 Education220
Ch 4 Fuselage Bulkheads25231
Ch 5 Fuselage Sides32283
Ch 6 Fuselage Assembly30270
Ch 7 Fuselage Exterior14140
Ch 8 Roll Over/Seat Belts990
Ch 9 Main Gear/Landing Brake71642
Ch 10 Canard28287
Ch 11 Elevators36298
Ch 12 Canard Installation12102
Ch 13 Nose and Nose Gear1291097
Ch 14 CenterSection Spar57525
Ch 15 Firewall and Accessories448
Ch 16 Control System27237
Ch 17 Roll/Pitch Trim System654
Ch 18 Canopy70502
Ch 19 Wings, Alierons1271090
Ch 20 Winglets/Rudders71528
Ch 21 Strakes - Fuel/Baggage65437
Ch 22 Electrical System591031
Ch 23 Engine Installation961152
Ch 24 Covers/Fairings/Consoles25202
Ch 25 Finishing561084
Ch 26 Upholstry340
Fuel System46310
Rollover1050
Cabin heating System60331
The Ferry Tank335
Blog2694182
Build Mods2252513
Nose Gear Doors856
Wheel Pants/Gear Leg Fairing40473
Oxygen System762
Roll and Pitch Trim964
Winglet Intersection Fairings445
Baggage Pods11104
Pilot Side Windows437
RAM Air & Hellhole Cover15177
Main Gear Beef Up322
Post Cure124
Fire Extinguisher16
Wing Fences13
EVS (Enhanced Visual System)130
Hinge Upgrade115
Cowl Keeper110
Rudder Gust Locks19
Cooling20607
Taxi Tests42
Flying10

Complete the Test Flight Program

2025/6/30 10:26:01

Round Australia in Four Flights

2026/4/1 10:26:01

Round the World Departure

2026/8/22 10:26:01

Rough River Flyin, Sept 23, 2026

2026/9/23 10:26:01

© Copyright 2025 Dave Berenholtz