• Home
  • Flying
    • First Flight
  • Build by Chapter
    • Ch 3 Education
    • Ch 4 Fuselage Bulkheads
    • Ch 5 Fuselage Sides
    • Ch 6 Fuselage Assembly
    • Ch 7 Fuselage Exterior
    • Ch 8 Roll Over/Seat Belts
    • Ch 9 Main Gear/Landing Brake
    • Ch 10 Canard
    • Ch 11 Elevators
    • Ch 12 Canard Installation
    • Ch 13 Nose and Nose Gear
    • Ch 14 CenterSection Spar
    • Ch 15 Firewall and Accessories
    • Ch 16 Control System
    • Ch 17 Roll/Pitch Trim System
    • Ch 18 Canopy
    • Ch 19 Wings, Alierons
    • Ch 20 Winglets/Rudders
    • Ch 21 Strakes – Fuel/Baggage
    • Ch 22 Electrical System
    • Ch 23 Engine Installation
    • Ch 24 Covers/Consoles
    • Ch 25 Finishing
    • Ch 26 Upholstry
  • Build Mods
    • Liquid Cooling, Numbers, Weights and Flow
    • Cooling
      • Solving Ground Cooling 1
      • Solving Ground Cooling 2
      • Solving Ground Cooling 3
      • Solving Ground Cooling 4
      • Solving Ground Cooling 5
      • Solving Ground Cooling 6
      • Solving Ground Cooling7 – Test Data
      • Solving Ground Cooling 8 – Flap Building
      • Solving Ground Cooling 9 – Hinges
      • Solving Ground Cooling 10 – Lower Flaps
      • Solving Ground Cooling 11 – Upper Flaps
      • Solving Ground Cooling 12 – Completed
      • Cooling the Beast 1
      • Cooling the Beast 2 – Lower Cowl Expansion
      • Cooling the Beast 3 – KW Oil Cooler Diffuser
    • EVS (Enhanced Vision System)
    • Cowl Keeper
    • Rudder Gust Locks
    • Wing Fences
    • Post Cure
    • Hinge Upgrade
    • RAM Air & Hellhole Cover
    • Main Gear Beef Up
    • Pilot Side Windows
    • Baggage Pods
    • Winglet Intersection Fairings
    • Titanium Rollover
    • Nose Gear Doors
    • Wheel Pants/Gear Leg Fairing
    • Cabin heating System
    • Fuel System
    • Roll and Pitch Trim
    • Oxygen System
    • The Ferry Tank
    • Cruise Angle Indicator
    • Fire Extinguisher Install
  • Round the World
    • RTW Route East #12 rev1
    • Survival Equipment
    • Training Flights
  • Other Stuff
    • Blog
    • Around the World: RAAUS Sport Pilot Issue 110
    • Taxi Tests
    • Summary Feb ’24 from an SAAA Meeting
    • AOPA Pilot 27th Sept 2019
    • Build Tests
    • Flying Stories
      • A Long Easy Dream ’06
      • Townsville ’07
      • Cairns ’08
      • Albany ’08
      • East Coast ’08
      • Brisbane ’09
      • Cairns ’10
      • Perth ’10
    • Non Build Mods
      • F16 Scoop for JZE
      • Ram Air Box for JZE
      • Strange Tips
    • Milestones
    • Links
  • Contact

Blog

Home
Ch 21 Strakes - Fuel/Baggage
Leak Test 2 (pass), Strainers and Right Strake Top

Leak Test 2 (pass), Strainers and Right Strake Top

7 years ago
Dave Berenholtz
Ch 21 Strakes - Fuel/Baggage
Date:  06-21-2018
Number of Hours:  10
Manual Reference:  21-3

First up was finding that leak on the left side. The strake itself was fine, the pipe I had made to the common sump was fine, the sump seems OK BUT…. Out of sight the join between the pipe and the sump had a leak where the underside joins that you can’t see. Just enough for a slow drip. I hadn’t put enough flox where I couldn’t see it. Rookie mistake eh?

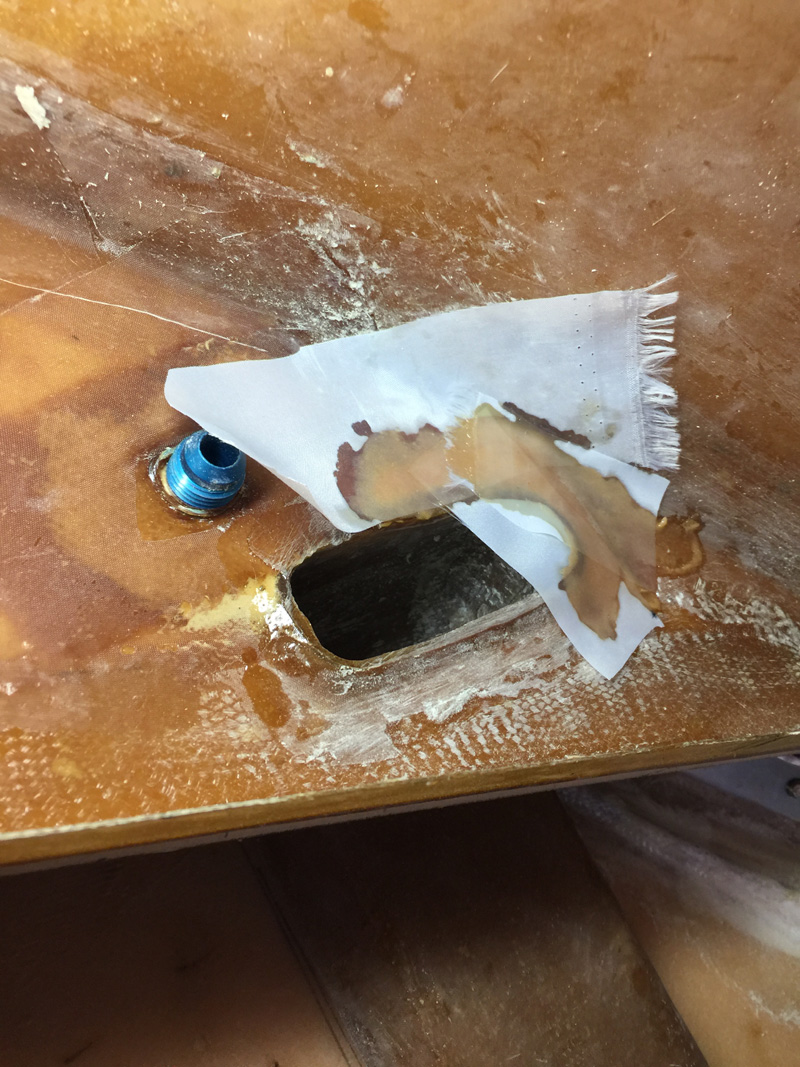
I wanted to seal the pipe to sump join with flox so that fuel would not leak into the foam. This was just a matter of grinding out the area around the bottom of the pipe. Once done I filled this with flox and a bit of peel ply on top and let it cure overnight. Being winter here, the heater was again on all night and all day in the workshop. Not for me, I can put on a jumper, its all about getting the temperature up for the epoxy.

After the cure I’ve sealed the end of the pipe with a scrap bit of glassed foam. I’ve used 5mt glue and micro to make it thick for a good seal. I later want to pressure test the strakes for leaks separately so that block will stay there for a while.

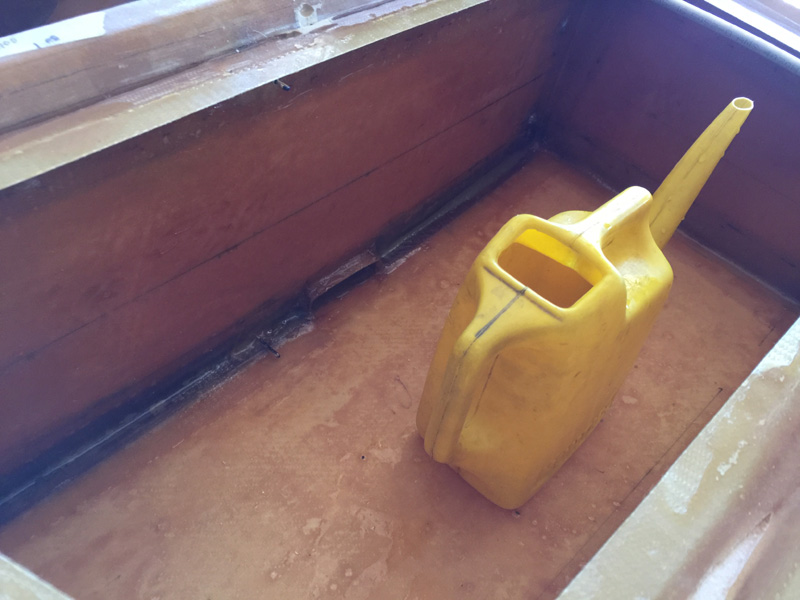
All I had to do was pour some water with a little dish-washing liquid into the pipe and wait to see if it was going to leak.

Dry as a bone after leaving it all day. Lets call it good and move on.

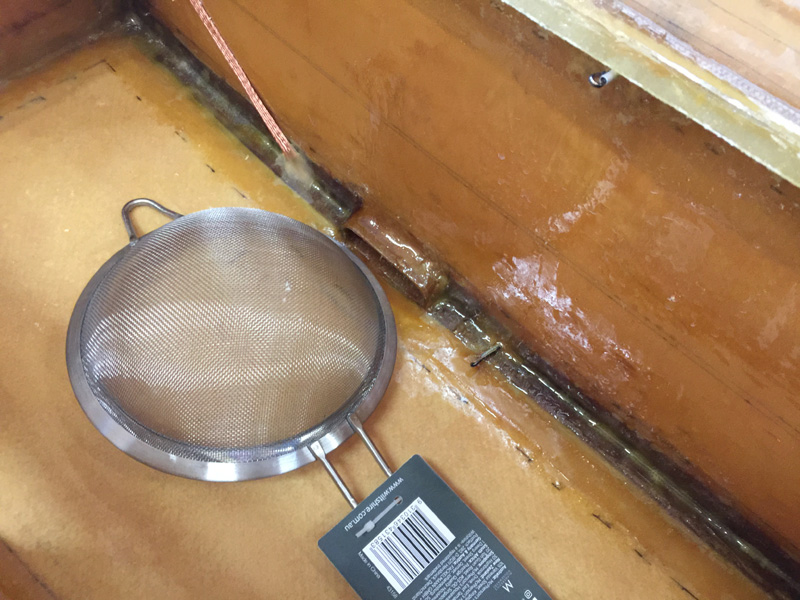
I’ve found some stainless steel strainers for my outlet covers.

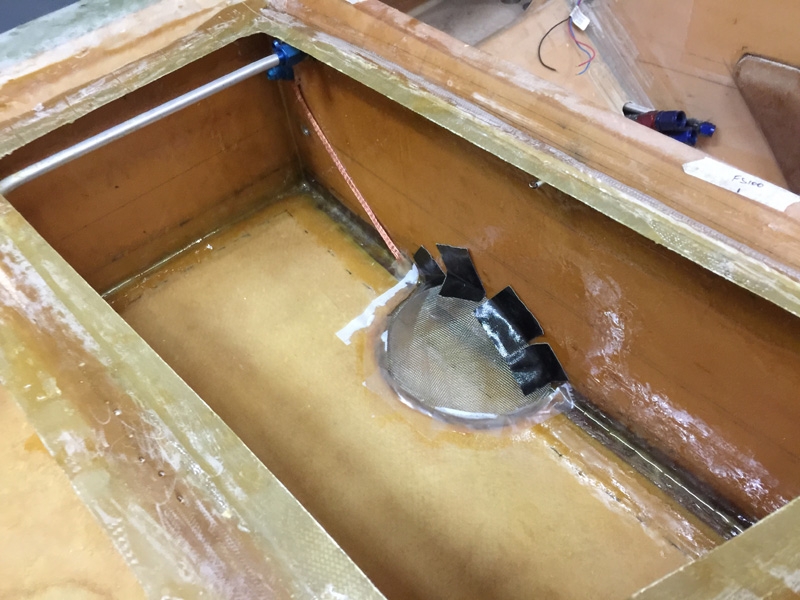
A bit of work with the angle grinder and most of the weight was gone leaving fine mesh for my cover. I did want to use a large area strainer too so that it would be almost impossible to fully block with debris. I glassed this in two stages. Just the bottom part with flox first and using gaffer tape to retain the shape where I wanted it. Stainless mesh is quite floppy once you remove the strainer rim.

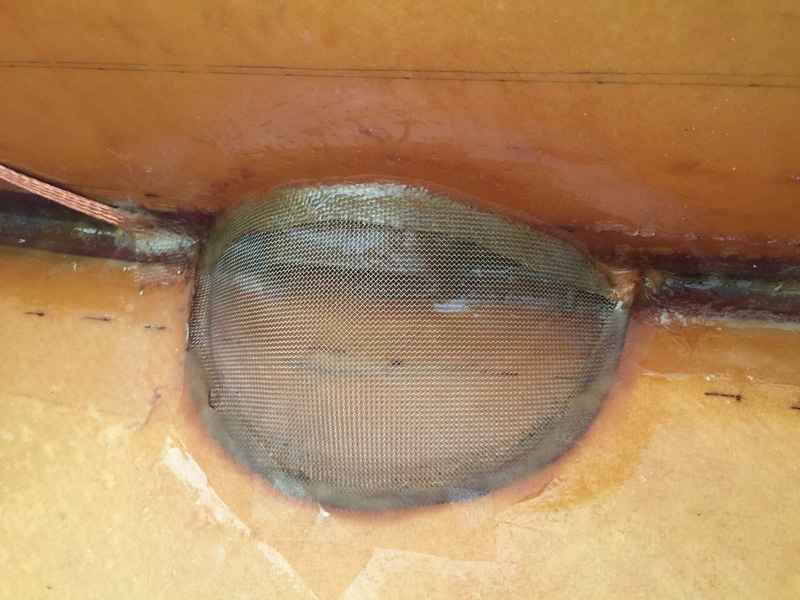
Stage two was a line of glass that joins the strainer to the fuel tank wall. This is the right side done.

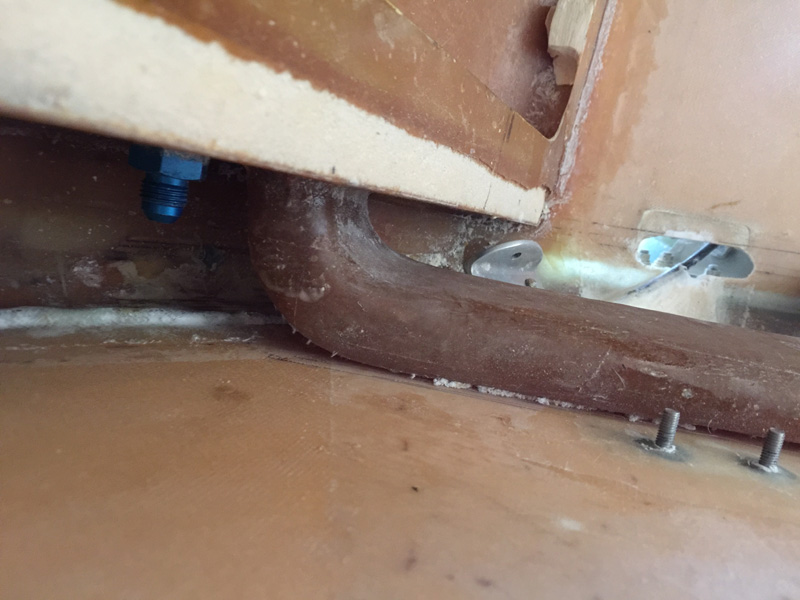
Now I know the left side is leak free at least with the top open I put the first stage of the strainer in there today.

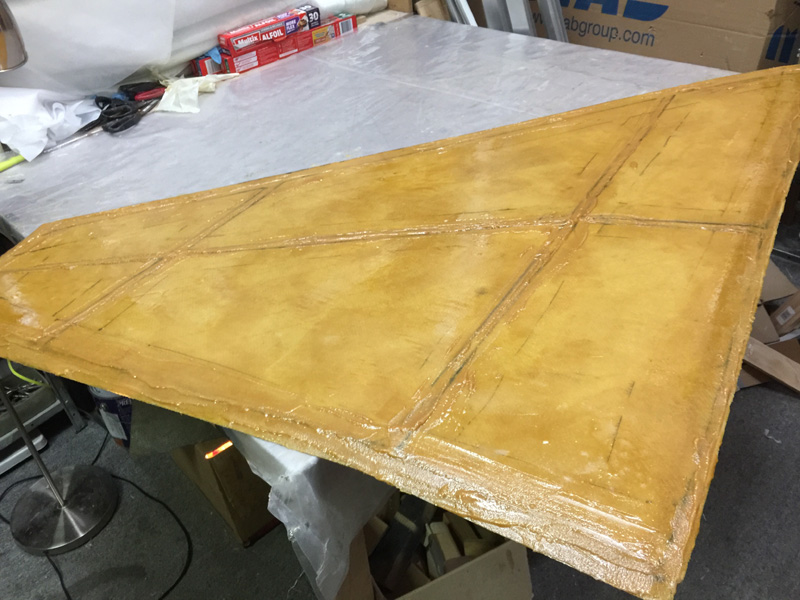
The last part of this two day job was to flox on the right strake top. I got the peel ply off with a bit of a struggle and cleaned it all up very carefully. Of course I’d cleaned the tank area as well…. several times. I applied a thin coat of epoxy on the strake top underside and after that mixed a good 144 grams of flox which was soon used up.

Another couple of batches of flox were used on the strake mating surface.

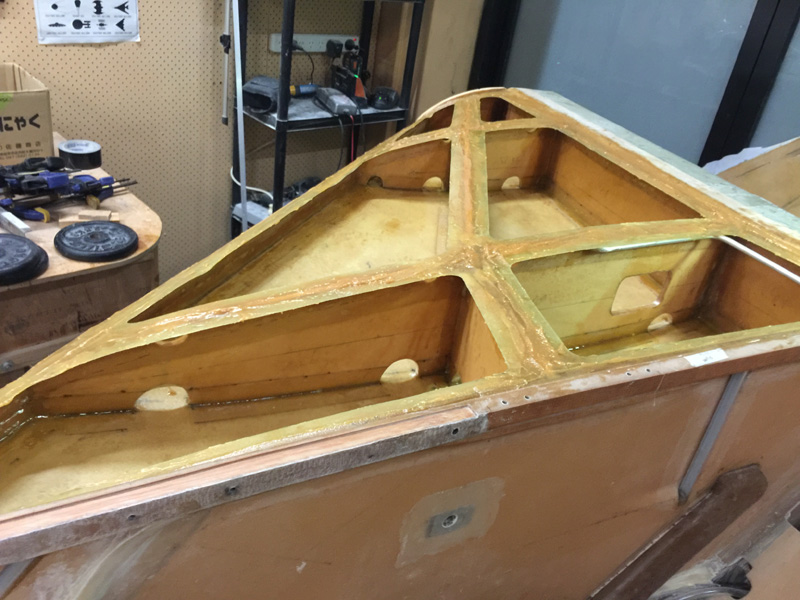
Yes I has previously very carefully sanded this hat top surface so it was not shinny. Yes I had ground down the bare foam areas for some glass to glass on the insides. Yes I did wet it all out with pure epoxy before the flox. Yes I did enjoy the prospect of no peel ply for a change too.

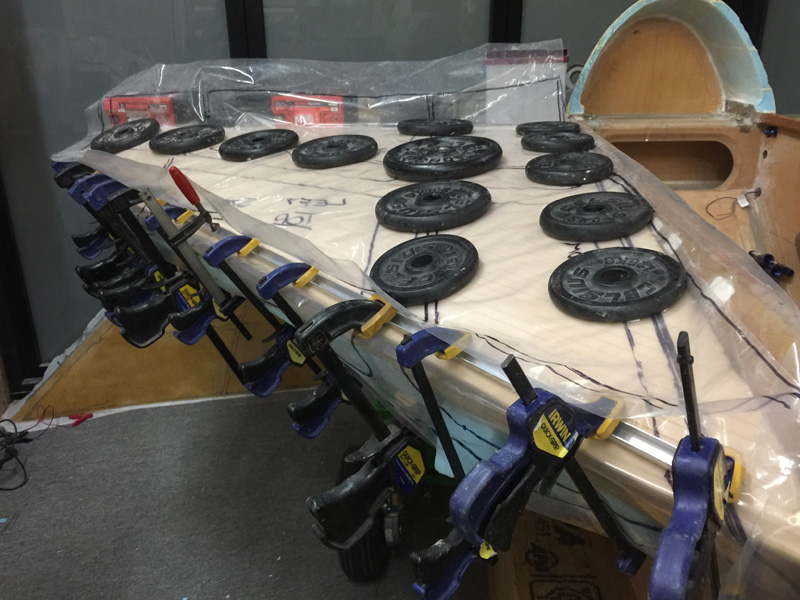
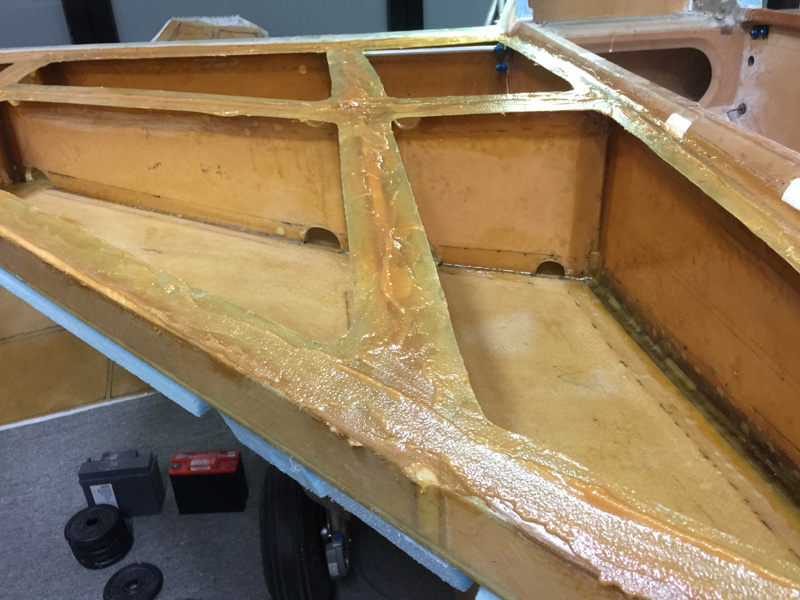
I mated the two surfaces and wiggled them in an inch or so back and forth for a while. Next was to cover it in plastic and put on the weights. The plastic was a template I’d made of where the strakes are, but I’d put on the left one. Opps… easy fix the right one went on next. This way I know exactly where the top hats are so I could place the weights right where the flox surfaces were mating.

I’d previously hot glued foam blocks to the underside of the strakes so that I could clamp onto what was a curved surface. No way clamps could work otherwise. I used a bit of aluminum as a clamping jig and I should have a good seal at the leading edge.

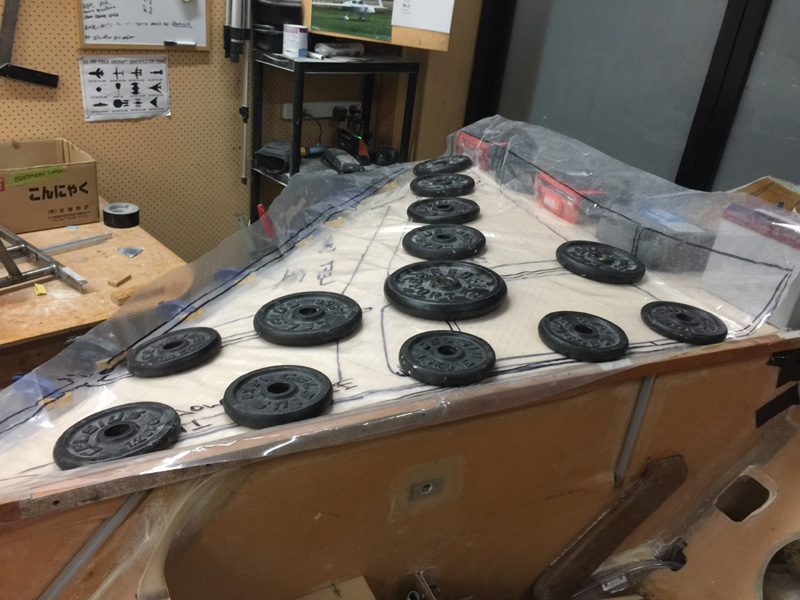
All my ducks in a row here. Time to call it a night.

Previous Post
Strake Leak Test 1 (fail)
Next Post
Left Strake Top

Leave a Reply Cancel reply

Your email address will not be published. Required fields are marked *

Fill out this field
Fill out this field
Please enter a valid email address.

CategoryLogsHours
All157617079
Uncategorized135
Ch 3 Education220
Ch 4 Fuselage Bulkheads25231
Ch 5 Fuselage Sides32283
Ch 6 Fuselage Assembly30270
Ch 7 Fuselage Exterior14140
Ch 8 Roll Over/Seat Belts990
Ch 9 Main Gear/Landing Brake71642
Ch 10 Canard28287
Ch 11 Elevators36298
Ch 12 Canard Installation12102
Ch 13 Nose and Nose Gear1291097
Ch 14 CenterSection Spar57525
Ch 15 Firewall and Accessories448
Ch 16 Control System27237
Ch 17 Roll/Pitch Trim System654
Ch 18 Canopy70502
Ch 19 Wings, Alierons1271090
Ch 20 Winglets/Rudders71528
Ch 21 Strakes - Fuel/Baggage65437
Ch 22 Electrical System591031
Ch 23 Engine Installation961152
Ch 24 Covers/Fairings/Consoles25202
Ch 25 Finishing561084
Ch 26 Upholstry340
Fuel System46310
Rollover1050
Cabin heating System60331
The Ferry Tank335
Blog2694182
Build Mods2252513
Nose Gear Doors856
Wheel Pants/Gear Leg Fairing40473
Oxygen System762
Roll and Pitch Trim964
Winglet Intersection Fairings445
Baggage Pods11104
Pilot Side Windows437
RAM Air & Hellhole Cover15177
Main Gear Beef Up322
Post Cure124
Fire Extinguisher16
Wing Fences13
EVS (Enhanced Visual System)130
Hinge Upgrade115
Cowl Keeper110
Rudder Gust Locks19
Cooling20607
Taxi Tests42
Flying10

Complete the Test Flight Program

2025/6/30 10:26:01

Round Australia in Four Flights

2026/4/1 10:26:01

Round the World Departure

2026/8/22 10:26:01

Rough River Flyin, Sept 23, 2026

2026/9/23 10:26:01

© Copyright 2025 Dave Berenholtz