• Home
  • Flying
    • First Flight
  • Build by Chapter
    • Ch 3 Education
    • Ch 4 Fuselage Bulkheads
    • Ch 5 Fuselage Sides
    • Ch 6 Fuselage Assembly
    • Ch 7 Fuselage Exterior
    • Ch 8 Roll Over/Seat Belts
    • Ch 9 Main Gear/Landing Brake
    • Ch 10 Canard
    • Ch 11 Elevators
    • Ch 12 Canard Installation
    • Ch 13 Nose and Nose Gear
    • Ch 14 CenterSection Spar
    • Ch 15 Firewall and Accessories
    • Ch 16 Control System
    • Ch 17 Roll/Pitch Trim System
    • Ch 18 Canopy
    • Ch 19 Wings, Alierons
    • Ch 20 Winglets/Rudders
    • Ch 21 Strakes – Fuel/Baggage
    • Ch 22 Electrical System
    • Ch 23 Engine Installation
    • Ch 24 Covers/Consoles
    • Ch 25 Finishing
    • Ch 26 Upholstry
  • Build Mods
    • Liquid Cooling, Numbers, Weights and Flow
    • Cooling
      • Solving Ground Cooling 1
      • Solving Ground Cooling 2
      • Solving Ground Cooling 3
      • Solving Ground Cooling 4
      • Solving Ground Cooling 5
      • Solving Ground Cooling 6
      • Solving Ground Cooling7 – Test Data
      • Solving Ground Cooling 8 – Flap Building
      • Solving Ground Cooling 9 – Hinges
      • Solving Ground Cooling 10 – Lower Flaps
      • Solving Ground Cooling 11 – Upper Flaps
      • Solving Ground Cooling 12 – Completed
      • Cooling the Beast 1
      • Cooling the Beast 2 – Lower Cowl Expansion
      • Cooling the Beast 3 – KW Oil Cooler Diffuser
    • EVS (Enhanced Vision System)
    • Cowl Keeper
    • Rudder Gust Locks
    • Wing Fences
    • Post Cure
    • Hinge Upgrade
    • RAM Air & Hellhole Cover
    • Main Gear Beef Up
    • Pilot Side Windows
    • Baggage Pods
    • Winglet Intersection Fairings
    • Titanium Rollover
    • Nose Gear Doors
    • Wheel Pants/Gear Leg Fairing
    • Cabin heating System
    • Fuel System
    • Roll and Pitch Trim
    • Oxygen System
    • The Ferry Tank
    • Cruise Angle Indicator
    • Fire Extinguisher Install
  • Round the World
    • RTW Route East #12 rev1
    • Survival Equipment
    • Training Flights
  • Other Stuff
    • Blog
    • Around the World: RAAUS Sport Pilot Issue 110
    • Taxi Tests
    • Summary Feb ’24 from an SAAA Meeting
    • AOPA Pilot 27th Sept 2019
    • Build Tests
    • Flying Stories
      • A Long Easy Dream ’06
      • Townsville ’07
      • Cairns ’08
      • Albany ’08
      • East Coast ’08
      • Brisbane ’09
      • Cairns ’10
      • Perth ’10
    • Non Build Mods
      • F16 Scoop for JZE
      • Ram Air Box for JZE
      • Strange Tips
    • Milestones
    • Links
  • Contact

Blog

Home
Blog
Fuselage to Gear Fairings

Fuselage to Gear Fairings

6 years ago
Dave Berenholtz
Blog, Build Mods, Wheel Pants/Gear Leg Fairing
Date:  06-30-2019
Number of Hours:  16
Manual Reference:  no ref

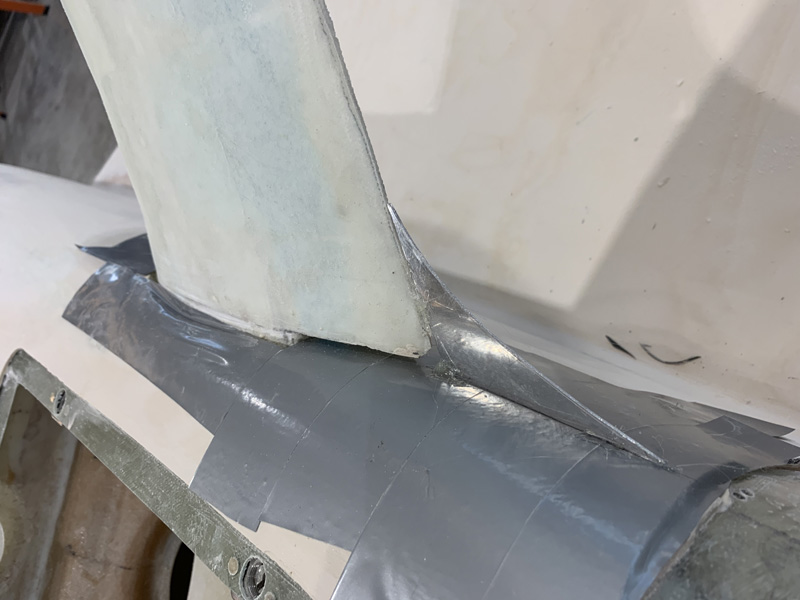
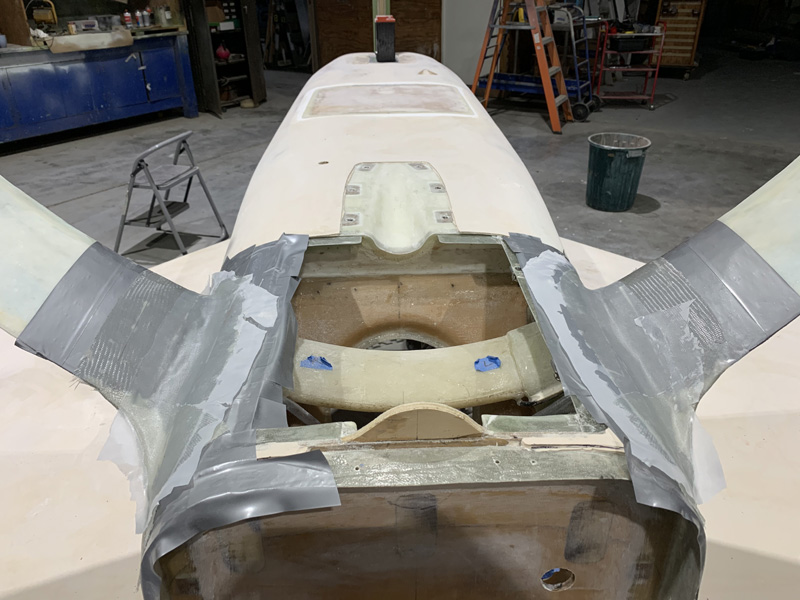
There needs to be a small gap between the fuselage sides and the main gear. Obviously when the main gear is loaded with the weight of the plane, with different fuel loads and when landing or even with a small bump during taxi, the gear will flex.  If the gear fairing is just bonded to the sides, that join will crack.

The other issue is that we need to smooth the flow of air here to reduce ‘intersection drag’.

I spent a while getting a little former made for the aft curve. I tried stiff cardboard first. It tended to droop a little so some scrap metal did the job. Who doesn’t like doing things twice?

I used just a hint of hot glue to get the little extensions sitting right.

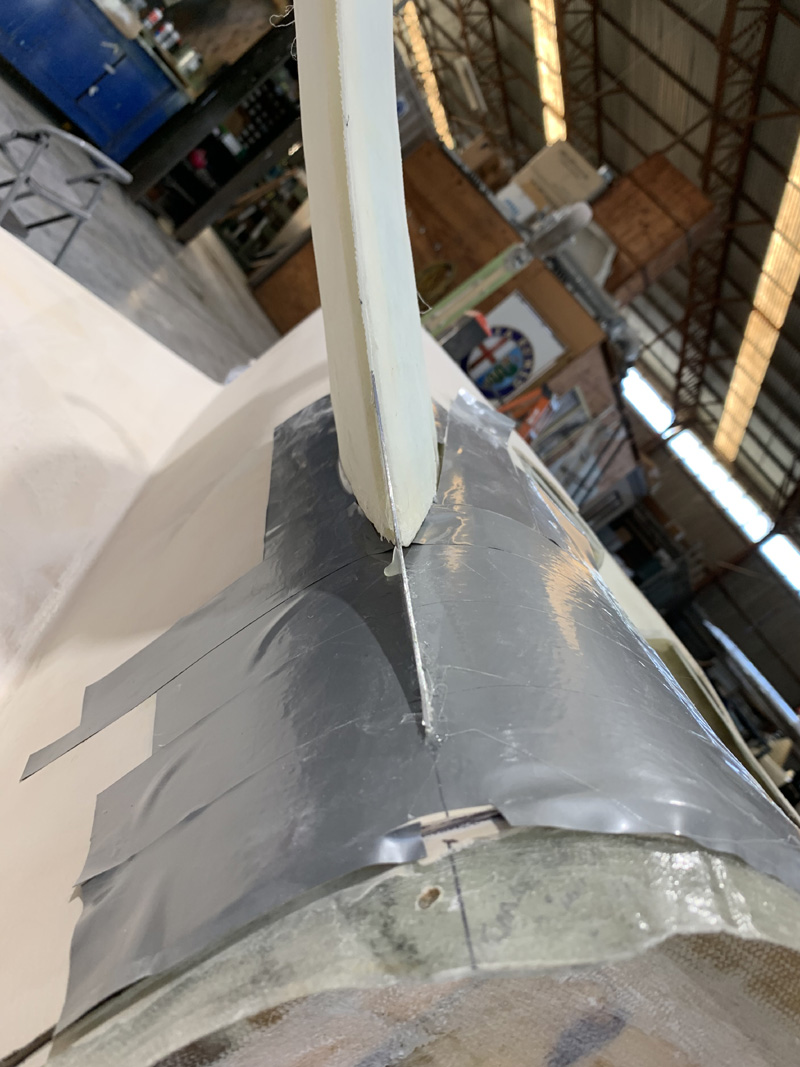
I had some modeling clay for making the curves. Yes two types.. this is the wrong type. Its too stiff or maybe it is too cold in the hangar, middle of winter here after all. I pressed on anyway.

I was determined to just get this done and was less interested in the perfect job as I was getting some tape on that ugly clay mess.

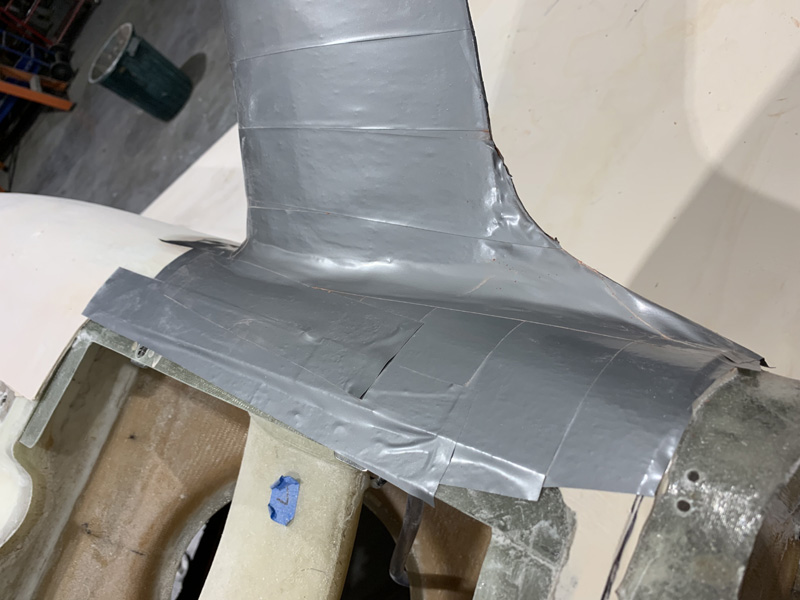
Late that night two plies of BID was wrapped around each leg. As I was driving home after a day too long I thought of all the things I could have done better. Particularly at the trailing edge where there were now 4 plies if you include the wrap of the ends. Way too much for a crisp result. I also thought about how I should have used some light clamps at this trailing edge to pull it all together.

Two days later after the cure I managed to get both fairings loose, clean up underneath and begin the trimming process. A much smarter person that I would have done this job before installing the wheel pants. There is a cuff now that prevents removing these fairings from the gear leg for a MUCH easier clean up.

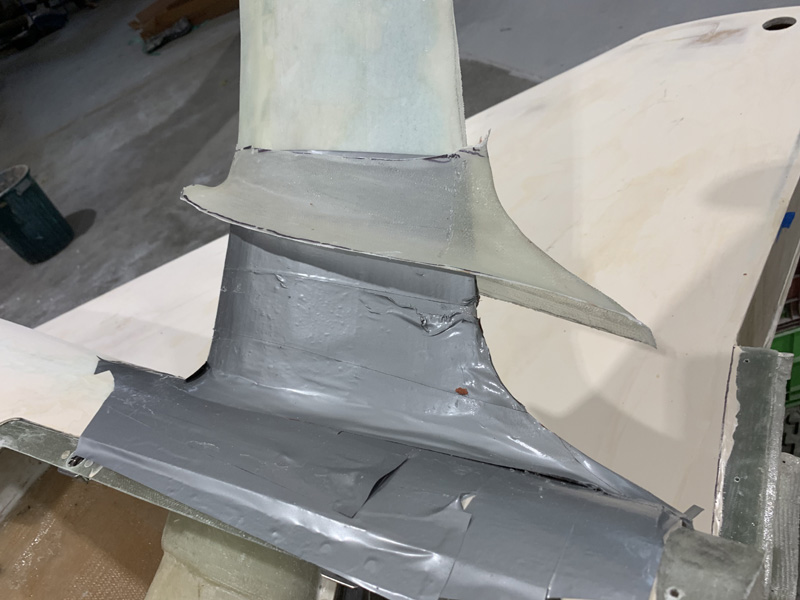
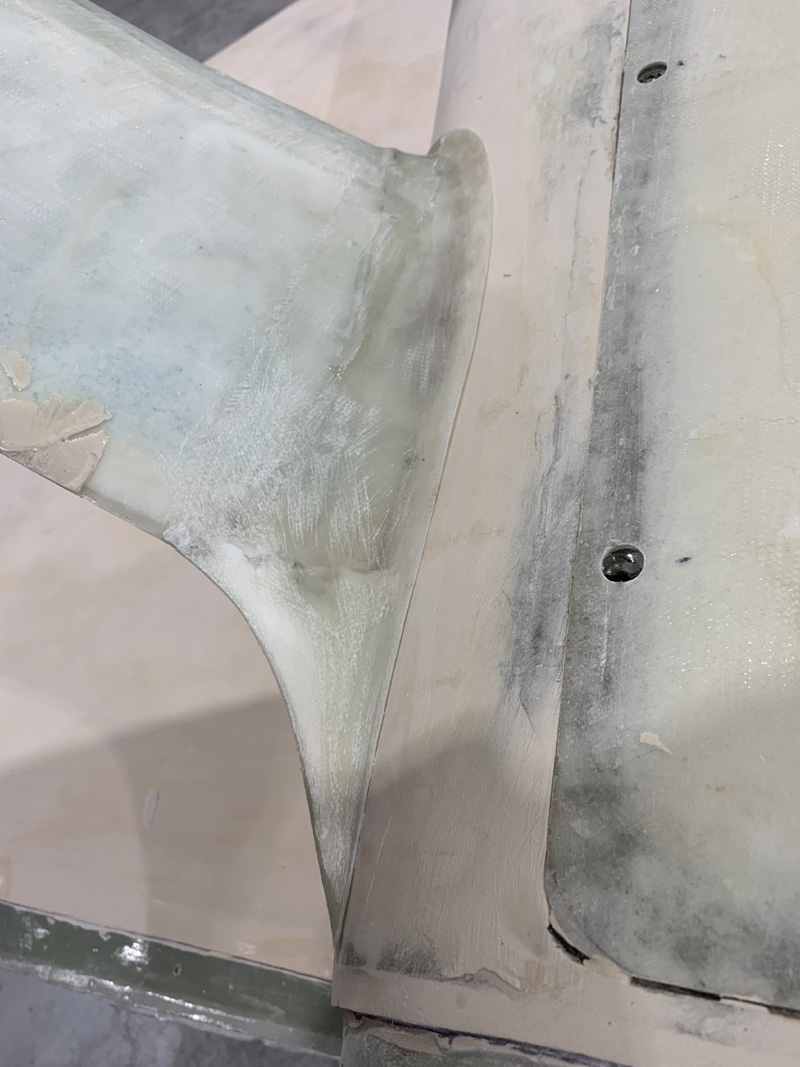
This illustrates the concept. The fairing is bonded to the leg just away from the fuselage with no load as it will be in flight. With a load on the ground the flexing of the leg will move the fairing away from the fuselage.

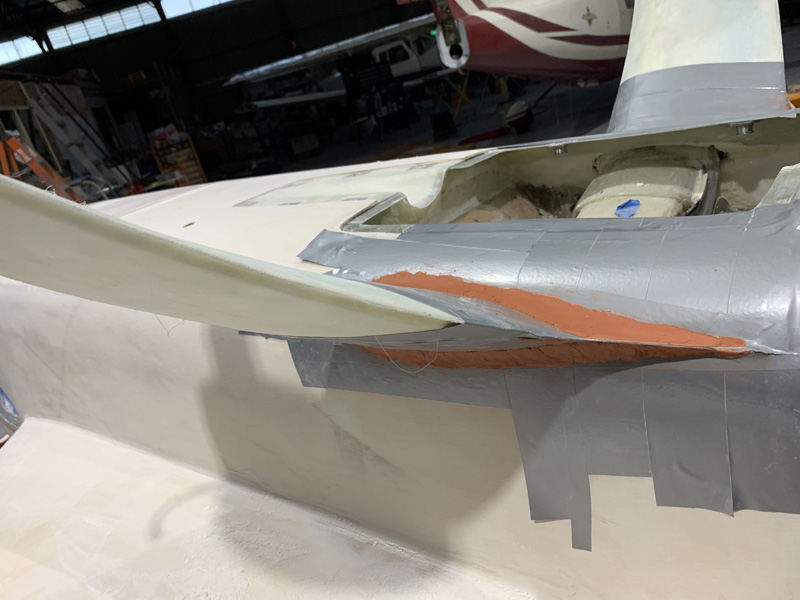
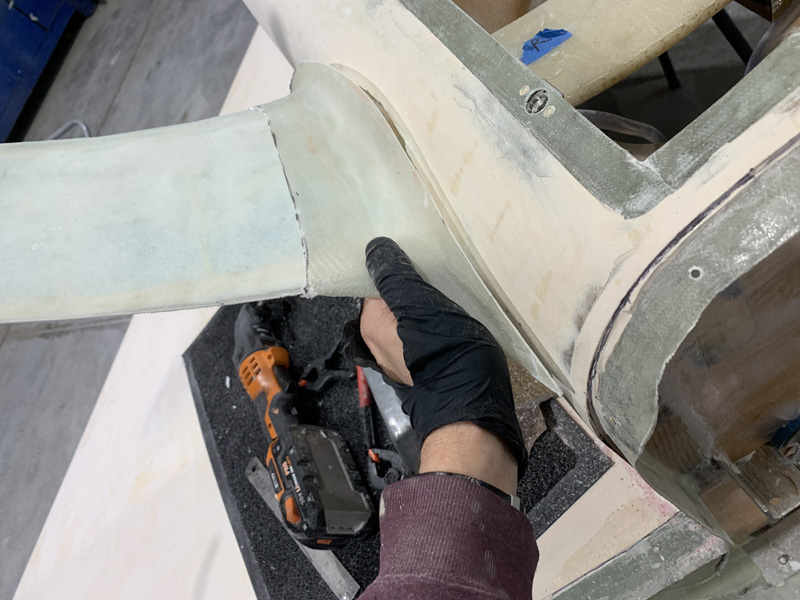
This is getting closer. I think those trailing edges are too thick. After this shot I filled the fairing with a little flox and micro mixed. After that cured, I removed most of it and then had a bed to thin those trailing edges from the outside with a little meat in them. I’ll get them nice.

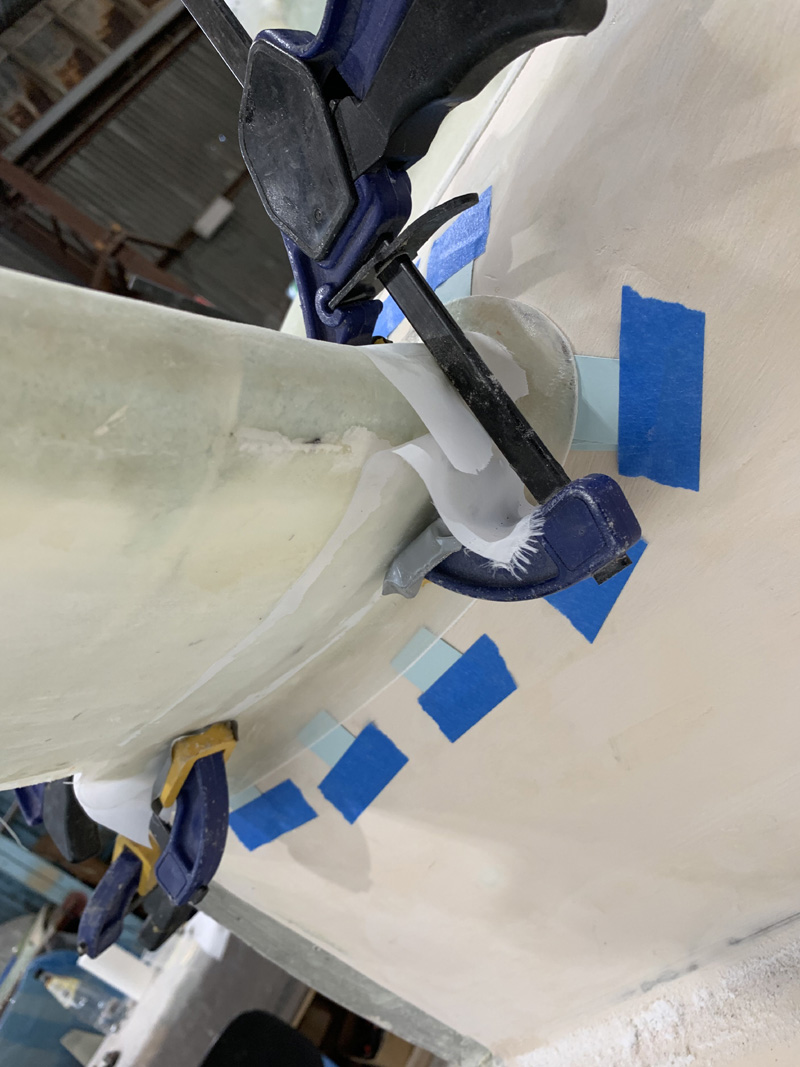
Meanwhile I needed to get those fairings on for real. I used cardboard spacers and floxed the top of the fairings in place where they met the gear leg. To be tidy, I added one ply of BID as well. The clamp’s are to ensure nothing moves and that gap at the fuselage remains close.

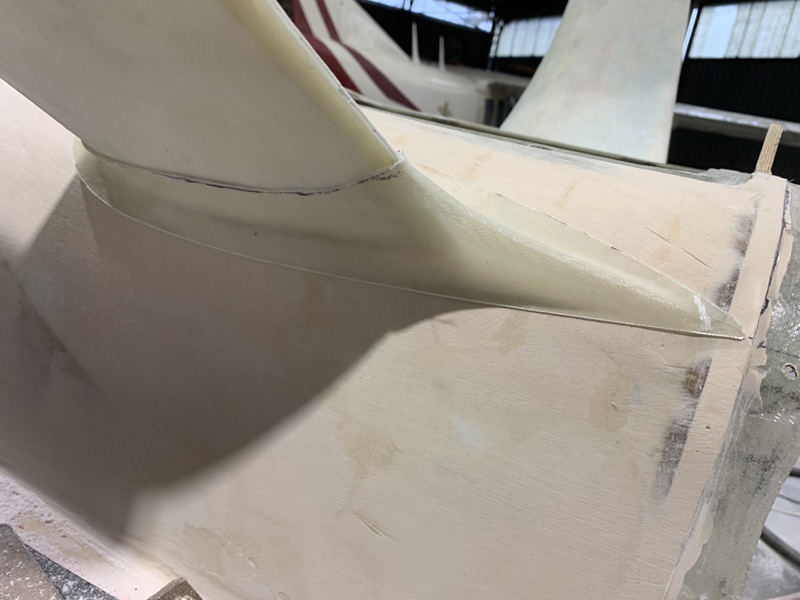
Don’t even ask me how we are going to paint this so the intersecting gap remains. I’m thinking razor blades and a careful line. Yes I need to do some filling, yes I’m not 100% happy but these did happen quickly and I’m a man on a mission. The clock is ticking. There is all the time in the world for safe. Plenty of time for good. No time left for perfect.

Previous Post
Scoop to Cowl Fairing
Next Post
Underside Fill and Fair Done

Leave a Reply Cancel reply

Your email address will not be published. Required fields are marked *

Fill out this field
Fill out this field
Please enter a valid email address.

CategoryLogsHours
All157617079
Uncategorized135
Ch 3 Education220
Ch 4 Fuselage Bulkheads25231
Ch 5 Fuselage Sides32283
Ch 6 Fuselage Assembly30270
Ch 7 Fuselage Exterior14140
Ch 8 Roll Over/Seat Belts990
Ch 9 Main Gear/Landing Brake71642
Ch 10 Canard28287
Ch 11 Elevators36298
Ch 12 Canard Installation12102
Ch 13 Nose and Nose Gear1291097
Ch 14 CenterSection Spar57525
Ch 15 Firewall and Accessories448
Ch 16 Control System27237
Ch 17 Roll/Pitch Trim System654
Ch 18 Canopy70502
Ch 19 Wings, Alierons1271090
Ch 20 Winglets/Rudders71528
Ch 21 Strakes - Fuel/Baggage65437
Ch 22 Electrical System591031
Ch 23 Engine Installation961152
Ch 24 Covers/Fairings/Consoles25202
Ch 25 Finishing561084
Ch 26 Upholstry340
Fuel System46310
Rollover1050
Cabin heating System60331
The Ferry Tank335
Blog2694182
Build Mods2252513
Nose Gear Doors856
Wheel Pants/Gear Leg Fairing40473
Oxygen System762
Roll and Pitch Trim964
Winglet Intersection Fairings445
Baggage Pods11104
Pilot Side Windows437
RAM Air & Hellhole Cover15177
Main Gear Beef Up322
Post Cure124
Fire Extinguisher16
Wing Fences13
EVS (Enhanced Visual System)130
Hinge Upgrade115
Cowl Keeper110
Rudder Gust Locks19
Cooling20607
Taxi Tests42
Flying10

Complete the Test Flight Program

2025/6/30 10:26:01

Round Australia in Four Flights

2026/4/1 10:26:01

Round the World Departure

2026/8/22 10:26:01

Rough River Flyin, Sept 23, 2026

2026/9/23 10:26:01

© Copyright 2025 Dave Berenholtz