• Home
  • Flying
    • First Flight
  • Build by Chapter
    • Ch 3 Education
    • Ch 4 Fuselage Bulkheads
    • Ch 5 Fuselage Sides
    • Ch 6 Fuselage Assembly
    • Ch 7 Fuselage Exterior
    • Ch 8 Roll Over/Seat Belts
    • Ch 9 Main Gear/Landing Brake
    • Ch 10 Canard
    • Ch 11 Elevators
    • Ch 12 Canard Installation
    • Ch 13 Nose and Nose Gear
    • Ch 14 CenterSection Spar
    • Ch 15 Firewall and Accessories
    • Ch 16 Control System
    • Ch 17 Roll/Pitch Trim System
    • Ch 18 Canopy
    • Ch 19 Wings, Alierons
    • Ch 20 Winglets/Rudders
    • Ch 21 Strakes – Fuel/Baggage
    • Ch 22 Electrical System
    • Ch 23 Engine Installation
    • Ch 24 Covers/Consoles
    • Ch 25 Finishing
    • Ch 26 Upholstry
  • Build Mods
    • Liquid Cooling, Numbers, Weights and Flow
    • Cooling
      • Solving Ground Cooling 1
      • Solving Ground Cooling 2
      • Solving Ground Cooling 3
      • Solving Ground Cooling 4
      • Solving Ground Cooling 5
      • Solving Ground Cooling 6
      • Solving Ground Cooling7 – Test Data
      • Solving Ground Cooling 8 – Flap Building
      • Solving Ground Cooling 9 – Hinges
      • Solving Ground Cooling 10 – Lower Flaps
      • Solving Ground Cooling 11 – Upper Flaps
      • Solving Ground Cooling 12 – Completed
      • Cooling the Beast 1
      • Cooling the Beast 2 – Lower Cowl Expansion
      • Cooling the Beast 3 – KW Oil Cooler Diffuser
    • EVS (Enhanced Vision System)
    • Cowl Keeper
    • Rudder Gust Locks
    • Wing Fences
    • Post Cure
    • Hinge Upgrade
    • RAM Air & Hellhole Cover
    • Main Gear Beef Up
    • Pilot Side Windows
    • Baggage Pods
    • Winglet Intersection Fairings
    • Titanium Rollover
    • Nose Gear Doors
    • Wheel Pants/Gear Leg Fairing
    • Cabin heating System
    • Fuel System
    • Roll and Pitch Trim
    • Oxygen System
    • The Ferry Tank
    • Cruise Angle Indicator
    • Fire Extinguisher Install
  • Round the World
    • RTW Route East #12 rev1
    • Survival Equipment
    • Training Flights
  • Other Stuff
    • Blog
    • Around the World: RAAUS Sport Pilot Issue 110
    • Taxi Tests
    • Summary Feb ’24 from an SAAA Meeting
    • AOPA Pilot 27th Sept 2019
    • Build Tests
    • Flying Stories
      • A Long Easy Dream ’06
      • Townsville ’07
      • Cairns ’08
      • Albany ’08
      • East Coast ’08
      • Brisbane ’09
      • Cairns ’10
      • Perth ’10
    • Non Build Mods
      • F16 Scoop for JZE
      • Ram Air Box for JZE
      • Strange Tips
    • Milestones
    • Links
  • Contact

Blog

Home
Blog
Fuel Cap Install, Safety Line and Earth

Fuel Cap Install, Safety Line and Earth

4 years ago
Dave Berenholtz
Blog, Ch 21 Strakes - Fuel/Baggage
Date:  09-29-2021
Number of Hours:  25
Manual Reference:  21

Now the strakes are beautifully painted I need to cut two big holes in them for the fuel caps.

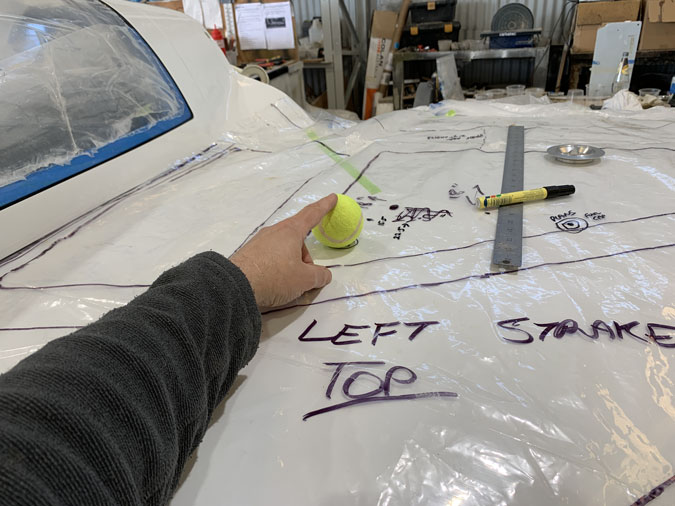
The exact position for the fuel caps just took too long. When I built the strakes I made plastic templates so I would know where the flanges were to allow the caps to go close but not on top.This is for strength.

I used the tennis ball to help visualise what would happen if I spilled fuel. I wanted to gauge the runoff and its direction relative to the caps.

I didn’t want to be too near the passenger and right in the middle of the highest point would give me maximum fuel if I ever wanted every drop possible. The downside of this was it put the caps too far from the leading edge to be comfortable when juggling a heavy fuel nozzle. It also had me or a refueler leaning well over my nice pretty paint with rivets in jeans scratching my while plane. Hey!!

I ended up going on the ‘down slope’ after calculating how much less fuel I would carry if the caps were in a sensible position. The answer was less than a liter fewer a side.

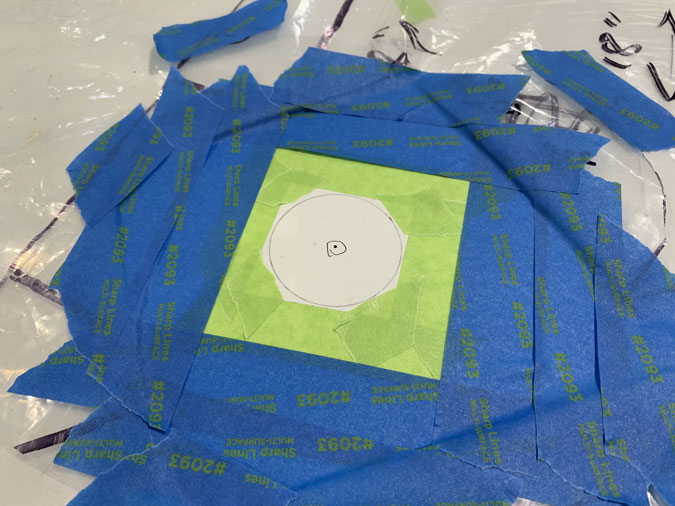
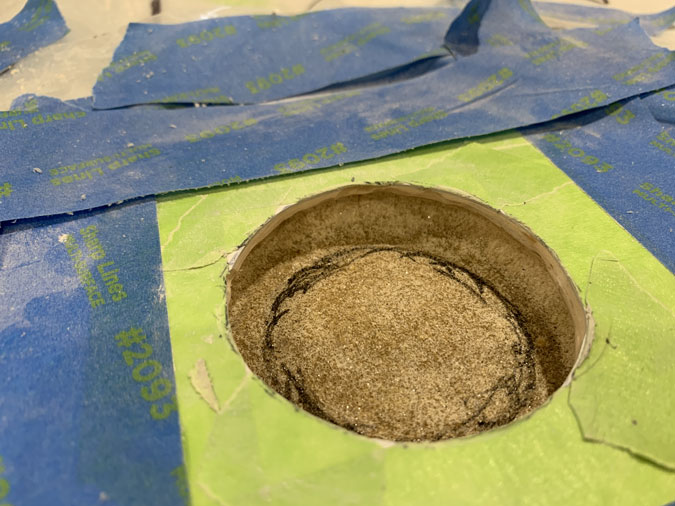
Marking this out after measuring and remeasuring and second guessing myself over a few days was a big deal.

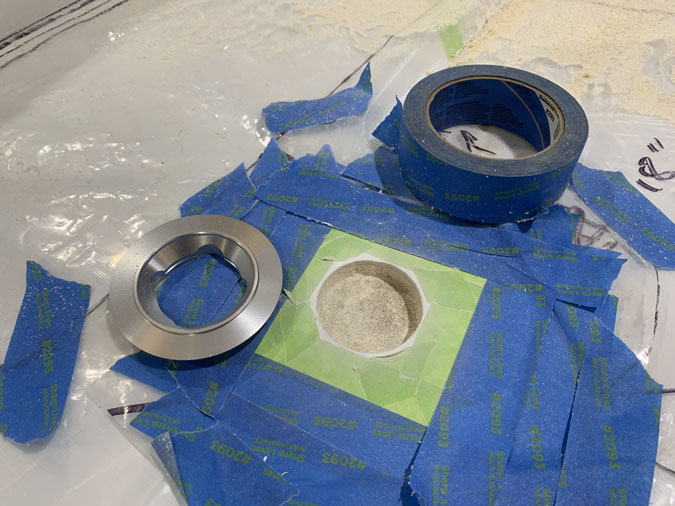
Once I had a tiny hole marked it was on! This first hole took ages, the second one happened in about 20 minutes.

I used lots of toys including the improvised sanding drum aka red tape with sandpaper glued to it.

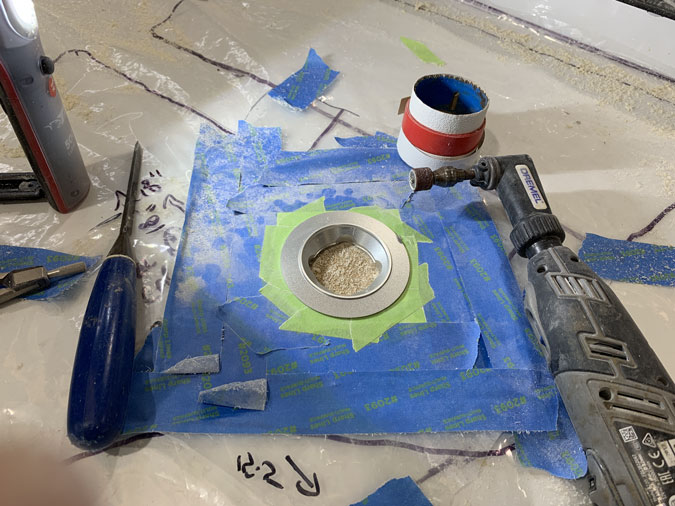
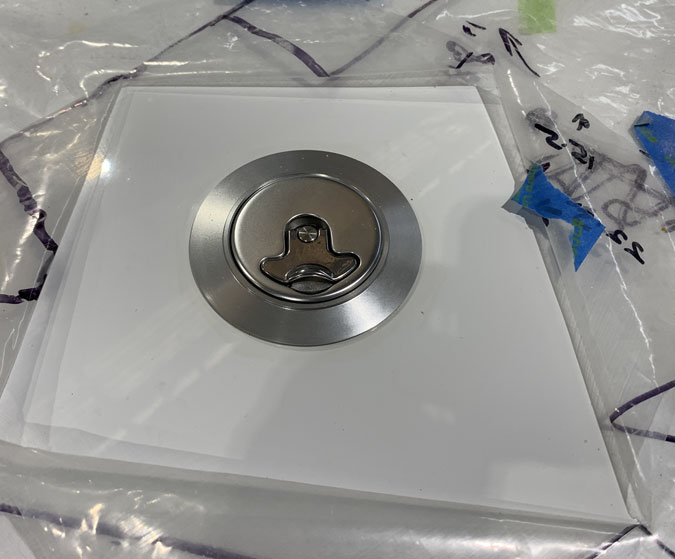
You can see I have just gone down to the inner skin at the bottom. At the sides I have removed material so I can get flox under the top skin. When that bonds to the fuel cap to will give extra strength to hold the cap in place.

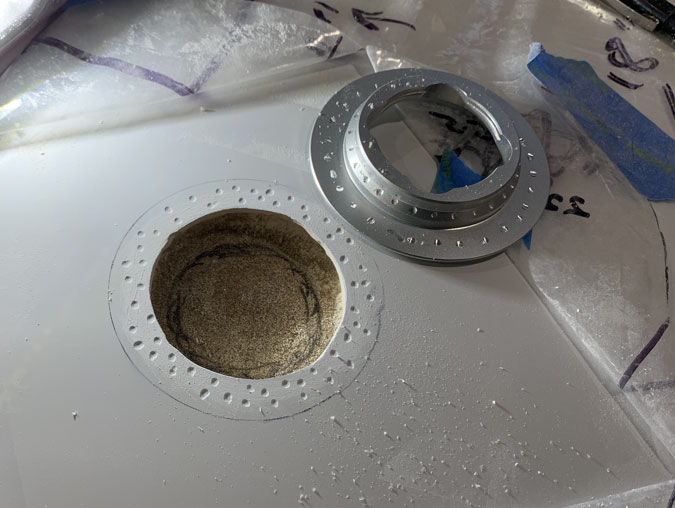
I made a bunch of key holes via a round bit to give the flox something to grab onto. I also roughed out the cap bottom with 80 grit after this photo. I took the shine off the key surface paint as well.

Then I had to cut through the hole to the tank itself. I had my vacuum cleaner on hand and if any debris got in the tank it is too small to see. I will be flushing fuel though them later when I do W&B.

Given I am not exactly to plans on this I want to weigh with different fuel loads when I have the aircraft scales hired.  That’s when the fuel calibration will be done.

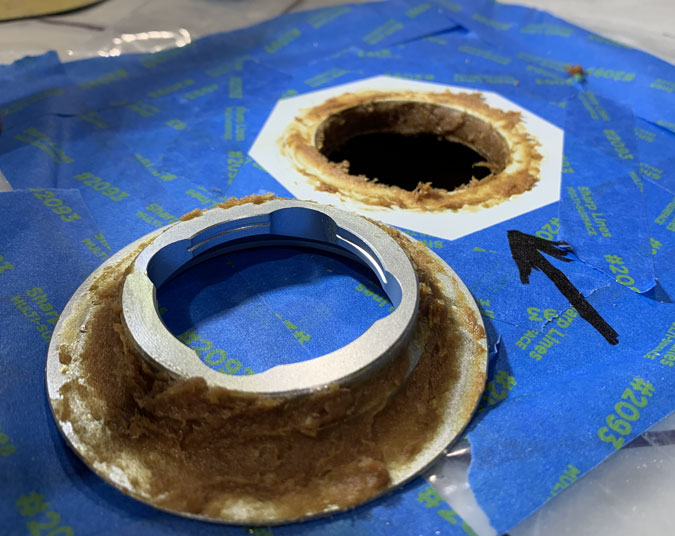
I used a lot of flox and cleaned up a good squeeze out. I think there are no voids to worry about. I used the same epoxy the tanks were built with. Old school and proven fuel safe over many years.

The fuel caps are now permanently in place.

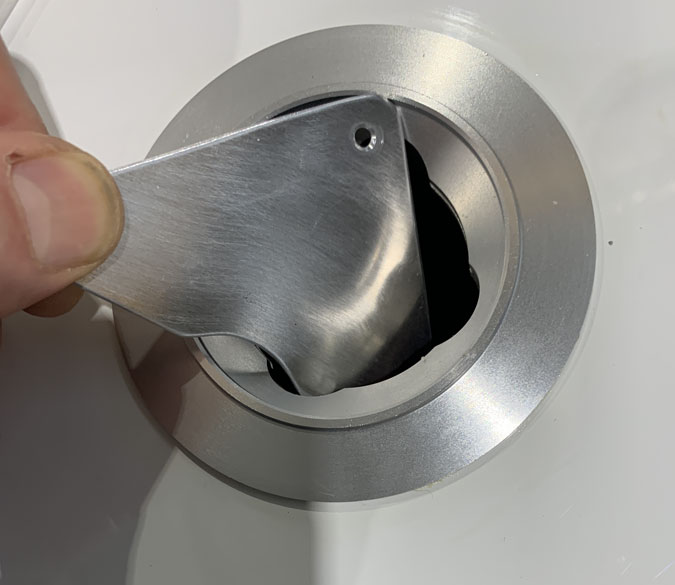
A very important safety item is to ensure the caps do not depart the airplane if they are not locked in place.

Of course I will never forget this but I’d hate to have even the possibility of a cap go into the prop . I also chose to have the caps inside the prop arc, even when outside of this a lose cap can still make its way into the prop.

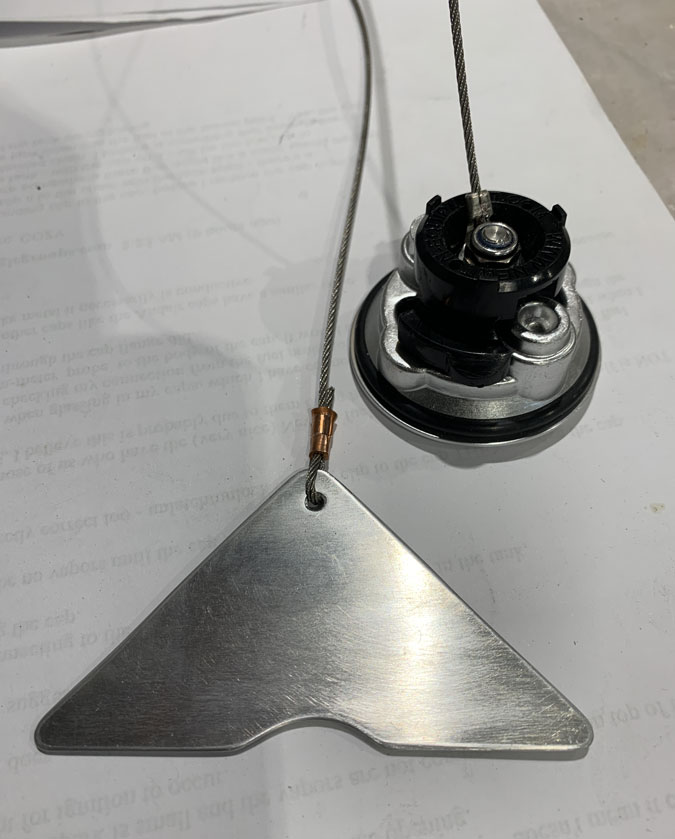
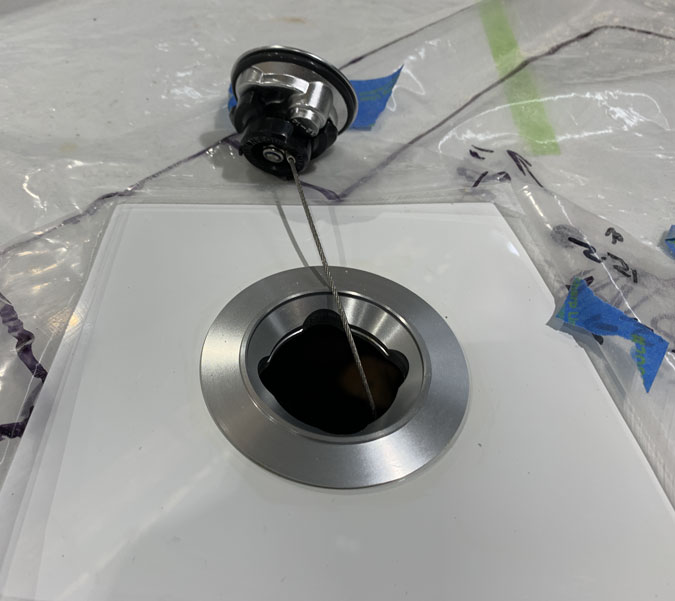
I’m using 2024T3 0.063″ aluminium and shaped so it JUST fits sideways in the fuel cap opening. Once tethered at the apex it will keep the cap from departure.

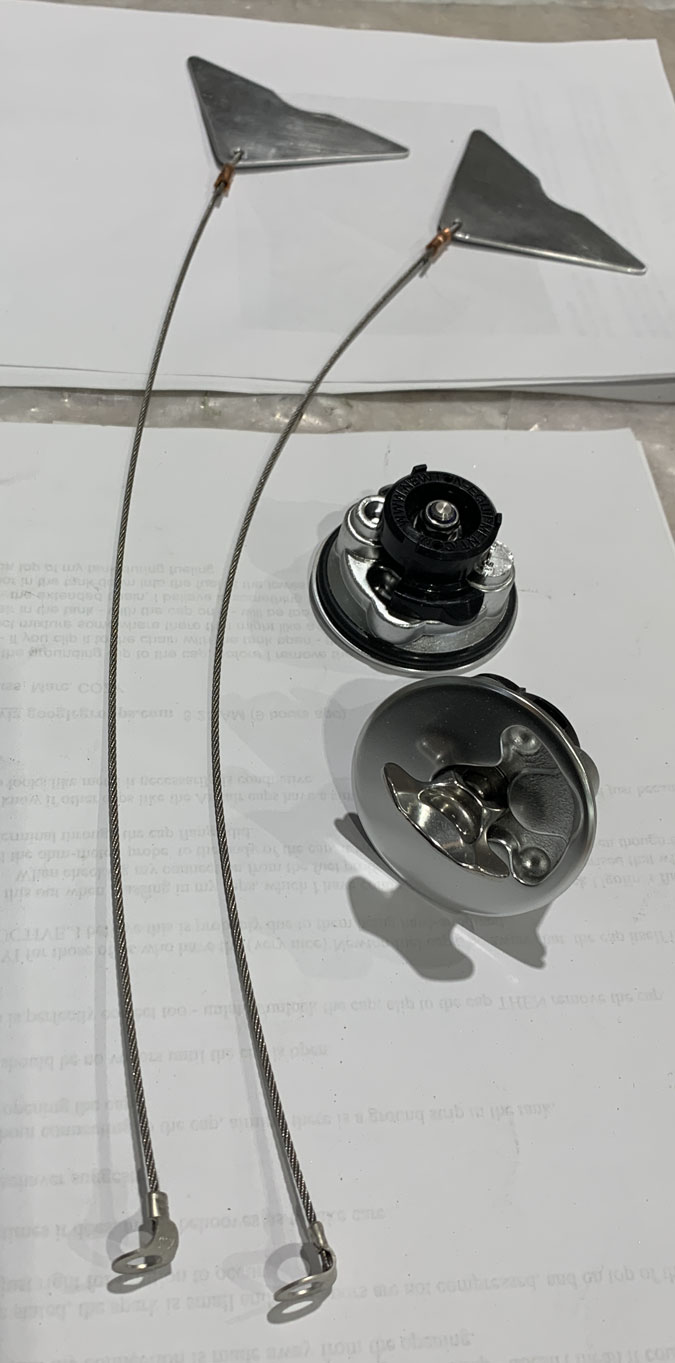
The length of the cable allows the triangle to sit on the bottom of the tank even when the cap is off and resting nearby.

I used simple attachments and rudder cable, During refueling an earth strap can go on the cap latch. The other end needs to penetrate the surface of the fuel. The body of the cap is ‘coated’ and will not earth, so use the latch!

I have also put some braid inside the tanks so earthing is possible from the external vents assuming I connect them at the vent manifold. There are options. The cap seems the simplest.

Touching the fuel nozzle to the cap latch initially may be good practice. However the fuel running quickly through the metal hose also builds up static.

This is how it will go during refueling. If I’m smart I’ll have a rag handy to put on the strake.

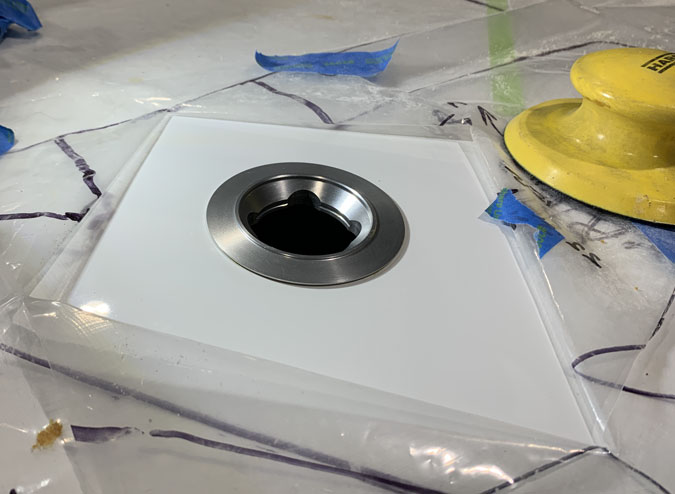
Cap in place, job done.


Previous Post
Brake Lines at the Wheels 2
Next Post
Final Elevator Fit and Ice Shields

Leave a Reply Cancel reply

Your email address will not be published. Required fields are marked *

Fill out this field
Fill out this field
Please enter a valid email address.

CategoryLogsHours
All157617079
Uncategorized135
Ch 3 Education220
Ch 4 Fuselage Bulkheads25231
Ch 5 Fuselage Sides32283
Ch 6 Fuselage Assembly30270
Ch 7 Fuselage Exterior14140
Ch 8 Roll Over/Seat Belts990
Ch 9 Main Gear/Landing Brake71642
Ch 10 Canard28287
Ch 11 Elevators36298
Ch 12 Canard Installation12102
Ch 13 Nose and Nose Gear1291097
Ch 14 CenterSection Spar57525
Ch 15 Firewall and Accessories448
Ch 16 Control System27237
Ch 17 Roll/Pitch Trim System654
Ch 18 Canopy70502
Ch 19 Wings, Alierons1271090
Ch 20 Winglets/Rudders71528
Ch 21 Strakes - Fuel/Baggage65437
Ch 22 Electrical System591031
Ch 23 Engine Installation961152
Ch 24 Covers/Fairings/Consoles25202
Ch 25 Finishing561084
Ch 26 Upholstry340
Fuel System46310
Rollover1050
Cabin heating System60331
The Ferry Tank335
Blog2694182
Build Mods2252513
Nose Gear Doors856
Wheel Pants/Gear Leg Fairing40473
Oxygen System762
Roll and Pitch Trim964
Winglet Intersection Fairings445
Baggage Pods11104
Pilot Side Windows437
RAM Air & Hellhole Cover15177
Main Gear Beef Up322
Post Cure124
Fire Extinguisher16
Wing Fences13
EVS (Enhanced Visual System)130
Hinge Upgrade115
Cowl Keeper110
Rudder Gust Locks19
Cooling20607
Taxi Tests42
Flying10

Complete the Test Flight Program

2025/6/30 10:26:01

Round Australia in Four Flights

2026/4/1 10:26:01

Round the World Departure

2026/8/22 10:26:01

Rough River Flyin, Sept 23, 2026

2026/9/23 10:26:01

© Copyright 2025 Dave Berenholtz