• Home
  • Flying
    • First Flight
  • Build by Chapter
    • Ch 3 Education
    • Ch 4 Fuselage Bulkheads
    • Ch 5 Fuselage Sides
    • Ch 6 Fuselage Assembly
    • Ch 7 Fuselage Exterior
    • Ch 8 Roll Over/Seat Belts
    • Ch 9 Main Gear/Landing Brake
    • Ch 10 Canard
    • Ch 11 Elevators
    • Ch 12 Canard Installation
    • Ch 13 Nose and Nose Gear
    • Ch 14 CenterSection Spar
    • Ch 15 Firewall and Accessories
    • Ch 16 Control System
    • Ch 17 Roll/Pitch Trim System
    • Ch 18 Canopy
    • Ch 19 Wings, Alierons
    • Ch 20 Winglets/Rudders
    • Ch 21 Strakes – Fuel/Baggage
    • Ch 22 Electrical System
    • Ch 23 Engine Installation
    • Ch 24 Covers/Consoles
    • Ch 25 Finishing
    • Ch 26 Upholstry
  • Build Mods
    • Liquid Cooling, Numbers, Weights and Flow
    • Cooling
      • Solving Ground Cooling 1
      • Solving Ground Cooling 2
      • Solving Ground Cooling 3
      • Solving Ground Cooling 4
      • Solving Ground Cooling 5
      • Solving Ground Cooling 6
      • Solving Ground Cooling7 – Test Data
      • Solving Ground Cooling 8 – Flap Building
      • Solving Ground Cooling 9 – Hinges
      • Solving Ground Cooling 10 – Lower Flaps
      • Solving Ground Cooling 11 – Upper Flaps
      • Solving Ground Cooling 12 – Completed
      • Cooling the Beast 1
      • Cooling the Beast 2 – Lower Cowl Expansion
      • Cooling the Beast 3 – KW Oil Cooler Diffuser
    • EVS (Enhanced Vision System)
    • Cowl Keeper
    • Rudder Gust Locks
    • Wing Fences
    • Post Cure
    • Hinge Upgrade
    • RAM Air & Hellhole Cover
    • Main Gear Beef Up
    • Pilot Side Windows
    • Baggage Pods
    • Winglet Intersection Fairings
    • Titanium Rollover
    • Nose Gear Doors
    • Wheel Pants/Gear Leg Fairing
    • Cabin heating System
    • Fuel System
    • Roll and Pitch Trim
    • Oxygen System
    • The Ferry Tank
    • Cruise Angle Indicator
    • Fire Extinguisher Install
  • Round the World
    • RTW Route East #12 rev1
    • Survival Equipment
    • Training Flights
  • Other Stuff
    • Blog
    • Around the World: RAAUS Sport Pilot Issue 110
    • Taxi Tests
    • Summary Feb ’24 from an SAAA Meeting
    • AOPA Pilot 27th Sept 2019
    • Build Tests
    • Flying Stories
      • A Long Easy Dream ’06
      • Townsville ’07
      • Cairns ’08
      • Albany ’08
      • East Coast ’08
      • Brisbane ’09
      • Cairns ’10
      • Perth ’10
    • Non Build Mods
      • F16 Scoop for JZE
      • Ram Air Box for JZE
      • Strange Tips
    • Milestones
    • Links
  • Contact

Blog

Home
Ch 23 Engine Installation
Cowl Install 1

Cowl Install 1

7 years ago
Dave Berenholtz
Ch 23 Engine Installation
Date:  10-23-2018
Number of Hours:  10
Manual Reference:  23-2

After reviewing all the material I could including Mike Melvill’s instructions and the LE plans, I still spend another two days really thinking about it at the hangar. I finally have a plan.

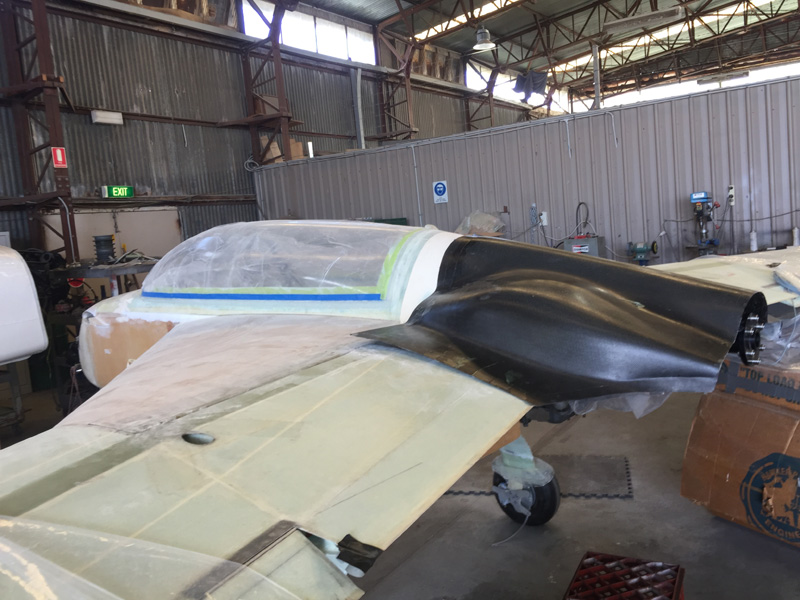
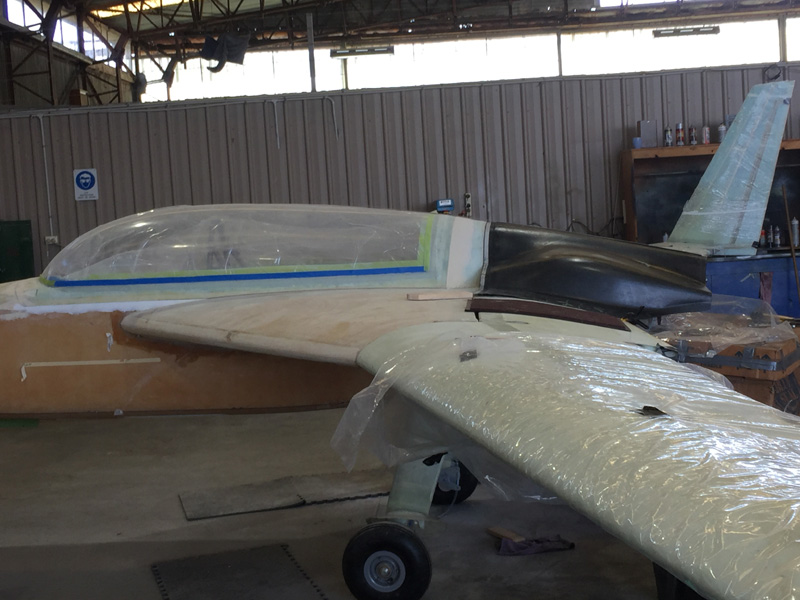
Here’s the top cowl just sitting at a good angle, aesthetically.

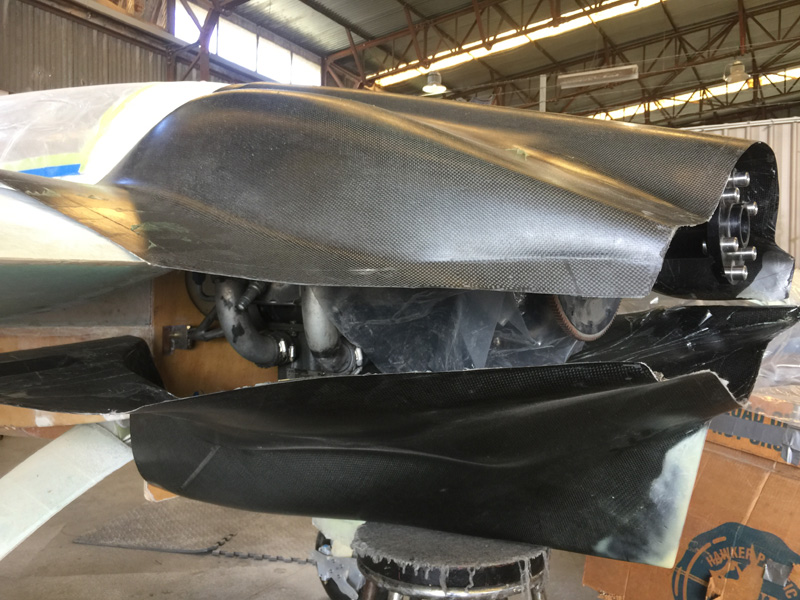
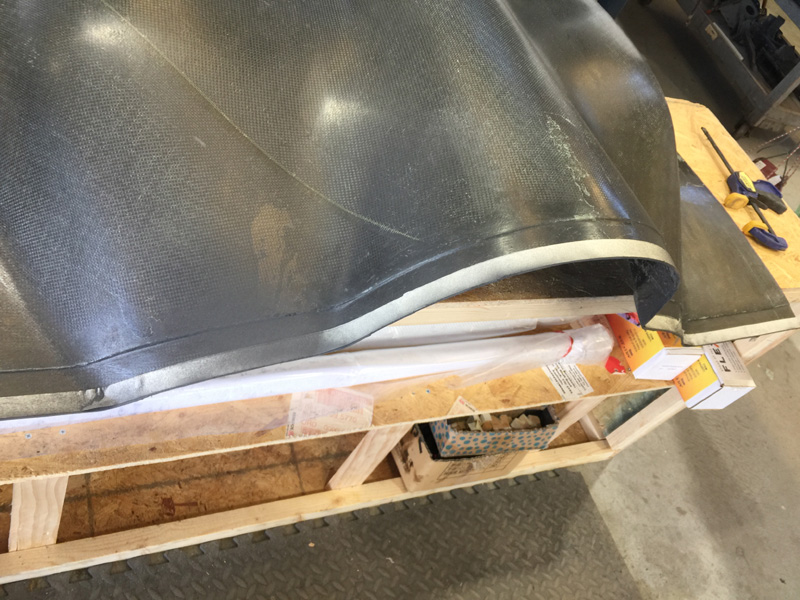
Here is how the top and bottom cowls fit as delivered. A bit or work is required for a perfect fit.

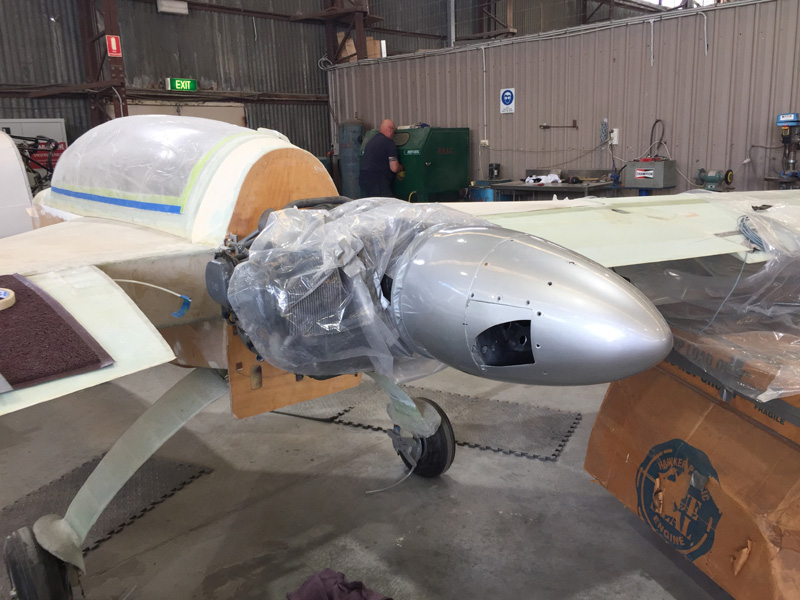
I’ve borrowed a spinner that goes with a Savier ‘Black Bart’ prop. Crazy big right? It was useful in visualizing how the top cowl will sit and I spent a while talking myself into the fact that the engine is pretty much straight. I did a lot of measuring too as things were looking crooked to the left. The measurements however told me the engine is within .05 or within the ‘noise’ of rough checking. After a few hours I decided to soldier on.

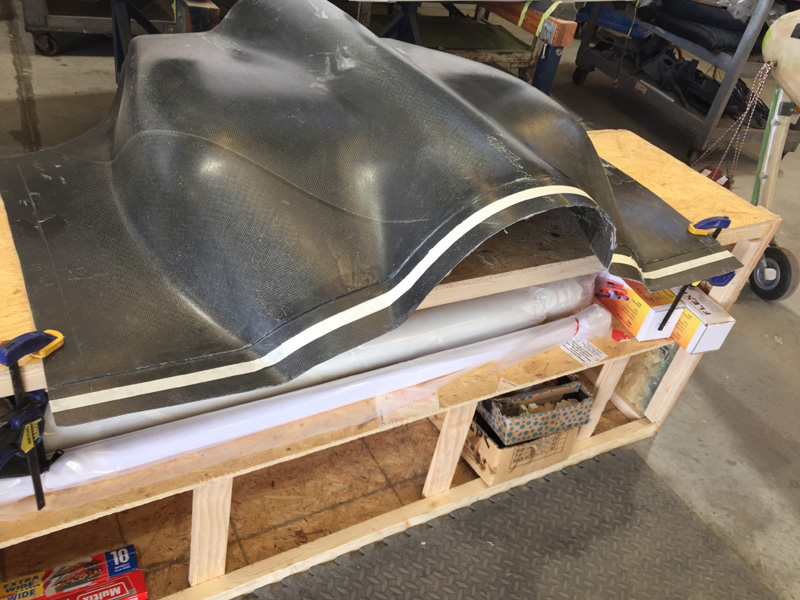
As a plan formed. I decided I wanted a 1.5″ lip and marked out the difference.

It was an easy cut with a dremel and a metal cutting disk. I now have carbon fiber black all over me around the safety gear I was wearing.

This is tough to explain. I’ll try. I’m just installing the top cowl first. Plans have you join the two now at the trailing edge. Bad idea IMHO.

I don’t think this will work as well as getting one installed perfectly and then matching the bottom cowl to fit.Β  On these Melvill cowls there is a joggled lip. Now it needs to go BUT I can use it as a former for the initial top lip on the spar and rollover.

Yes I’m going to make the plans lips then add to them per the Melvill instructions. Although not exactly. That joggle is really 5 plies of BID deep. Interesting.

My spar is sightly lower than my wings now they are all butted up and installed. Just a little, so it makes sense to use this when making my cowl lips. I like the plans method as it has to be strong. I am going to lay up 5 plies on the top of the spar and turtleback into the cowl joggle which I will line with release tape.

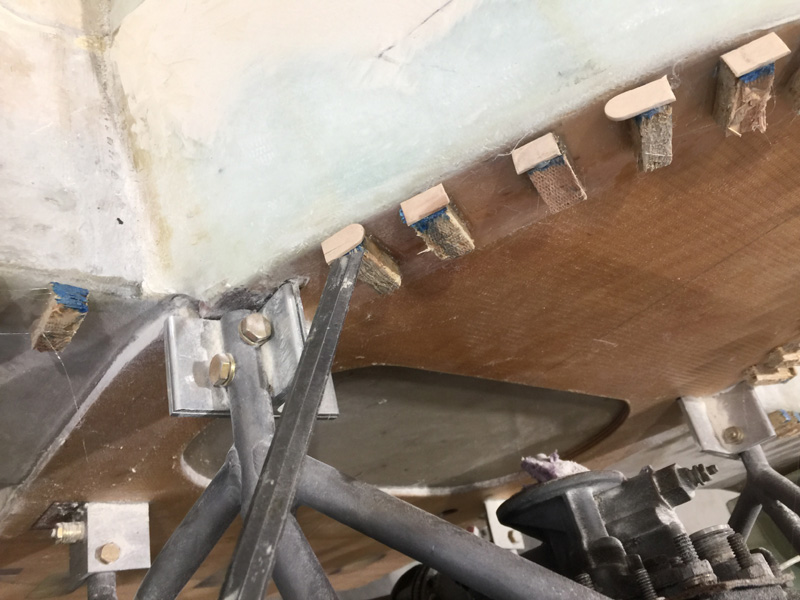
Does this make sense? On the turtleback I need to set up the cowl so it sits flush with the edge. To do that I need to make a support for the cowl in lineΒ  with the edge. To do this, pay attention, <grin>, I need to set cowl supports lower by the cowl thickness.

That what those stick pieces are on the top of the supports. A stick the thickness of the cowl. On the spar I want the edge to be higher so I don’t need that spacer. This will reduce the amount of filler I use later to get it all to play nicely together and be level.

In this shot you can see the little sticks on the turtleback are not removed. But I did! I just forgot a photo so please imagine it.

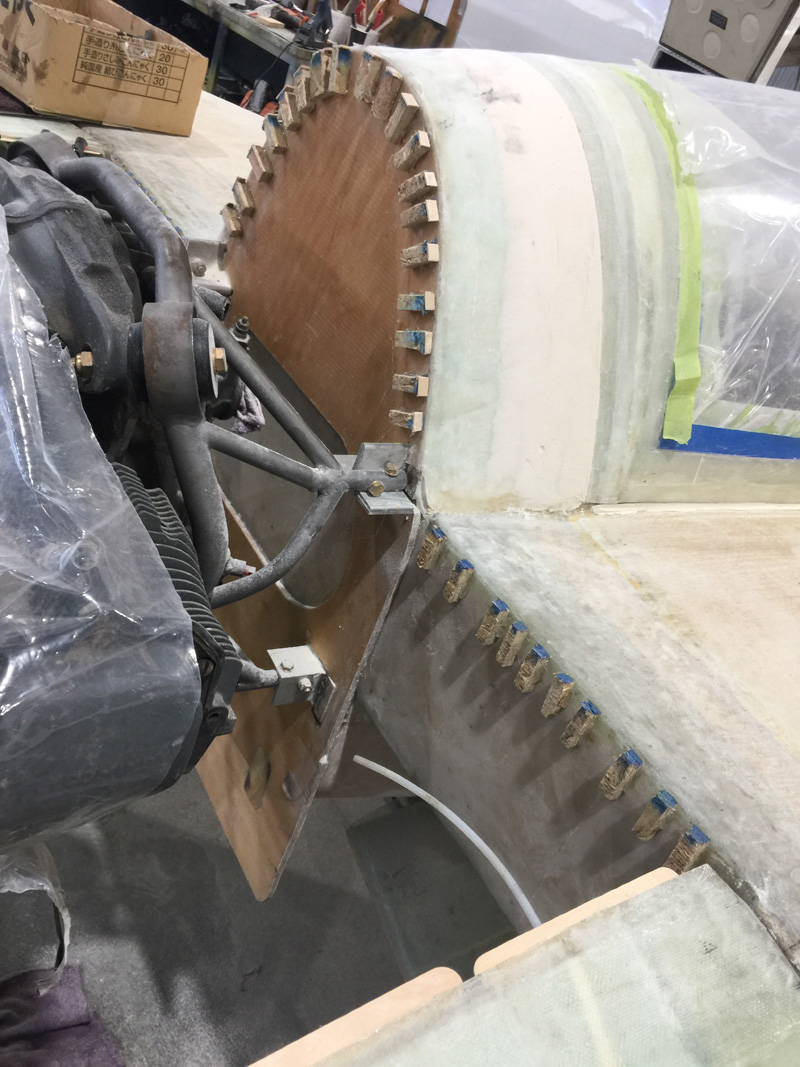
When I put the cowl on for the first trial fit it should sit exactly level with the turtleback less the thickness of 5 plies of BID. However it will be proud on the spar or rather when I do the layup between the spar and cowl it will be level. Forward of the spar there will be a joggle on the top spar edge. That’s OK as there is a bit of a dip there because of the curved strakes. Man! This is not a simple build.

I’ll find out how it goes with the first fit. At that point I can look at trimming the edges at the wings for a perfect trial fit. I added some stick there which you can see in the last shot.

On another point for those of you with the Mike Melvill cowls, his instructions talk about making the front edge longer aft so the cowls match the wings. If you got your cowls from Greg at Aerocomposites (successors to Featherlite) then you will see that there is enough extra meat in the way he makes them for this not to be an issue. You can just see faintly on the cowls where the exact Melvill part was and yes it may have been an issue. Gregs cowls give you a couple of inches extra to play with.

This means your lip size is really now determined by the sort of fasteners you will be using. If its camlocs, an inch and a half is a good lip size. Feeeewww!! Got all that?


Previous Post
Loaner Engine Install ver1 and ver2
Next Post
Cowl Install 2

Leave a Reply Cancel reply

Your email address will not be published. Required fields are marked *

Fill out this field
Fill out this field
Please enter a valid email address.

CategoryLogsHours
All157617079
Uncategorized135
Ch 3 Education220
Ch 4 Fuselage Bulkheads25231
Ch 5 Fuselage Sides32283
Ch 6 Fuselage Assembly30270
Ch 7 Fuselage Exterior14140
Ch 8 Roll Over/Seat Belts990
Ch 9 Main Gear/Landing Brake71642
Ch 10 Canard28287
Ch 11 Elevators36298
Ch 12 Canard Installation12102
Ch 13 Nose and Nose Gear1291097
Ch 14 CenterSection Spar57525
Ch 15 Firewall and Accessories448
Ch 16 Control System27237
Ch 17 Roll/Pitch Trim System654
Ch 18 Canopy70502
Ch 19 Wings, Alierons1271090
Ch 20 Winglets/Rudders71528
Ch 21 Strakes - Fuel/Baggage65437
Ch 22 Electrical System591031
Ch 23 Engine Installation961152
Ch 24 Covers/Fairings/Consoles25202
Ch 25 Finishing561084
Ch 26 Upholstry340
Fuel System46310
Rollover1050
Cabin heating System60331
The Ferry Tank335
Blog2694182
Build Mods2252513
Nose Gear Doors856
Wheel Pants/Gear Leg Fairing40473
Oxygen System762
Roll and Pitch Trim964
Winglet Intersection Fairings445
Baggage Pods11104
Pilot Side Windows437
RAM Air & Hellhole Cover15177
Main Gear Beef Up322
Post Cure124
Fire Extinguisher16
Wing Fences13
EVS (Enhanced Visual System)130
Hinge Upgrade115
Cowl Keeper110
Rudder Gust Locks19
Cooling20607
Taxi Tests42
Flying10

Complete the Test Flight Program

2025/6/30 10:26:01

Round Australia in Four Flights

2026/4/1 10:26:01

Round the World Departure

2026/8/22 10:26:01

Rough River Flyin, Sept 23, 2026

2026/9/23 10:26:01

Β© Copyright 2025 Dave Berenholtz