| Date: 05-13-2017 | |
| Number of Hours: 4 | |
| Manual Reference: no ref |
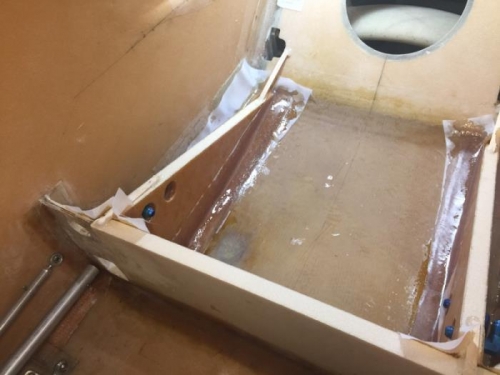
Here we are all floxed, taped and peel plied. It took a few hours and I kept making extra epoxy mixes. I’m concerned I’m using all this special stuff which I bought for the strakes. I am worried I may run out and it is crazy expensive to import!
I first applied pure epoxy to where I’d previously drawn lots of lines for where the joins are and then where the tapes go plus a little at the edges for peel ply.
Next up was lots of flox over the joins and on the two parts, left and right sump sides. I got each in position and then hot glued a couple of ice cream sticks which you can see in the pics. These hold the sides in position while everything is still wet.
I then ensured all the joins had flox worked into the edges nicely and added my tapes. Finally some peel ply with lots of pure epoxy. This is not the time for dry layups,
Pic 3 is after the cure and cleaning up the edges. I’ve just placed the 15″X 15″ Hyrdamat (still protected in plastic) so you can see that it fits.
Taped and floxed
Fittings ready
All done


