• Home
  • Flying
    • First Flight
  • Build by Chapter
    • Ch 3 Education
    • Ch 4 Fuselage Bulkheads
    • Ch 5 Fuselage Sides
    • Ch 6 Fuselage Assembly
    • Ch 7 Fuselage Exterior
    • Ch 8 Roll Over/Seat Belts
    • Ch 9 Main Gear/Landing Brake
    • Ch 10 Canard
    • Ch 11 Elevators
    • Ch 12 Canard Installation
    • Ch 13 Nose and Nose Gear
    • Ch 14 CenterSection Spar
    • Ch 15 Firewall and Accessories
    • Ch 16 Control System
    • Ch 17 Roll/Pitch Trim System
    • Ch 18 Canopy
    • Ch 19 Wings, Alierons
    • Ch 20 Winglets/Rudders
    • Ch 21 Strakes – Fuel/Baggage
    • Ch 22 Electrical System
    • Ch 23 Engine Installation
    • Ch 24 Covers/Consoles
    • Ch 25 Finishing
    • Ch 26 Upholstry
  • Build Mods
    • Liquid Cooling, Numbers, Weights and Flow
    • Cooling
      • Solving Ground Cooling 1
      • Solving Ground Cooling 2
      • Solving Ground Cooling 3
      • Solving Ground Cooling 4
      • Solving Ground Cooling 5
      • Solving Ground Cooling 6
      • Solving Ground Cooling7 – Test Data
      • Solving Ground Cooling 8 – Flap Building
      • Solving Ground Cooling 9 – Hinges
      • Solving Ground Cooling 10 – Lower Flaps
      • Solving Ground Cooling 11 – Upper Flaps
      • Solving Ground Cooling 12 – Completed
      • Cooling the Beast 1
      • Cooling the Beast 2 – Lower Cowl Expansion
      • Cooling the Beast 3 – KW Oil Cooler Diffuser
    • EVS (Enhanced Vision System)
    • Cowl Keeper
    • Rudder Gust Locks
    • Wing Fences
    • Post Cure
    • Hinge Upgrade
    • RAM Air & Hellhole Cover
    • Main Gear Beef Up
    • Pilot Side Windows
    • Baggage Pods
    • Winglet Intersection Fairings
    • Titanium Rollover
    • Nose Gear Doors
    • Wheel Pants/Gear Leg Fairing
    • Cabin heating System
    • Fuel System
    • Roll and Pitch Trim
    • Oxygen System
    • The Ferry Tank
    • Cruise Angle Indicator
    • Fire Extinguisher Install
  • Round the World
    • RTW Route East #12 rev1
    • Survival Equipment
    • Training Flights
  • Other Stuff
    • Blog
    • Around the World: RAAUS Sport Pilot Issue 110
    • Taxi Tests
    • Summary Feb ’24 from an SAAA Meeting
    • AOPA Pilot 27th Sept 2019
    • Build Tests
    • Flying Stories
      • A Long Easy Dream ’06
      • Townsville ’07
      • Cairns ’08
      • Albany ’08
      • East Coast ’08
      • Brisbane ’09
      • Cairns ’10
      • Perth ’10
    • Non Build Mods
      • F16 Scoop for JZE
      • Ram Air Box for JZE
      • Strange Tips
    • Milestones
    • Links
  • Contact

The Ferry Tank

Home
Build Mods
The Ferry Tank

Ferry Tank First Fitting

Date:  10-24-2019
Number of Hours:  4
Manual Reference:  no ref

Time to look at this ferry tank fitting. How in the world am I going to make it work?

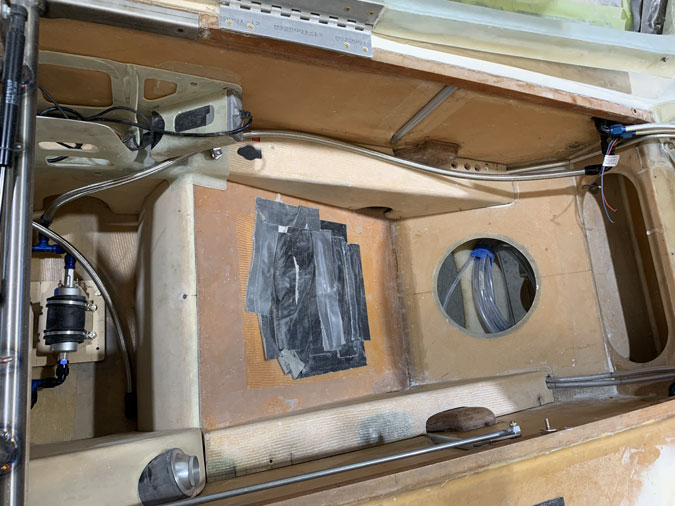
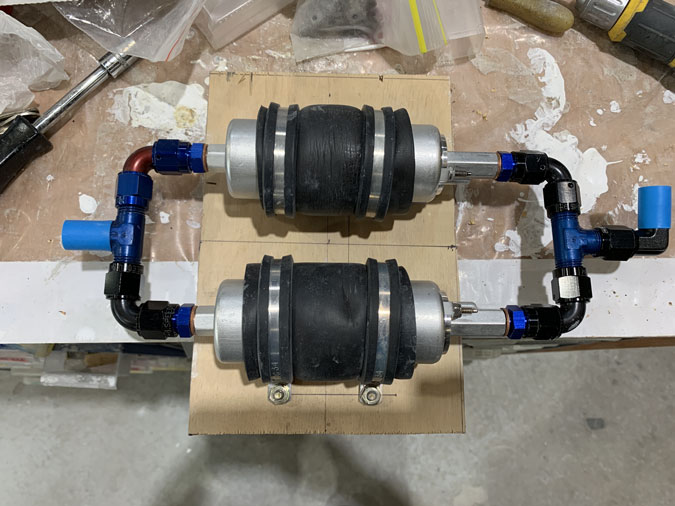
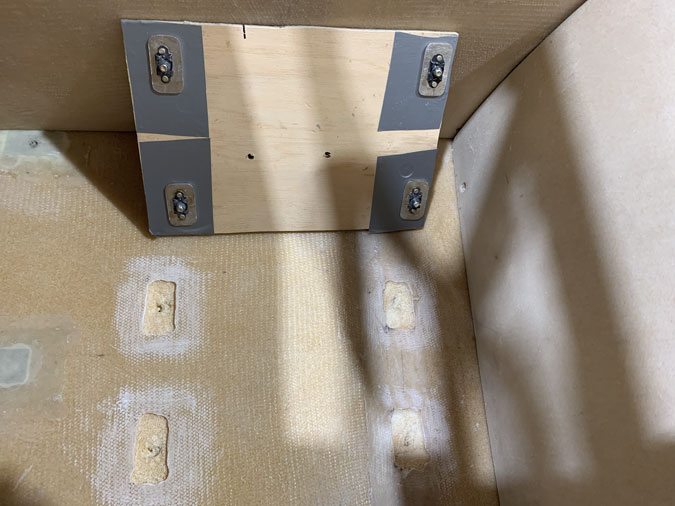
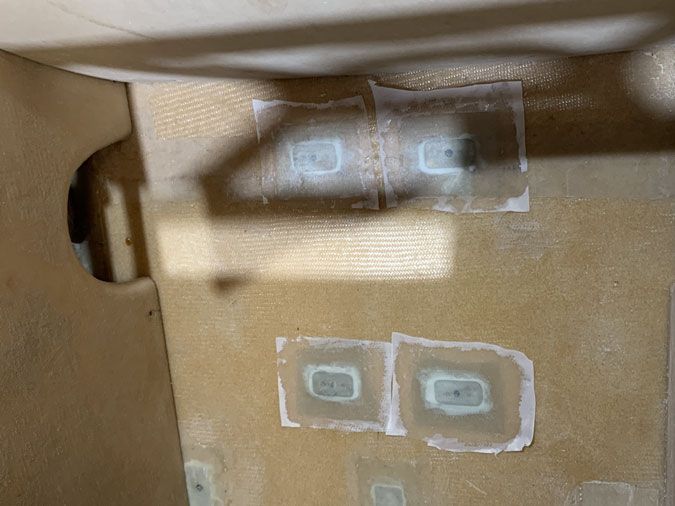
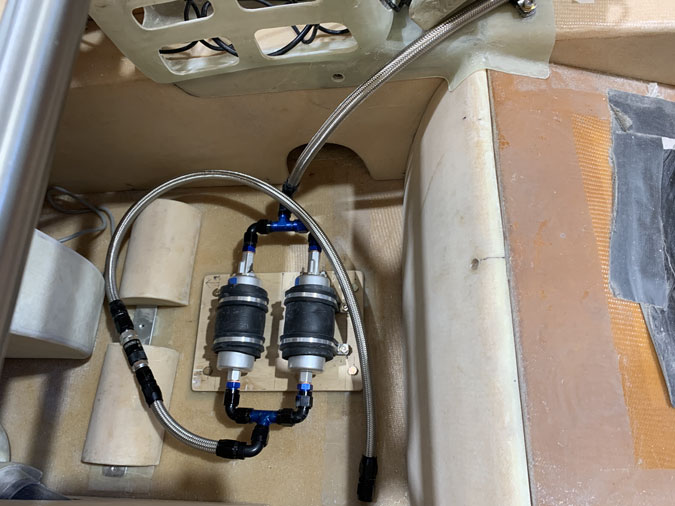
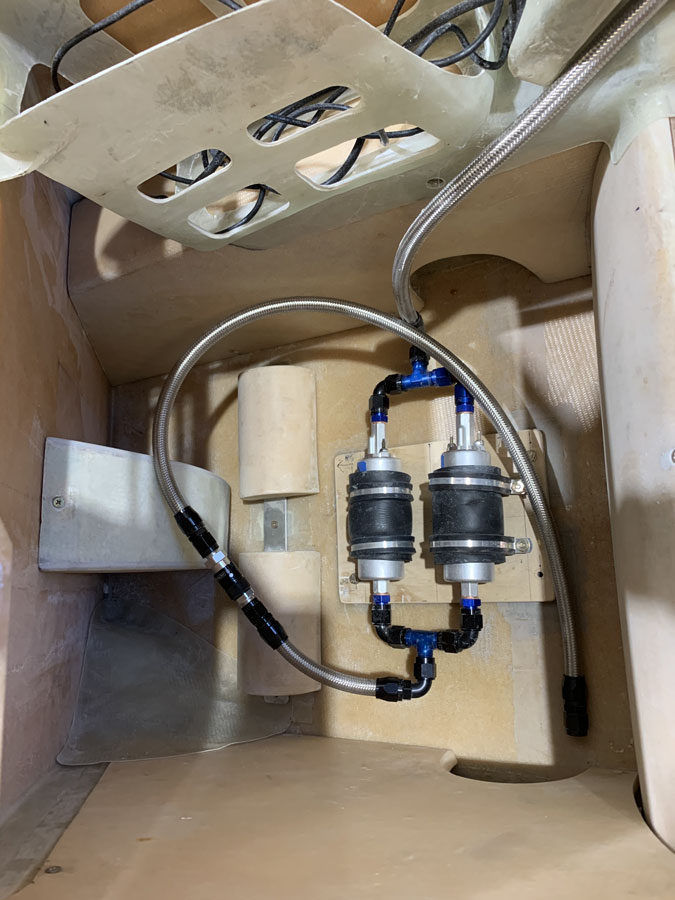
I finally have the basic components for pumps and hoses fitted.

I put everything together with the armrests and so on. Now its crunch time.

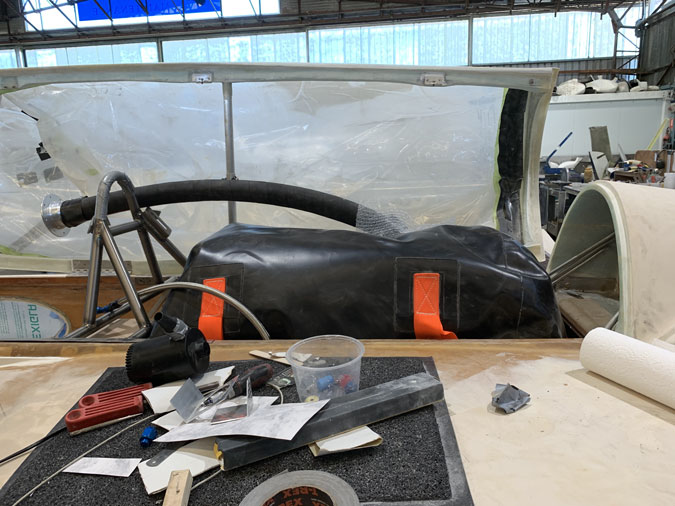
I filled the tank in place with air from a blow up bed pump and it looks like I should get at least 200 liters into the tank. Its maximum is 250 litres (66 gallons).

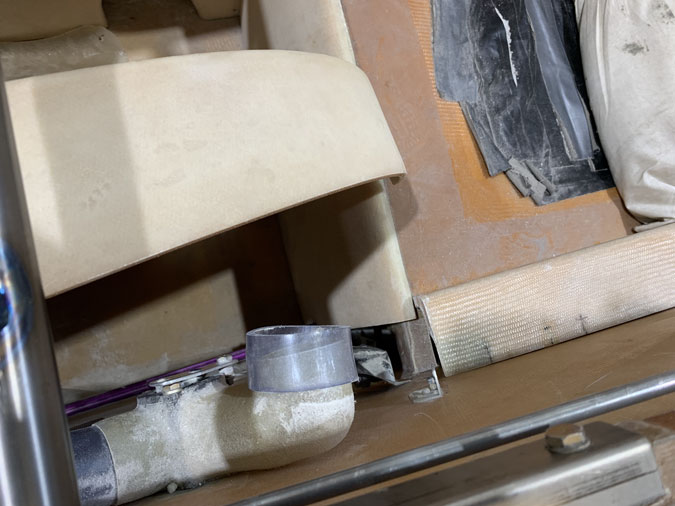
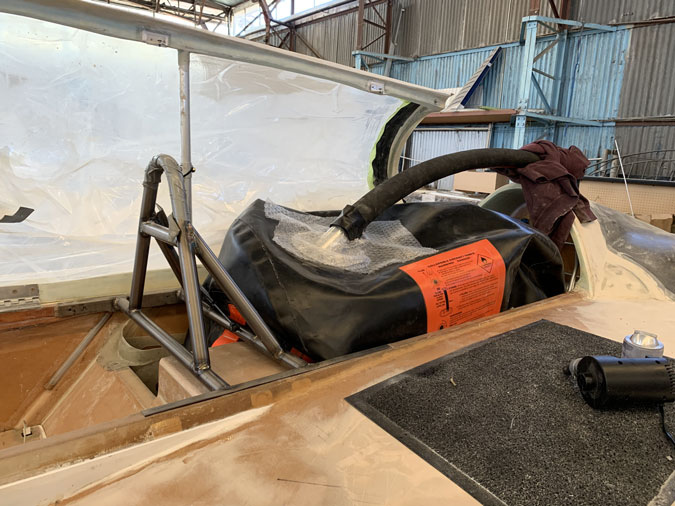
Immediate problems are that I can’t close the canopy with that hose there and the tank is pushing on the canopy latch fittings. I may have to make some sort of substantial cover so the tank is not pinched or pierced.

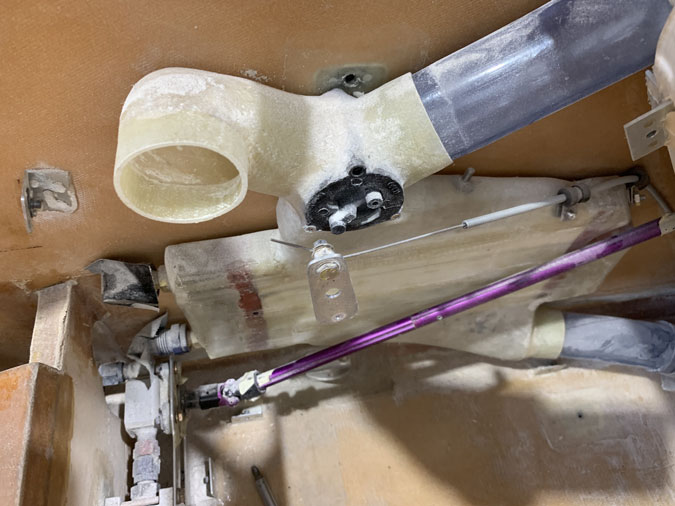
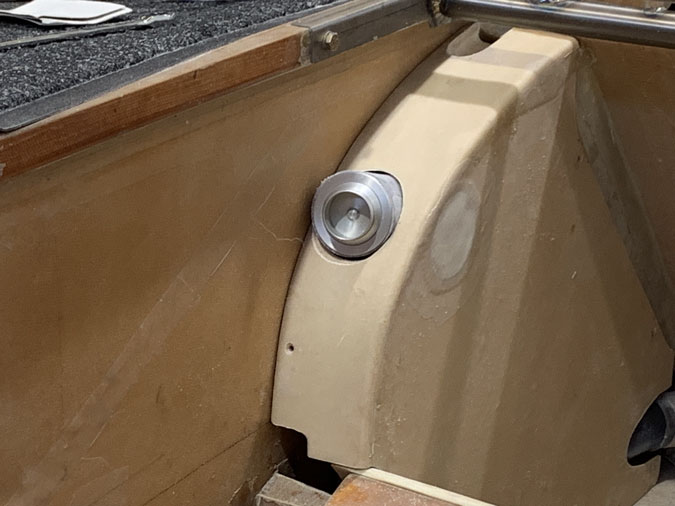
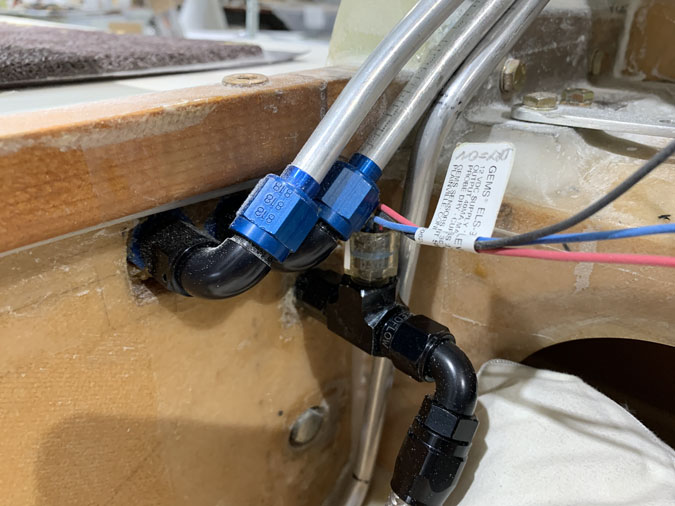
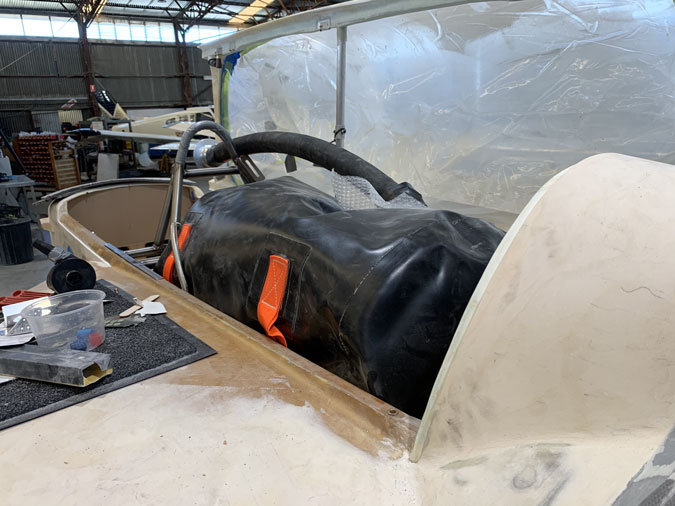
To my surprise this looks like the better option. I will still have to cut the filler hose shorted but now its not pointing at my head! The down side is that the tank outlet is not at the lowest point so I will have to have a look at that. I might look at a fitting on the passengers headrest that when fitted holds the filler hose end in place.  Another job is to make the outlet hose longer now it is around the other way!

I need to ensure that in turbulence the filler head doesn’t impact the canopy AND I need to get it closing without hindrance. I may need a frame over the fuel pumps to ensure the tank exit is at the lowest point.

There is some more work to do on this later…

Ferry Tank Plumbing

Date:  10-15-2019
Number of Hours:  25
Manual Reference:  no ref

Yes its time to get the ferry tank sorted out. Or at least make a good start with the fitting.

After a lot of fiddling around I got a bunch of ‘Speedflow’ fittings together on a piece of firewall plywood. You get the idea? Two pumps that start and end up in the same places. I have the Adel clamps as well which should allow for the vibrations that pumps seem to have.

I tried fitting the ferry tank in place and soon realised that I’d put the back seat heat outlet in the wrong place. Doh!

Its pointing inwardly and would rub against the tank. Not a good idea.

After a LOT of work I have removed the internal pipe, re-positioned it backwards and made a new hole for the outlet, I had to fill in the old hole of course. I’m very happy with the result because it will now work a lot better for the person in the back seat (GIB) and also be clear of the ferry tank when it is installed.

Back to the pump install. I needed hardpoints in the floor.

A few processes later the new fittings are secured with 2 ply of BID and with a bit of peel ply and yet another overnight cure.

The pump base is now secured to the floor with 4 X AN3  bolts and is rock solid. I have gone for Speed Flow 100 rubber pipes with the SS braid. Teflon has issues with bending and these hoses will get plenty. You might also notice a fitting which is a ‘dry break’. This allows me to disconnect the hose without getting any left over fuel leaking out.

The curve in the bottom hose will go to the bottom of the ferry tank. The other hose goes to the right hand side main tank as a top up.

Here’s the RHS hose entry from the ferry set up. The fitting above allows for a GEMS liquid sensor to tell me if the ferry tank pump is delivering fuel. I think this will work. If it doesn’t I’ll go to a pressure sensor instead.

Ferry Tank Side Tie Downs

Date:  01-08-2017
Number of Hours:  6
Manual Reference:  no ref

I’ve been playing with this since October last year as a little side job and its finally done. These are the side tie downs for the 250 liter rear ferry tank. Yes did I mention this is for crossing the Pacific Ocean? Yeap I have plans for this plane….

I’ve simply added two more ‘seat belt’ hard points per plans to hold the ferry tank on the sides when its in use. When I have this tank in the back I’ll use the existing passenger belt points and the two new ones I’ve now added for the front. Pretty simple. Four side tie down points. I’ll also need front and rear points which will come further on in the build.

Like a seat belt

Timber and glass

Tank side tie downs

CategoryLogsHours
All157617079
Uncategorized135
Ch 3 Education220
Ch 4 Fuselage Bulkheads25231
Ch 5 Fuselage Sides32283
Ch 6 Fuselage Assembly30270
Ch 7 Fuselage Exterior14140
Ch 8 Roll Over/Seat Belts990
Ch 9 Main Gear/Landing Brake71642
Ch 10 Canard28287
Ch 11 Elevators36298
Ch 12 Canard Installation12102
Ch 13 Nose and Nose Gear1291097
Ch 14 CenterSection Spar57525
Ch 15 Firewall and Accessories448
Ch 16 Control System27237
Ch 17 Roll/Pitch Trim System654
Ch 18 Canopy70502
Ch 19 Wings, Alierons1271090
Ch 20 Winglets/Rudders71528
Ch 21 Strakes - Fuel/Baggage65437
Ch 22 Electrical System591031
Ch 23 Engine Installation961152
Ch 24 Covers/Fairings/Consoles25202
Ch 25 Finishing561084
Ch 26 Upholstry340
Fuel System46310
Rollover1050
Cabin heating System60331
The Ferry Tank335
Blog2694182
Build Mods2252513
Nose Gear Doors856
Wheel Pants/Gear Leg Fairing40473
Oxygen System762
Roll and Pitch Trim964
Winglet Intersection Fairings445
Baggage Pods11104
Pilot Side Windows437
RAM Air & Hellhole Cover15177
Main Gear Beef Up322
Post Cure124
Fire Extinguisher16
Wing Fences13
EVS (Enhanced Visual System)130
Hinge Upgrade115
Cowl Keeper110
Rudder Gust Locks19
Cooling20607
Taxi Tests42
Flying10

Complete the Test Flight Program

39Days

Round Australia in Four Flights

314Days

Round the World Departure

457Days

Rough River Flyin, Sept 23, 2026

489Days

© Copyright 2025 Dave Berenholtz