• Home
  • Flying
    • First Flight
  • Build by Chapter
    • Ch 3 Education
    • Ch 4 Fuselage Bulkheads
    • Ch 5 Fuselage Sides
    • Ch 6 Fuselage Assembly
    • Ch 7 Fuselage Exterior
    • Ch 8 Roll Over/Seat Belts
    • Ch 9 Main Gear/Landing Brake
    • Ch 10 Canard
    • Ch 11 Elevators
    • Ch 12 Canard Installation
    • Ch 13 Nose and Nose Gear
    • Ch 14 CenterSection Spar
    • Ch 15 Firewall and Accessories
    • Ch 16 Control System
    • Ch 17 Roll/Pitch Trim System
    • Ch 18 Canopy
    • Ch 19 Wings, Alierons
    • Ch 20 Winglets/Rudders
    • Ch 21 Strakes – Fuel/Baggage
    • Ch 22 Electrical System
    • Ch 23 Engine Installation
    • Ch 24 Covers/Consoles
    • Ch 25 Finishing
    • Ch 26 Upholstry
  • Build Mods
    • Liquid Cooling, Numbers, Weights and Flow
    • Cooling
      • Solving Ground Cooling 1
      • Solving Ground Cooling 2
      • Solving Ground Cooling 3
      • Solving Ground Cooling 4
      • Solving Ground Cooling 5
      • Solving Ground Cooling 6
      • Solving Ground Cooling7 – Test Data
      • Solving Ground Cooling 8 – Flap Building
      • Solving Ground Cooling 9 – Hinges
      • Solving Ground Cooling 10 – Lower Flaps
      • Solving Ground Cooling 11 – Upper Flaps
      • Solving Ground Cooling 12 – Completed
      • Cooling the Beast 1
      • Cooling the Beast 2 – Lower Cowl Expansion
      • Cooling the Beast 3 – KW Oil Cooler Diffuser
    • EVS (Enhanced Vision System)
    • Cowl Keeper
    • Rudder Gust Locks
    • Wing Fences
    • Post Cure
    • Hinge Upgrade
    • RAM Air & Hellhole Cover
    • Main Gear Beef Up
    • Pilot Side Windows
    • Baggage Pods
    • Winglet Intersection Fairings
    • Titanium Rollover
    • Nose Gear Doors
    • Wheel Pants/Gear Leg Fairing
    • Cabin heating System
    • Fuel System
    • Roll and Pitch Trim
    • Oxygen System
    • The Ferry Tank
    • Cruise Angle Indicator
    • Fire Extinguisher Install
  • Round the World
    • RTW Route East #12 rev1
    • Survival Equipment
    • Training Flights
  • Other Stuff
    • Blog
    • Around the World: RAAUS Sport Pilot Issue 110
    • Taxi Tests
    • Summary Feb ’24 from an SAAA Meeting
    • AOPA Pilot 27th Sept 2019
    • Build Tests
    • Flying Stories
      • A Long Easy Dream ’06
      • Townsville ’07
      • Cairns ’08
      • Albany ’08
      • East Coast ’08
      • Brisbane ’09
      • Cairns ’10
      • Perth ’10
    • Non Build Mods
      • F16 Scoop for JZE
      • Ram Air Box for JZE
      • Strange Tips
    • Milestones
    • Links
  • Contact

Rollover

Home
Build Mods
Rollover

Headrest Support

Date:  11-20-2024
Number of Hours:  5
Manual Reference:  no ref

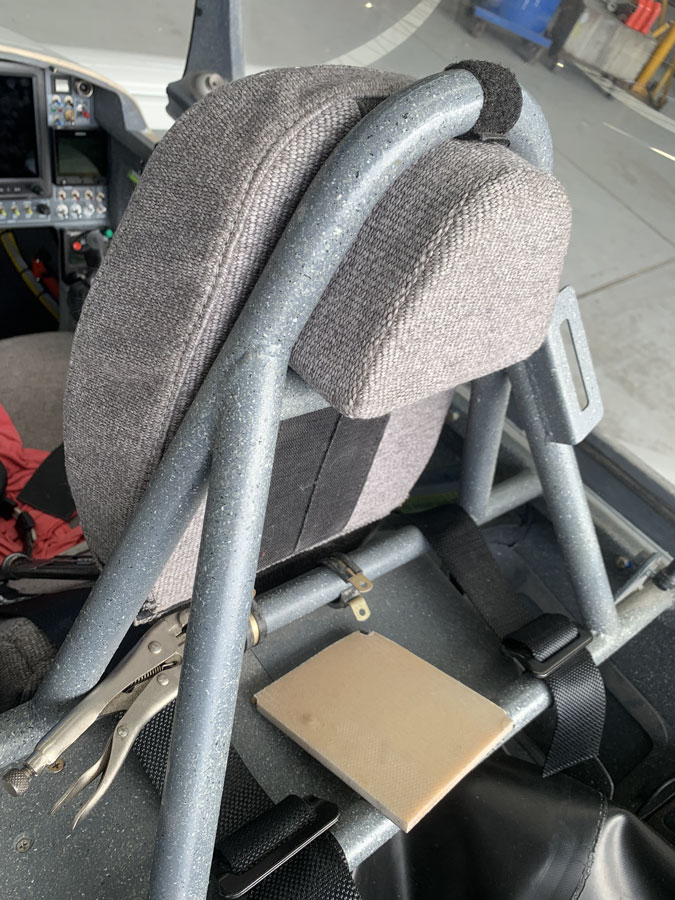
Such a simple thing. I had a padded headrest done to fit the rollover. It wasn’t as I’d hoped but I thought I’d work something out to make it more secure. The velcro wasn’t enough and it kept sliding backwards.

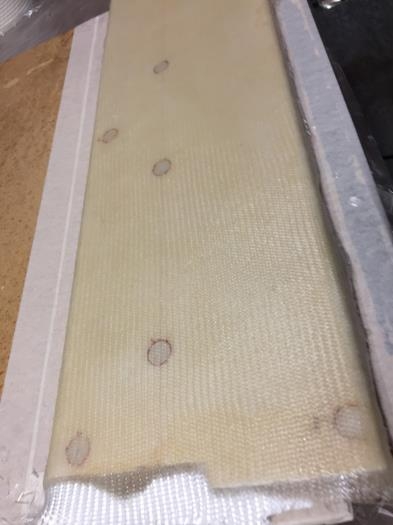
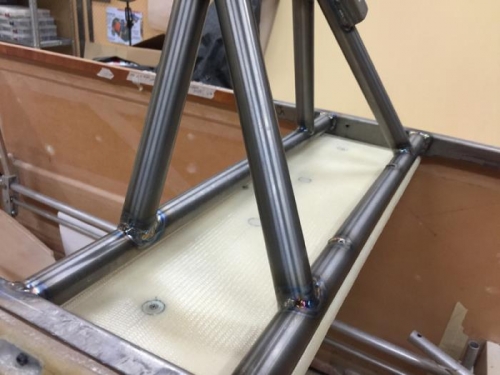
I found a bit of hard foam with glass on one side. The idea is to secure it to the bottom with hose clamps and that would stop the lower part of the headrest falling backwards.

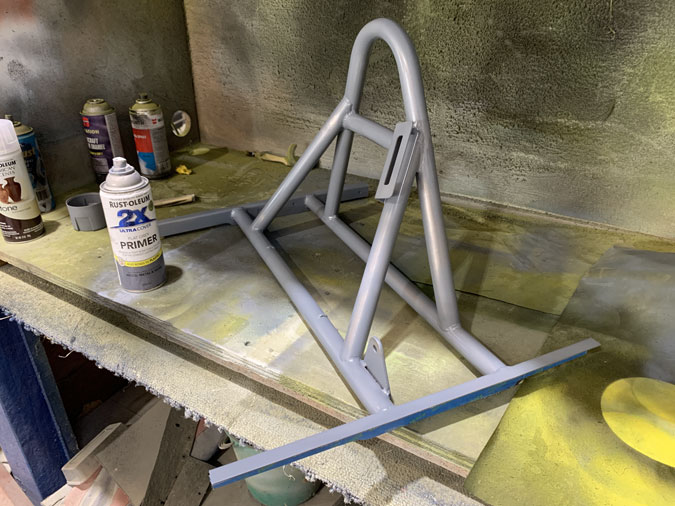
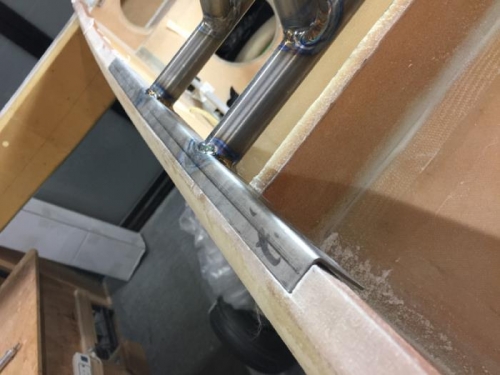
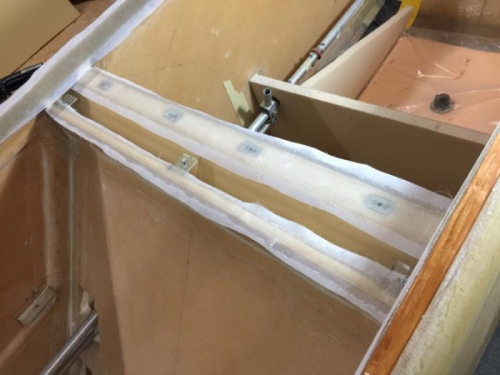
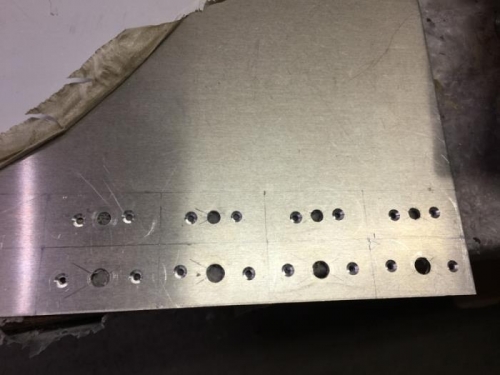
I glassed the other side, then made holes in the side so where the hose clamps were bolted on that part would be reinforced with flox. I cleaned it all up, painted it, installed it. Nice job.

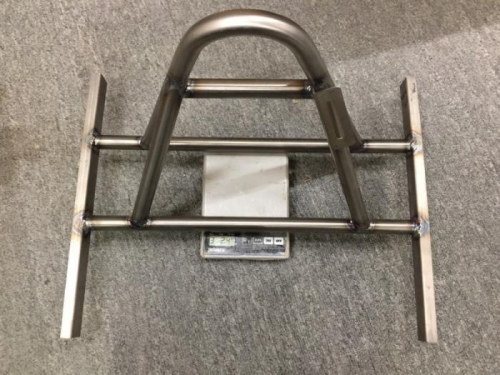
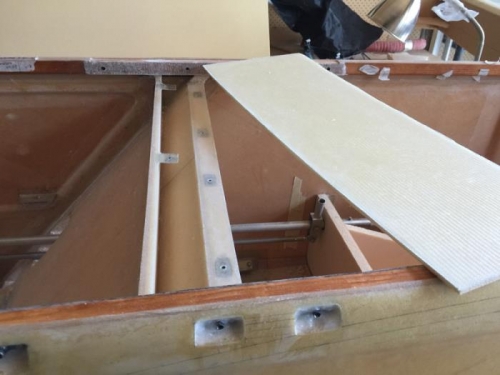
Epic fail. There it is on the bottom right. Looks really nice but it tended to rotate on the hose clamps backwards, not what I expected.

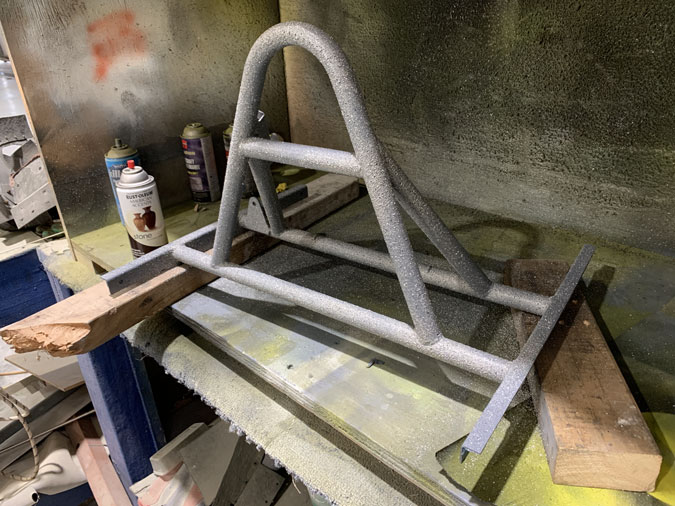
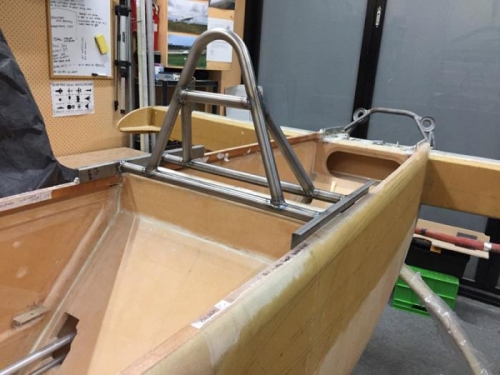
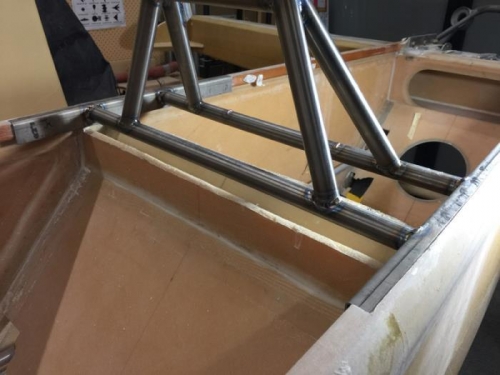
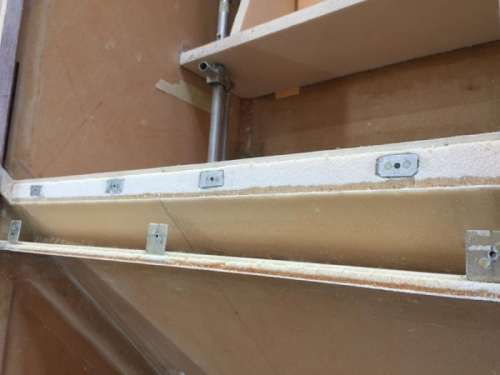
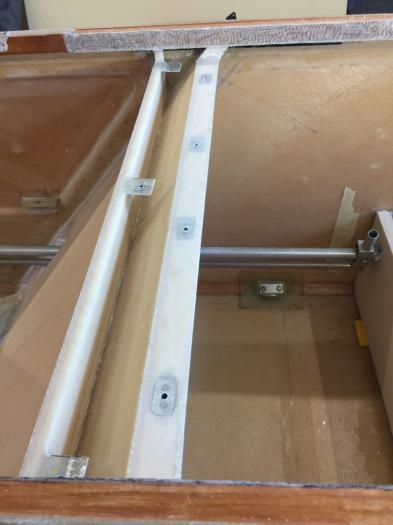
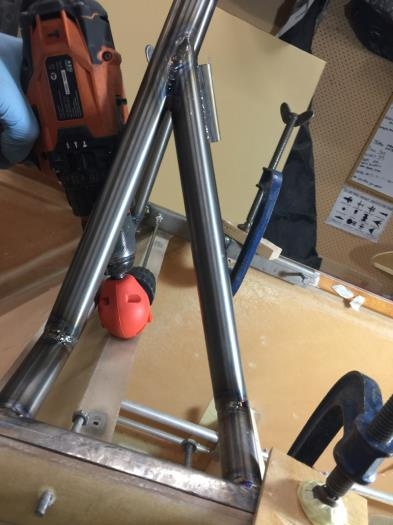
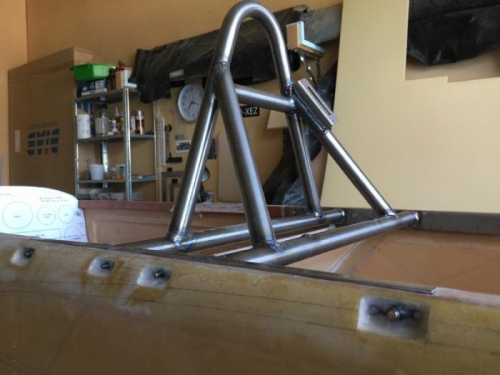
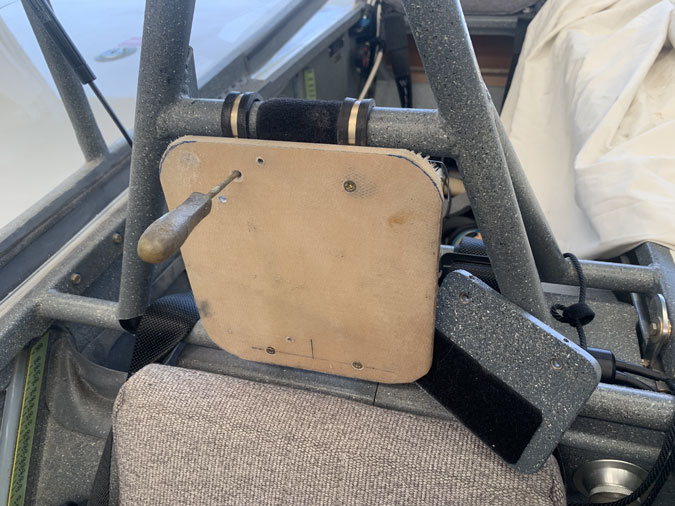
Version 2. That’s the big piece above. Yes now hose or P-Clamps top and bottom. Four of the things! At least I had found an old bit of foam with glass both sides. That’s why I keep scraps.

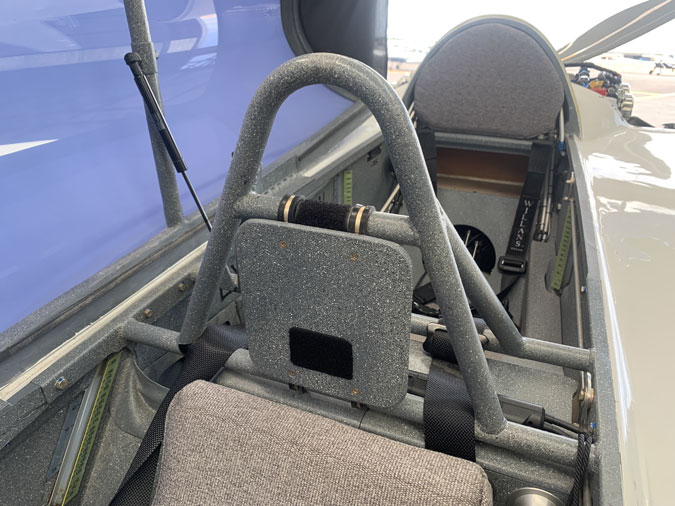
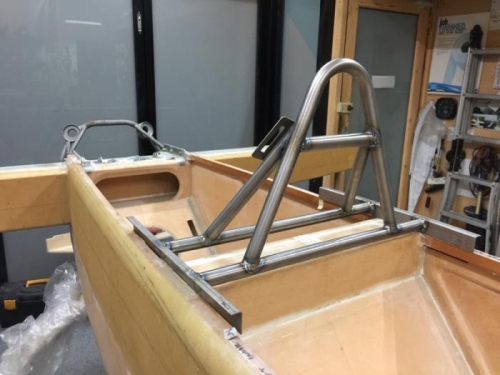
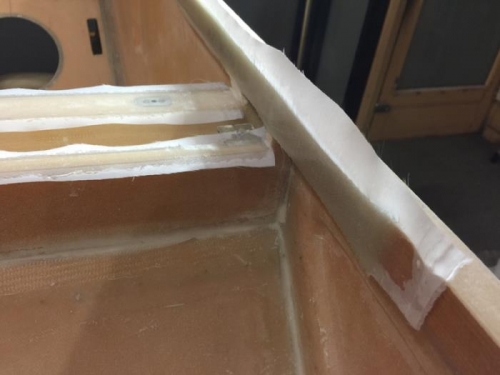
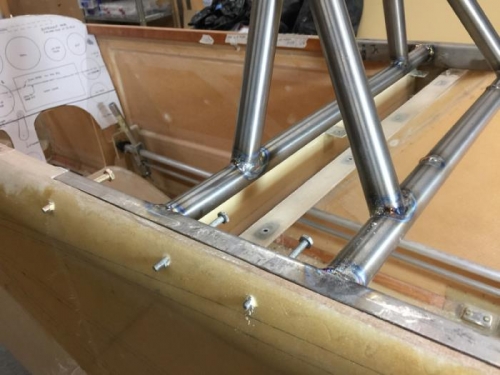
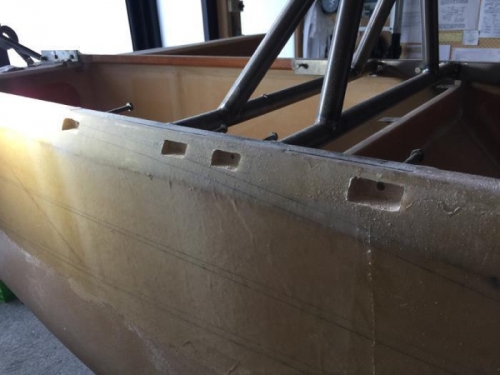
Looks pretty nice eh? Rock solid and weights a lot more than it should for just a headrest support BUT… As I was thinking how to do this I realised that if I store things on that tray for cockpit use I need to make sure they are secure and that they don’t fall forwards in turbulence. I needed a back board that I could velcro a nice big bag onto.

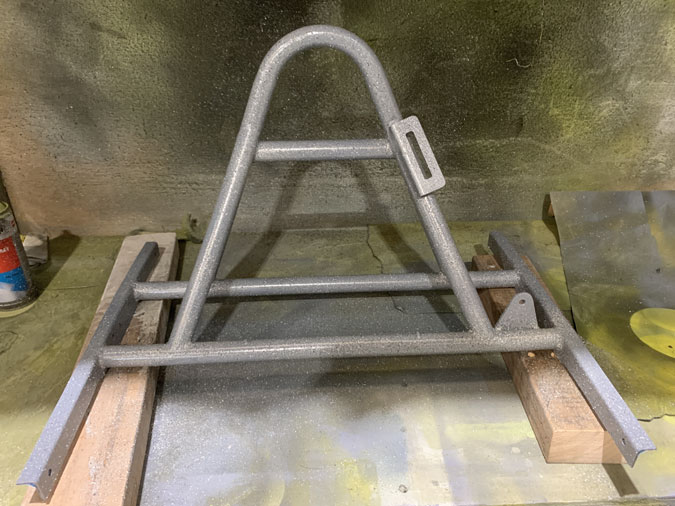
Perfect, I get a two of one here and I can now self justify the extra weight!

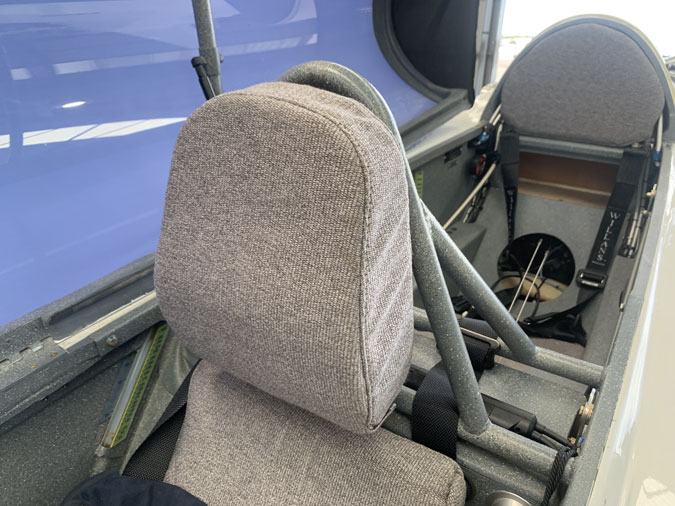
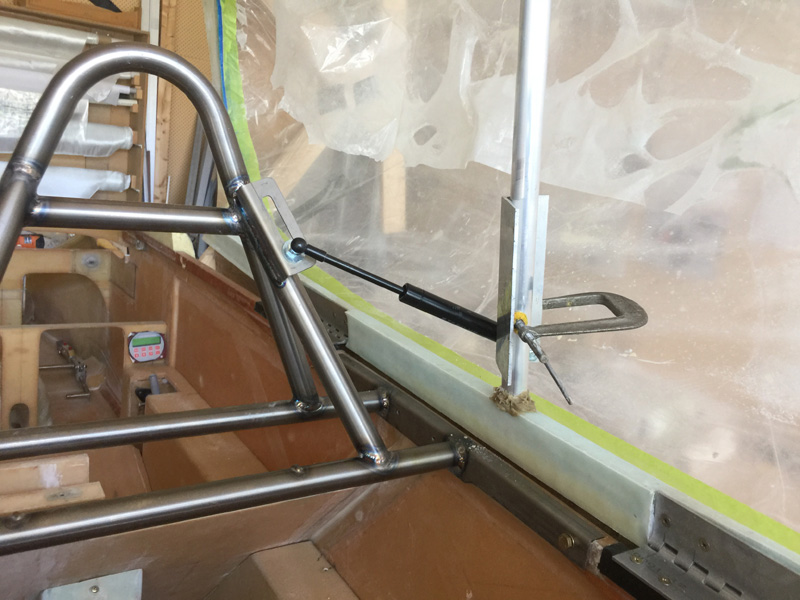
Headrest secured, problem solved.


Titanium Rollover 8

Date:  10-23-2020
Number of Hours:  4
Manual Reference:  no ref

The last part of the rollover task was to paint it. I toyed with a lot of ideas but in the end went for the finish that matches the rest of the interior. This way it becomes a part of the insides rather than a stand alone feature.

First up after the clean and prep, just rattle can primer.

Then the textured Rustoleum paint.

It has a LOT of texture.

Finally multiple spray coats of the 2K Matt finish.

After a bit of a sand to dull and smooth the exterior, the rollover fits right in with the rest of the internals.

I did do more work on the cover plate that goes under the rollover. This is access for the heat vent, external speaker and USB power.  I filled one hole so just three fasteners remain. This way the cover can come off with the rollover bolted on. No pics as it’s just not very exciting.

Titanium Rollover 1

Date:  04-12-2017
Number of Hours:  1
Manual Reference:  no ref

I am going with a Titanium rollover rather than the plans fiberglass headrest.

The three drawings below are what I gave a quality welding operation to work from, I’m yet to learn CAD. They did a great job. ‘Grip Sport‘ in Thomastown, Victoria, Australia who also supplied some titanium flat plate that they bent to make the angle sections.

The tubing I supplied to the fabricators came from ‘Titanium Joe‘ in Canada.

Titanium 1″ OD tube Grade 9 3AL2.5V CWSR 0.0510″ thick

I ordered 2 pieces 60″ long and one piece 42″ long and that was about the right quantity. There was a couple of feel left over some of which was used for test bending.

The design I mainly stole from pictures of Wayne Blackler’s beautiful Long-EZ and I just went a little lighter in the material diameter. Its not like I’m ever going to test this thing after all. If I do and survive then I’ll say the design is good. I’m sure it will be great for ground handling.

These are scans of the drawings I did. I’ve left them as large files. Yes I have no CAD skills at the moment, I think I’ve already alerted you to this!  A pencil and paper worked out to be the quickest way to transfer information to the fabricators.


Titanium Rollover 2

Date:  04-13-2017
Number of Hours:  1
Manual Reference:  no ref

Here’s the rollover. Of course I have a job to do to install it. These pics are just the unit sitting on the airframe.

Weight came in at 3lbs 2ozs. Other people have done rollovers using 4130 steel in the 6 to7lbs range. Its a significant weight saving.

3lbs 2ozs

Placed on the fuselage

On the fuselage, not yet fitted so you can see the angle support

Titanium Rollover 3

Date:  04-14-2017
Number of Hours:  6
Manual Reference:  no ref

Time to fit the new rollover. The angle iron part was far from straight so it was an hour or so with the rubber mallet and clamps trying to get something like a straight edge. I came close.

After looking at a lot of other peoples pics I decided where exactly the rollover will sit and I marked it out. Then a while cutting out the previous top and hardpoints I’d made for the plans rollover. That’s out the window now, It turns out I will use some of that structure so its all good. I might go for a screw on top…we’ll confirm this idea tomorrow 🙂

As you can see I’ve had to inlay the rollover angle into the longeron. That was done with a small dremel router, long wood chisel and a flat permagrit file.

Tomorrow I’ll add some BID plies just to close out the gaps of a 1-2mm or so. This only strengthens the longerons a little so I’m fine with that. I may end up trimming the length of the angle iron part too. There is still a bit of work to secure this to the sides and it now seems I’ll have to add a few fasteners that go vertically just to ensure the rollover sits flush for a good and repeatable canopy seal.

Overall this is a fun job that should be done in a few days. Then I can get on with measuring the proposed canopy size and get some quotes. I really like working on the plane when decisions are clear and its just…work. Indecision, or rather the processes of working out how to do something, eats time and is this project’s biggest delay item.

Longeron cutaway

Careful fit

Center part also removed


Titanium Rollover 4

Date:  04-15-2017
Number of Hours:  8
Manual Reference:  no ref

Today started with leveling the seat back to a good gap allowing a top tray later. This took a while with sanding sticks and the vibration cutter although not in that order.

After another think, I decided that a removable tray below the rollover, while more work, would allow me to easily lay wires across the plane up at the top of the longerons. Nothing like extra provisions eh? I might even fit some electronic box in there although its pretty tight.

This meant nutplates had to be installed and I had a bunch left over from the first few failures of the noselift sock. Four of them went in the seatback. I also had some glass angles I’d made for something else and never used. They went in the front section as you see in pic 1. The rest into the foam seat back. I glued these in with 5mt and flox.

Then a lot of glass was cut on foil. I also did the seat top foam with a ply of BID which is not pictured, you’ll see that in the next log. The rollover has a couple of mill to fill up at the sides which is perfect for reinforcing the longerons locally. I did 12 plies of BID per side as you might see in pic 3. Some of that will get sanded off but not much. I want a nice close fit for this rollover before I start drilling holes and adding bolts. The seatback got healthy flox corners of course and one ply of BID and some peel ply just in case I have to add any micro to get a flat top for the shelf. We will see tomorrow how it all worked out after a cure.

Hardpoint and flox corners ready

All plies done

12 ply longeron reinforcement


Titanium Rollover 5

Date:  04-16-2017
Number of Hours:  8
Manual Reference:  no ref

I quickly cleaned up yesterdays single ply with flox corners. I wasn’t so happy with the top plate I’d made as it had a bubble and seems like it will be a faction thick. I decided to do another layup of 22.5″ X 8.5″ foam only 1/4″ but this time two ply and no peel ply as its easier to see faults. This one is looking good.

Next up were some hours of carefully cutting down yesterdays 12 ply of BID on the longerons to perfectly fit the rollover. I had to cut a lot away but now have a good fit without stressing the sides. I would prefer it the angle iron was perfect but it came a little distorted from the welding so I’m working around that.

Next up was drilling out the titanium angle for 2 X AN4’s and 2 X AN3’s per side. I got to sharpen a few drill bits as required. Once all this was done I clamped the rollover in position and drilled out the 8 holes as you see in pics 2 and 3. ‘Luckily’ I had some long 1/4″ and 3/8″ bits as well as a right angle drill adapter.

Clean up

Challenging drill out

Ready for more hack work!


Titanium Rollover 6

Date:  04-18-2017
Number of Hours:  6
Manual Reference:  no ref

With holes drilled and positioned I just needed to cut access down to the ‘hard’ longerons from the outside as you see in pic 1. I though for a while as to where strength is needed and given the bolts are in shear and if I’m ever inverted, the weight of the fuselage is really assisting the rollover to stay on the longerons. Yes except for a pulling force from the sliding motion trying to tear things out of the fittings. I should be fine, especially if I stay upright.

Pic 2 is preparing backing plates to rivet the nut plates to. I had some 0.068″ 6061-T6 on my metal pile so I though that will do nicely. I’m using per side, 2 X AN3-11A’s on the insides and 2 X AN4-12A on the outsides.

Having trimmed everything to fit and after doing a test set up I have floxed the nut plate assemblies in place and will leave it a day or two to cure. Then with a bit of luck the beeswax on the bolts will allow them to come out and I will have my removable rollover.

Still a bit to do here but the main work is done.

Slotted sides

Nut plate plates

Bolted and floxed in


Titanium Rollover 7 (Canopy Stay)

Date:  04-01-2018
Number of Hours:  1
Manual Reference:  no ref

The canopy stay is covered in the Canopy Chapter 18 logs. However I did have to alter the rollover with a new bracket so I’ve added some details in this section in case your only interest is the ‘Titanium Rollover’.

The original bracket idea on the diagonal didn’t work out. It tends to twist the strut off its fittings as I found with the test jigging above. My unasked for advice is don’t do it that way! I needed a new position to pivot the gas strut from.

Here’s the drawing I gave the welders and the result below. They had a couple of goes at it.


This works well. The strut moves in line with the canopy as it comes down.


Rollover Shelf

Date:  04-19-2017
Number of Hours:  10
Manual Reference:  no ref

Time for that rollover shelf. I first made a piece in 10mm foam, glassed it and then realised it was too thick. OK how about 5mm foam but with two plys per side? Pic 1 has such a beast fitted to size. Pic 2 and I’ve turned it over to do another two ply on the reverse side. I added some flox hardpoints too for the screws.

Pic 3 has this almost fitted. The front three nut plates tended to bend when I put screws in and were just a PIA! So I’ve cut them out and done new aluminium angle with nut plates. It took a while and its one cure cycle per nut plate. I have one more to do tomorrow and we will be good. It was frustrating for such a minor thing but like the whole build, it needed to be done right. No more pics for this but a couple a hours to go before that little removable shelf is done.

First fitting

Hardpoints

Almost fitted


CategoryLogsHours
All157617079
Uncategorized135
Ch 3 Education220
Ch 4 Fuselage Bulkheads25231
Ch 5 Fuselage Sides32283
Ch 6 Fuselage Assembly30270
Ch 7 Fuselage Exterior14140
Ch 8 Roll Over/Seat Belts990
Ch 9 Main Gear/Landing Brake71642
Ch 10 Canard28287
Ch 11 Elevators36298
Ch 12 Canard Installation12102
Ch 13 Nose and Nose Gear1291097
Ch 14 CenterSection Spar57525
Ch 15 Firewall and Accessories448
Ch 16 Control System27237
Ch 17 Roll/Pitch Trim System654
Ch 18 Canopy70502
Ch 19 Wings, Alierons1271090
Ch 20 Winglets/Rudders71528
Ch 21 Strakes - Fuel/Baggage65437
Ch 22 Electrical System591031
Ch 23 Engine Installation961152
Ch 24 Covers/Fairings/Consoles25202
Ch 25 Finishing561084
Ch 26 Upholstry340
Fuel System46310
Rollover1050
Cabin heating System60331
The Ferry Tank335
Blog2694182
Build Mods2252513
Nose Gear Doors856
Wheel Pants/Gear Leg Fairing40473
Oxygen System762
Roll and Pitch Trim964
Winglet Intersection Fairings445
Baggage Pods11104
Pilot Side Windows437
RAM Air & Hellhole Cover15177
Main Gear Beef Up322
Post Cure124
Fire Extinguisher16
Wing Fences13
EVS (Enhanced Visual System)130
Hinge Upgrade115
Cowl Keeper110
Rudder Gust Locks19
Cooling20607
Taxi Tests42
Flying10

Complete the Test Flight Program

40Days

Round Australia in Four Flights

315Days

Round the World Departure

458Days

Rough River Flyin, Sept 23, 2026

490Days

© Copyright 2025 Dave Berenholtz