• Home
  • Flying
    • First Flight
  • Build by Chapter
    • Ch 3 Education
    • Ch 4 Fuselage Bulkheads
    • Ch 5 Fuselage Sides
    • Ch 6 Fuselage Assembly
    • Ch 7 Fuselage Exterior
    • Ch 8 Roll Over/Seat Belts
    • Ch 9 Main Gear/Landing Brake
    • Ch 10 Canard
    • Ch 11 Elevators
    • Ch 12 Canard Installation
    • Ch 13 Nose and Nose Gear
    • Ch 14 CenterSection Spar
    • Ch 15 Firewall and Accessories
    • Ch 16 Control System
    • Ch 17 Roll/Pitch Trim System
    • Ch 18 Canopy
    • Ch 19 Wings, Alierons
    • Ch 20 Winglets/Rudders
    • Ch 21 Strakes – Fuel/Baggage
    • Ch 22 Electrical System
    • Ch 23 Engine Installation
    • Ch 24 Covers/Consoles
    • Ch 25 Finishing
    • Ch 26 Upholstry
  • Build Mods
    • Liquid Cooling, Numbers, Weights and Flow
    • Cooling
      • Solving Ground Cooling 1
      • Solving Ground Cooling 2
      • Solving Ground Cooling 3
      • Solving Ground Cooling 4
      • Solving Ground Cooling 5
      • Solving Ground Cooling 6
      • Solving Ground Cooling7 – Test Data
      • Solving Ground Cooling 8 – Flap Building
      • Solving Ground Cooling 9 – Hinges
      • Solving Ground Cooling 10 – Lower Flaps
      • Solving Ground Cooling 11 – Upper Flaps
      • Solving Ground Cooling 12 – Completed
      • Cooling the Beast 1
      • Cooling the Beast 2 – Lower Cowl Expansion
      • Cooling the Beast 3 – KW Oil Cooler Diffuser
    • EVS (Enhanced Vision System)
    • Cowl Keeper
    • Rudder Gust Locks
    • Wing Fences
    • Post Cure
    • Hinge Upgrade
    • RAM Air & Hellhole Cover
    • Main Gear Beef Up
    • Pilot Side Windows
    • Baggage Pods
    • Winglet Intersection Fairings
    • Titanium Rollover
    • Nose Gear Doors
    • Wheel Pants/Gear Leg Fairing
    • Cabin heating System
    • Fuel System
    • Roll and Pitch Trim
    • Oxygen System
    • The Ferry Tank
    • Cruise Angle Indicator
    • Fire Extinguisher Install
  • Round the World
    • RTW Route East #12 rev1
    • Survival Equipment
    • Training Flights
  • Other Stuff
    • Blog
    • Around the World: RAAUS Sport Pilot Issue 110
    • Taxi Tests
    • Summary Feb ’24 from an SAAA Meeting
    • AOPA Pilot 27th Sept 2019
    • Build Tests
    • Flying Stories
      • A Long Easy Dream ’06
      • Townsville ’07
      • Cairns ’08
      • Albany ’08
      • East Coast ’08
      • Brisbane ’09
      • Cairns ’10
      • Perth ’10
    • Non Build Mods
      • F16 Scoop for JZE
      • Ram Air Box for JZE
      • Strange Tips
    • Milestones
    • Links
  • Contact

Pilot Side Windows

Home
Build Mods
Pilot Side Windows

Side Windows Completed

Date:  03-12-2019
Number of Hours:  15
Manual Reference:  no ref

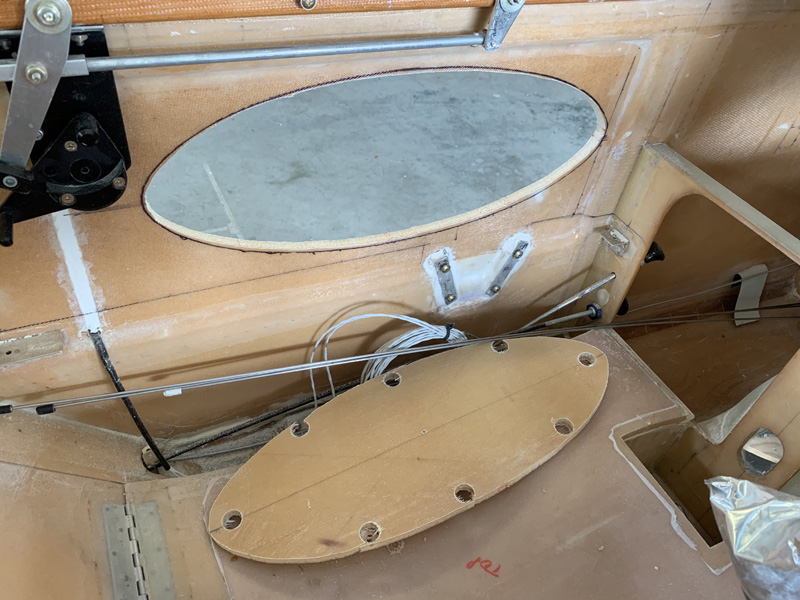
Just a word on weights. The two perspex windows together weigh 2lbs 3ozs all up. I kept the side structure ellipses that I cut out and weighed them, 12.7ozs. So thats a net gain of 1lb 6.3ozs. Lets take a bit more off for the fine cutting out and more foam removal. Then we have to add the epoxy, flox and the glass UND strips and a bit of filler.  I’m going to call it a 2lb penalty overall at worst. I still consider this a great mod.

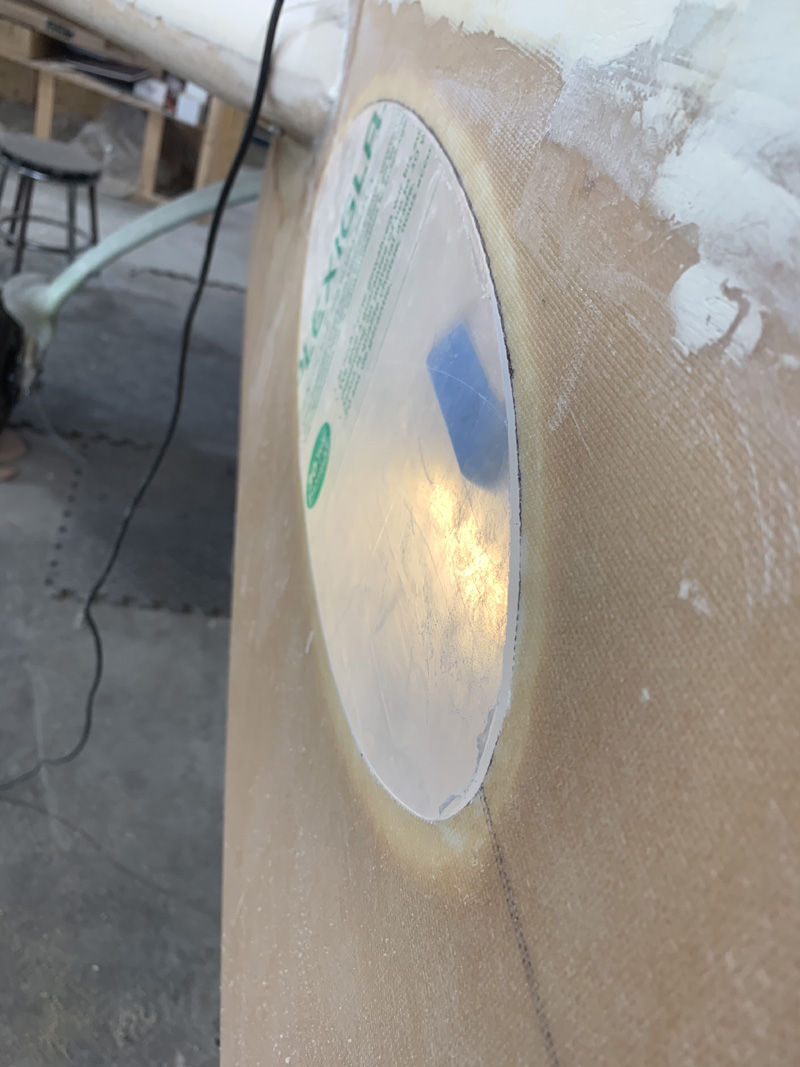
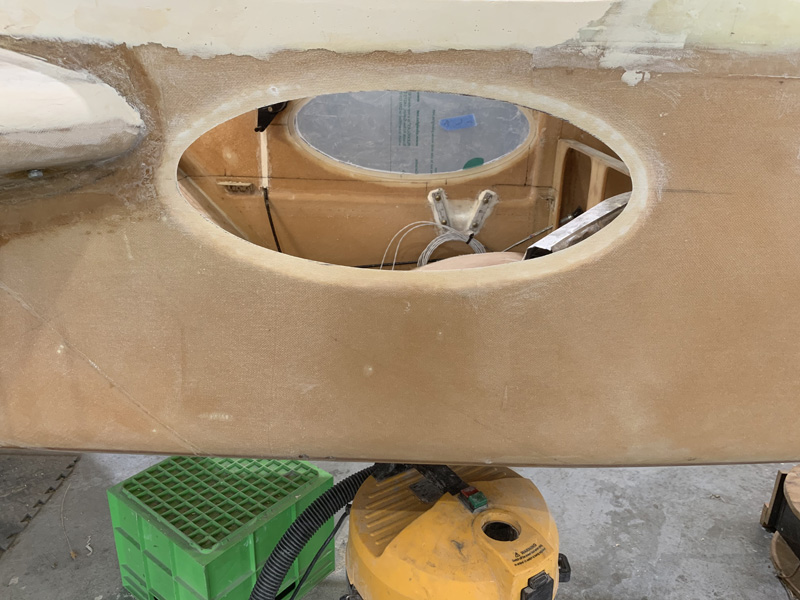
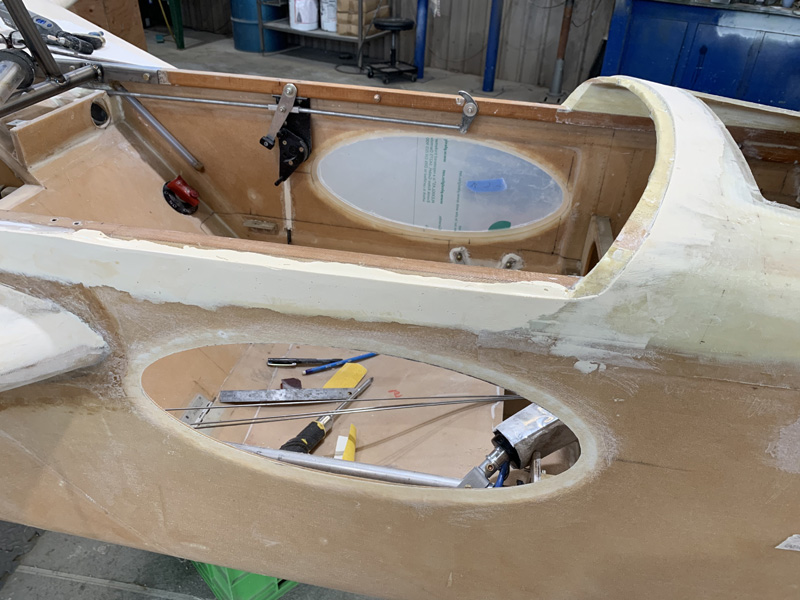
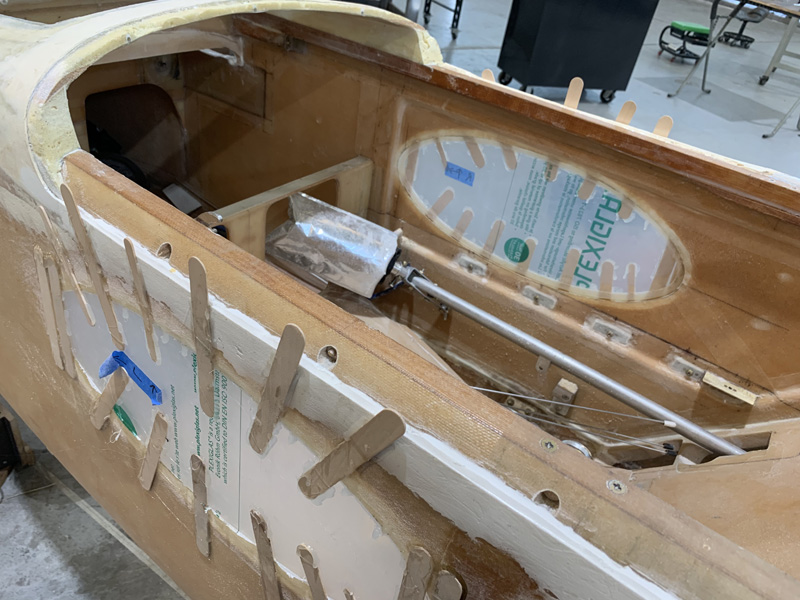
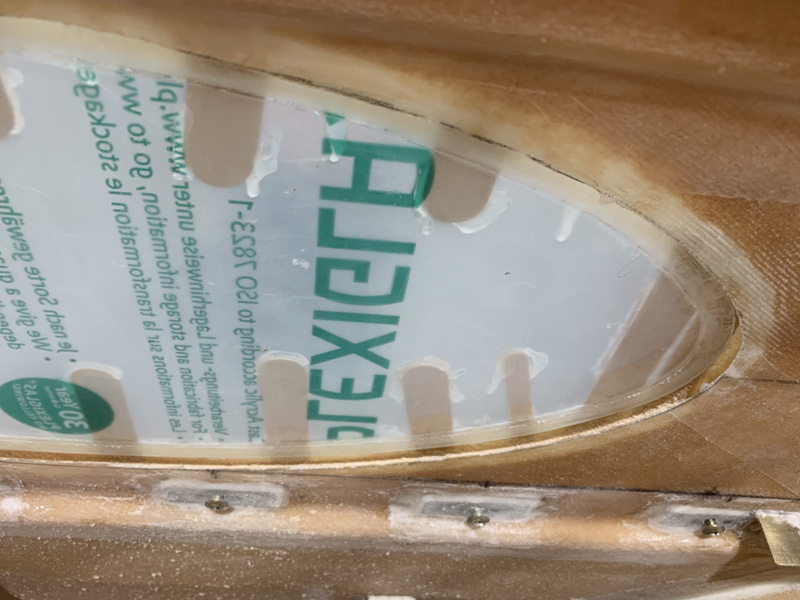
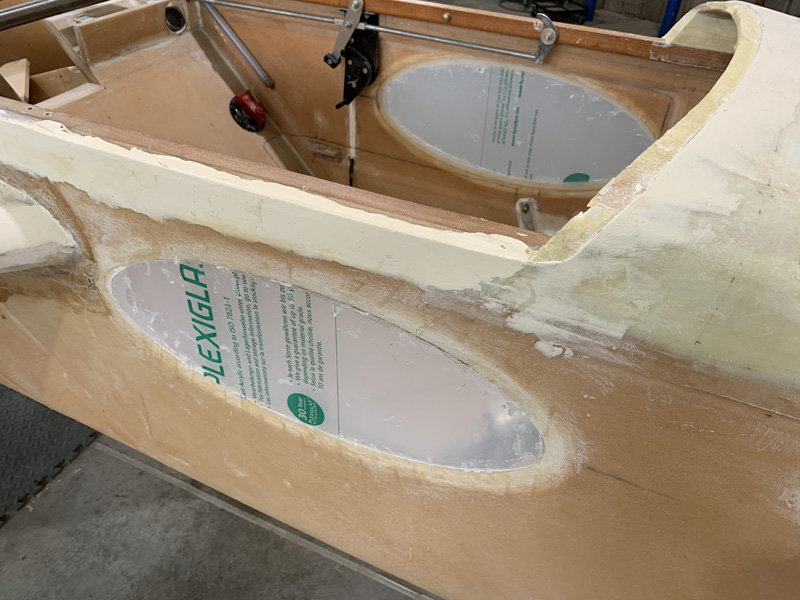
First up was cleaning all those holding sticks off as well as the hot glue on the protective window plastic. It took a while but I was very careful. The windows are almost perfectly flush with the outside skin.

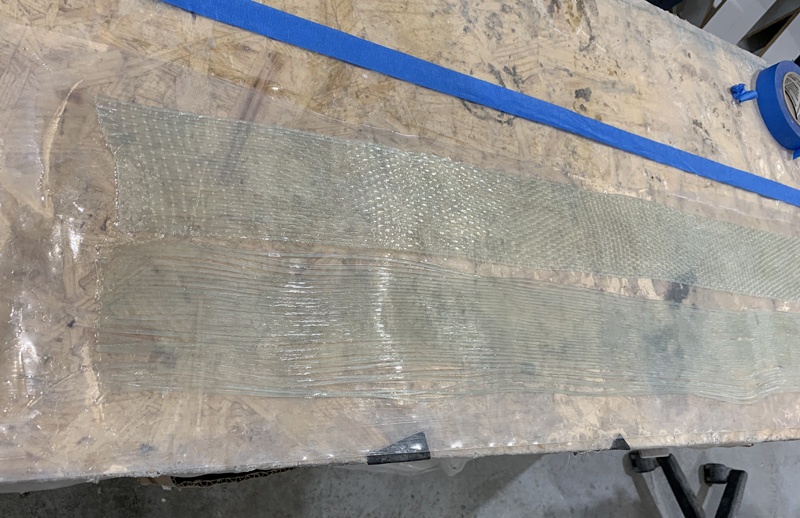
The next job was to fill that 1″ inside trough. I’ve used the same UND glass as was used on all the spar caps. You can see above the two pieces wetted out. I’ve removed the key and cross threads from the bottom one. Later the same with the top one. I used one total piece as above per side.

I grabbed 4-5 strands at a time and pushed them into the cavities with a mixing stick. Eventually the troughs were filled and then some peel ply.

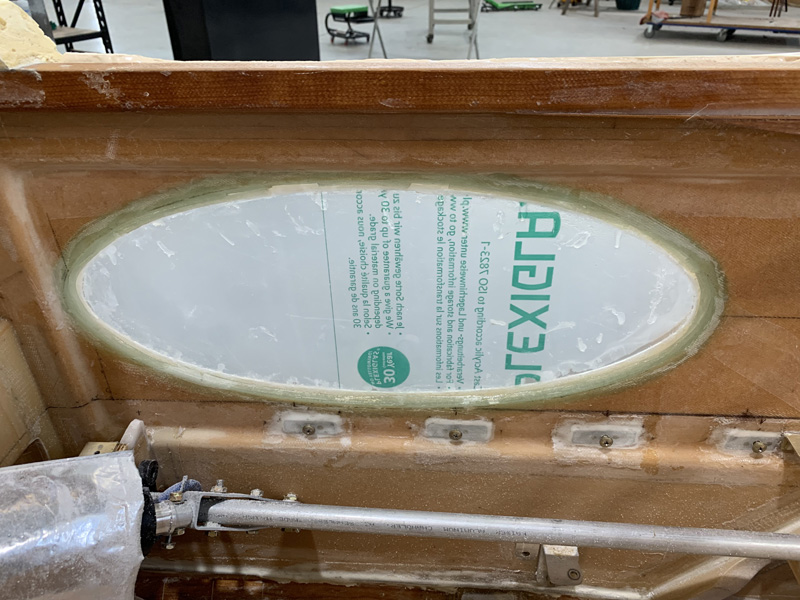
After cure and a clean up the ‘ring of glass’ was not pretty but I am really confident this is very strong. Probably stronger than with no window. Certainly in compression. Maybe not in shear or twist, but still strong.

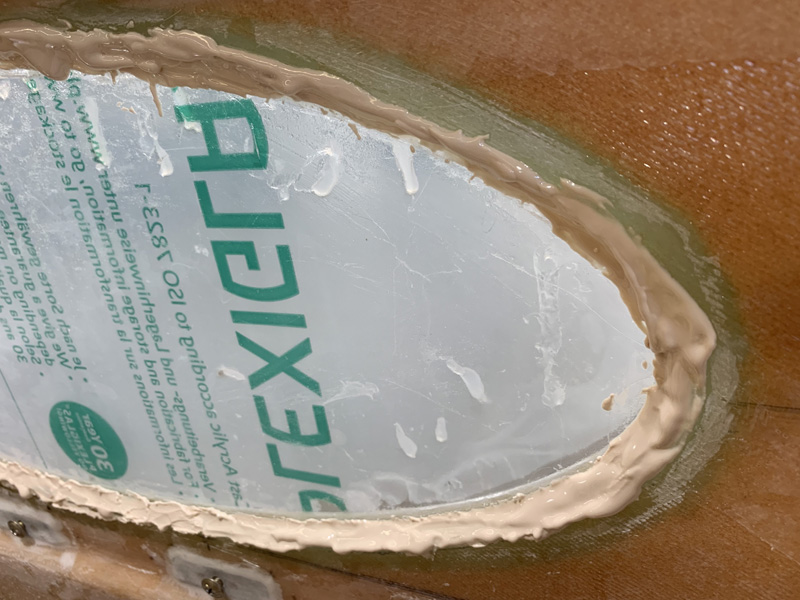
The next day, some lightweight filler.

Today I cleaned up the filler as best I could. It may need another go very close to painting the plane’s inside. At that time it may be best to remove the protective plastic and see where I am at. For now these windows are done!

 

Installing the Perspex Windows

Date:  03-09-2019
Number of Hours:  6
Manual Reference:  no ref

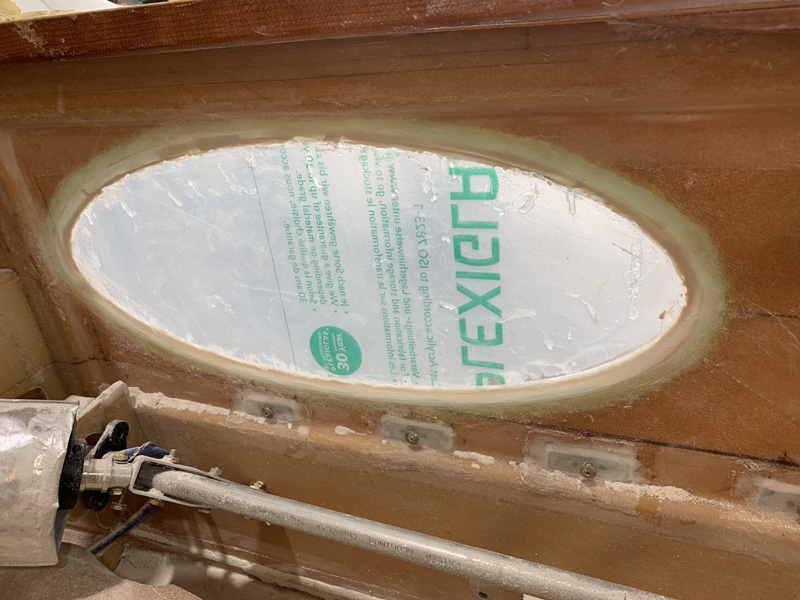
Today I finished off the fitting and floxed in the windows.

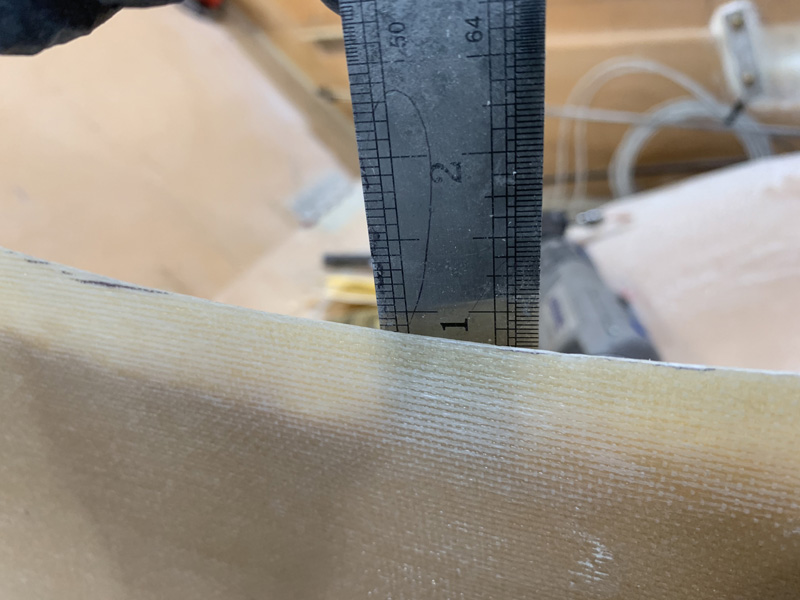
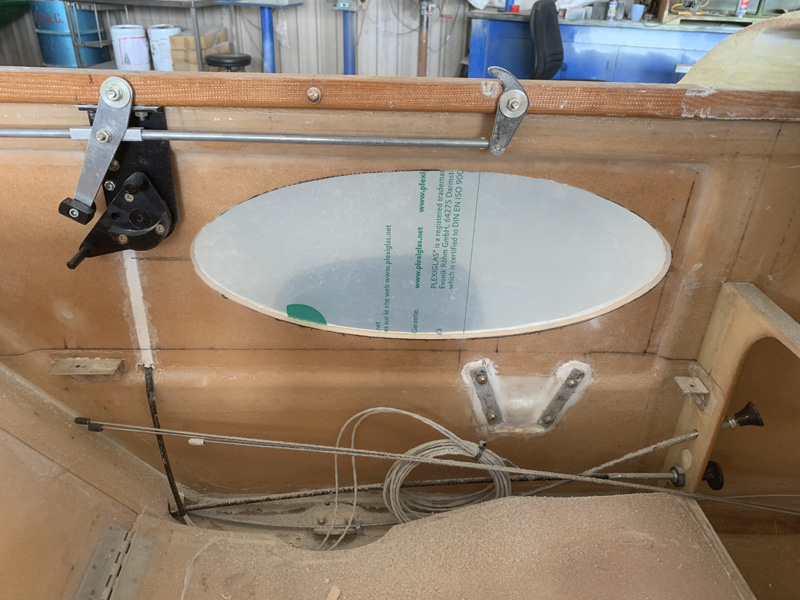
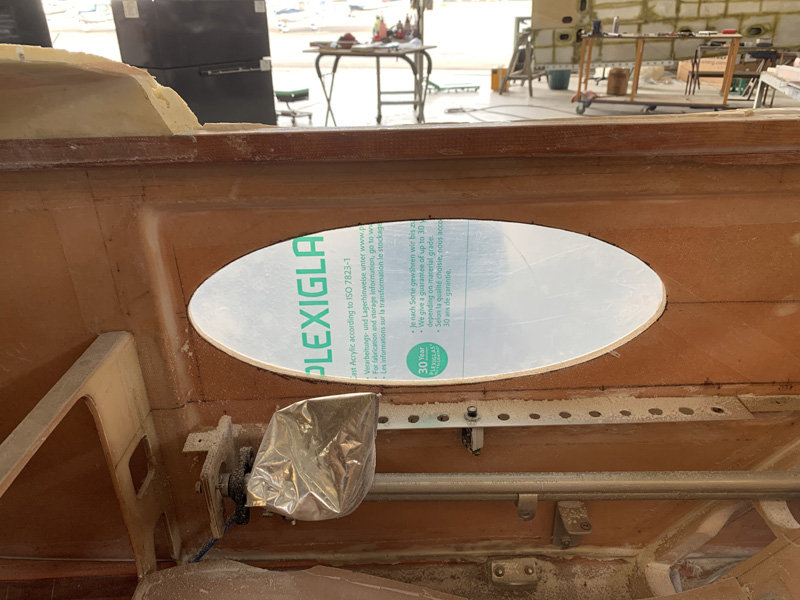
First up was to get the windows fitted from the inside. This meant removing about 0.5″ from the inside cutout. As you see above I could then push the window through from the inside where it would protrude through the outside hole. Yes it is beyond flush. Given the stepped lip is 3mm and the sides are only .022″  (two ply of UND) it makes sense.  Well its .55mm  so I need about 2.5mm of flox to pad it up with. 🙂   Or a tenth of an inch.

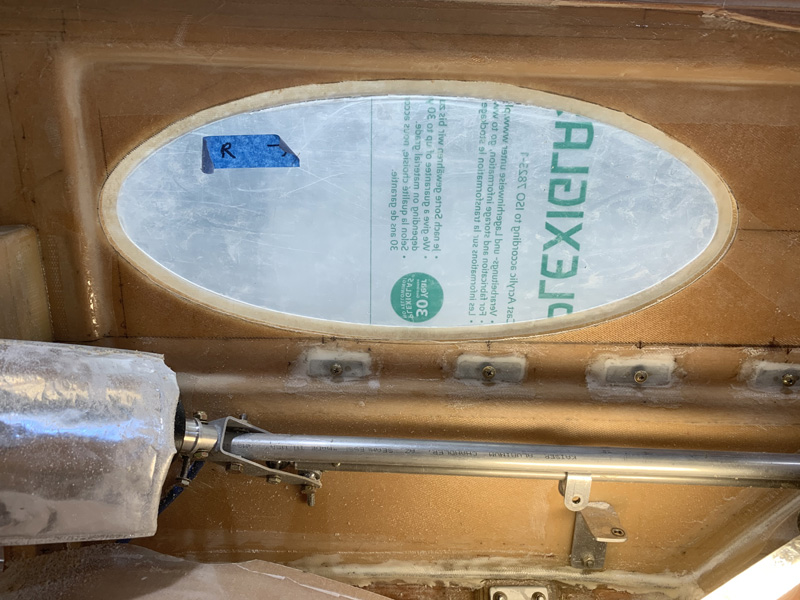
Here you can see the inside lip flush against the inside wall which as I said is .5″ greater in diameter all around than the outside. Effectively we capture the window.

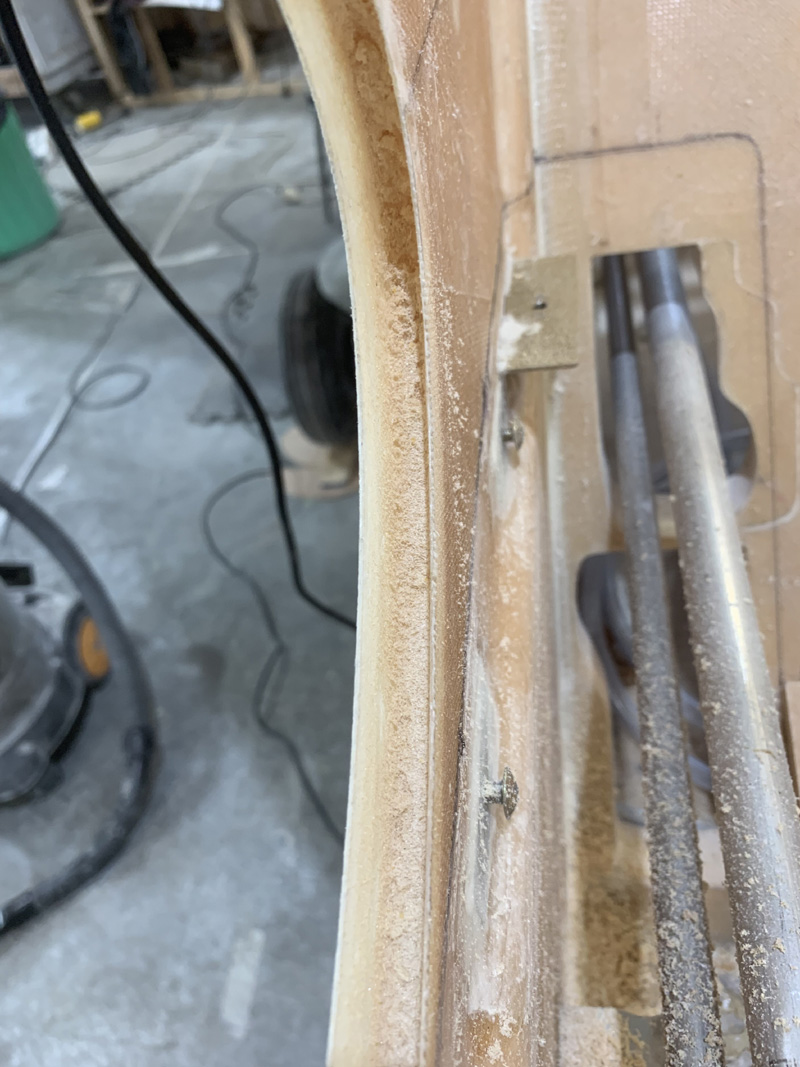
I continued digging out the foam between the skins to a one inch depth and of course thats only .5″ on the inside. I feel this will be enough, others may disagree.

Here’s how the inside trough looks.

The colour change at the rim is due to the foam being dug out so its easy to see how deep I’ve gone. I’ve also sanded around the outer lip in preparation for the fuselage fill and fare.

I did a final check and clean up before setting up the jigs and mixing the epoxy. I won’t be seeing through these windows until after the final paint job. The protective plastic will stay in place until then.

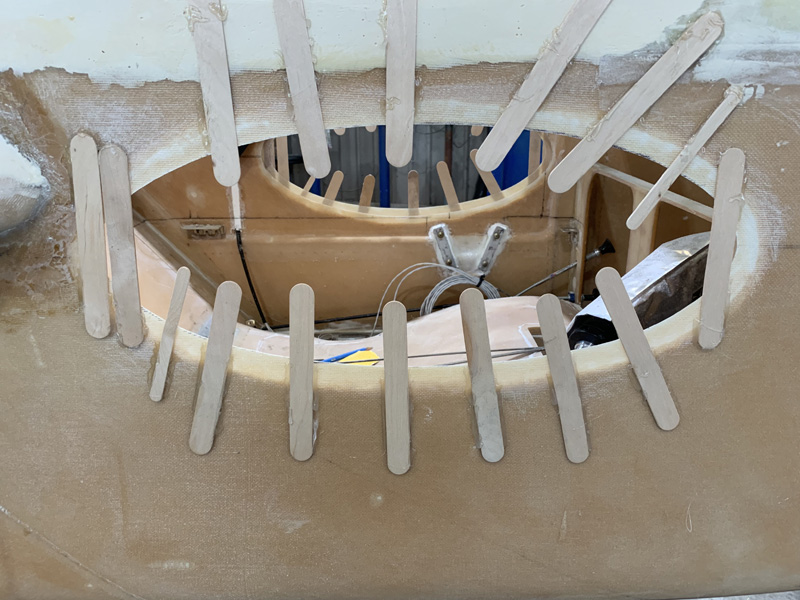
My idea is to get the windows flush with the outside using these sticks and hot glue. There will be a gap between the lip and the sides. I’ll be using plenty of flox to bridge this.

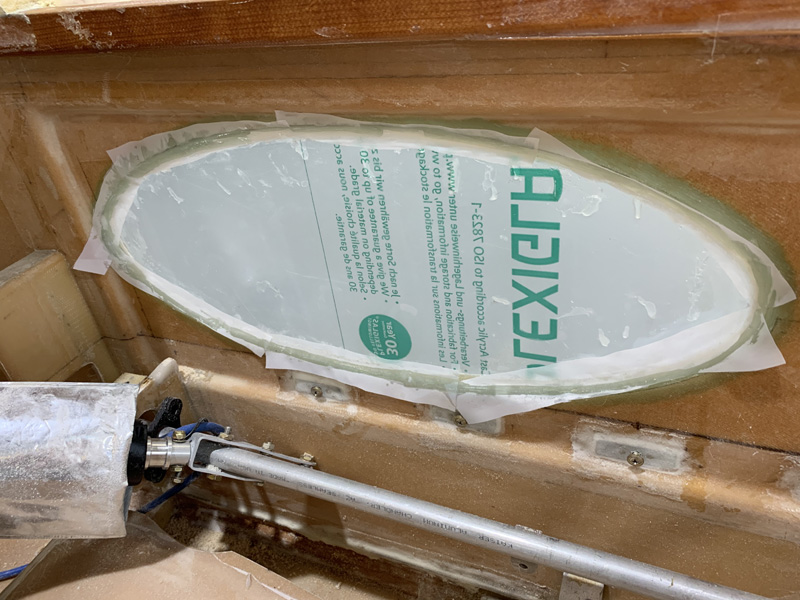
Less than an hour later I have both windows floxed in place with a little hot glue to help hold them.

Here’s how it is on the inside. You can see that even though the window is floxed in we still have a good gap to make reinforcement. That’s tomorrows job.


Cutting the Window Holes

Date:  03-08-2019
Number of Hours:  4
Manual Reference:  no ref

After all these years, today was the day.

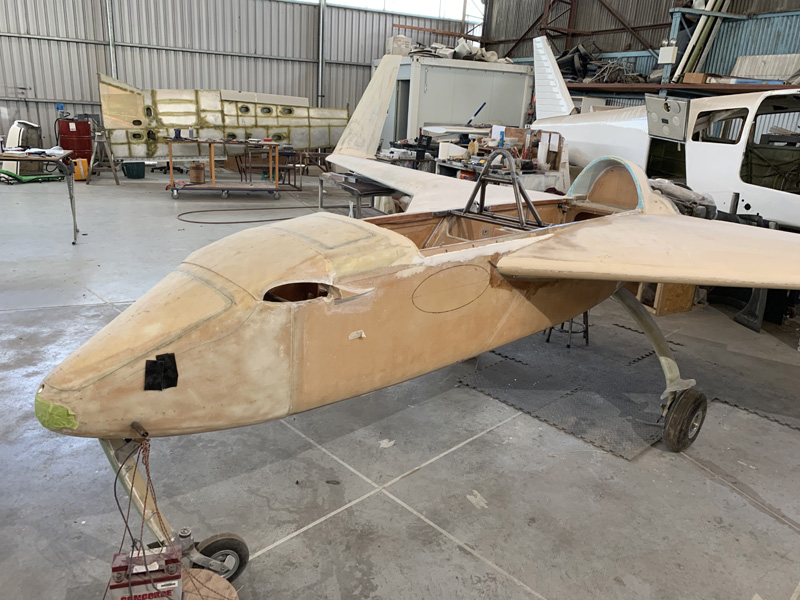
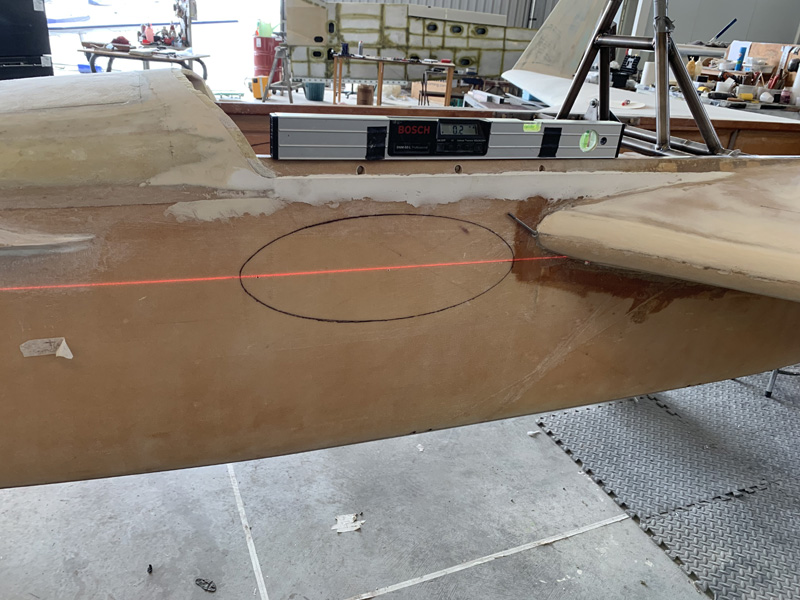
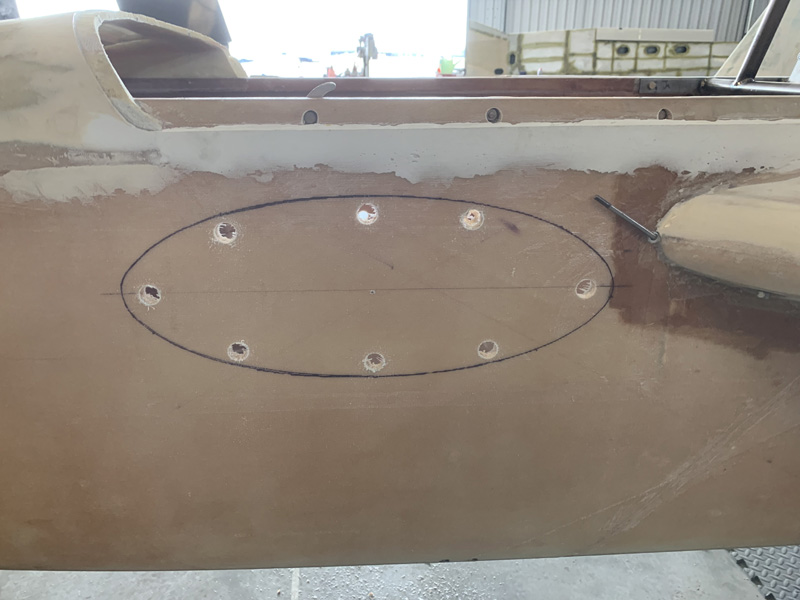
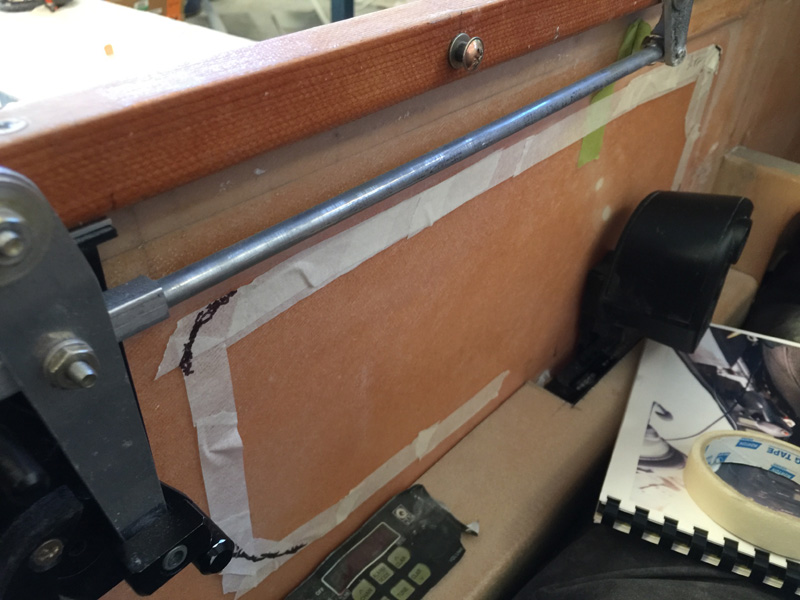
I transferred the inside drawing to the outside. They match within a couple of millimeters so I knew the cut would be in the right place relative to the inside of the cockpit.

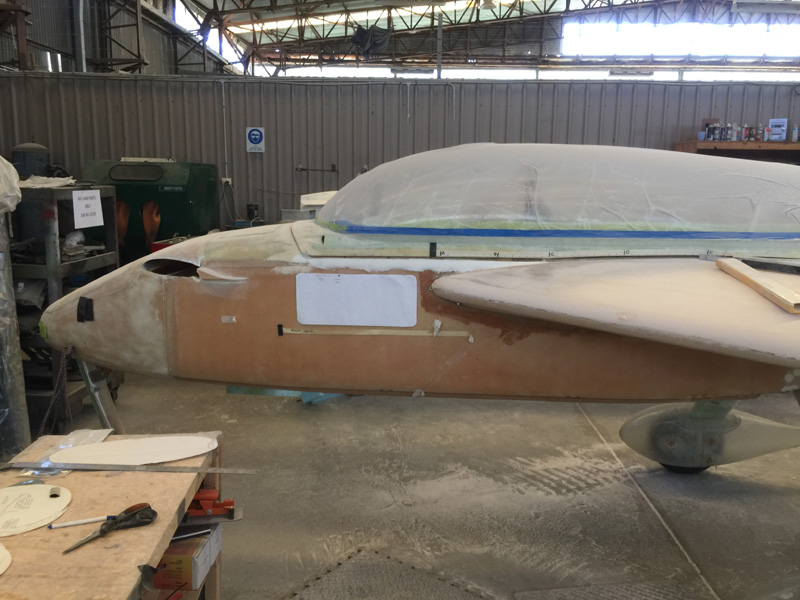
I played around with the laser and eventually, after this shot, got the fuselage level. I was happy with the window markings.

I noticed it took a little while to use the hole saw and make the first cut. There is a real feeling of no going back.

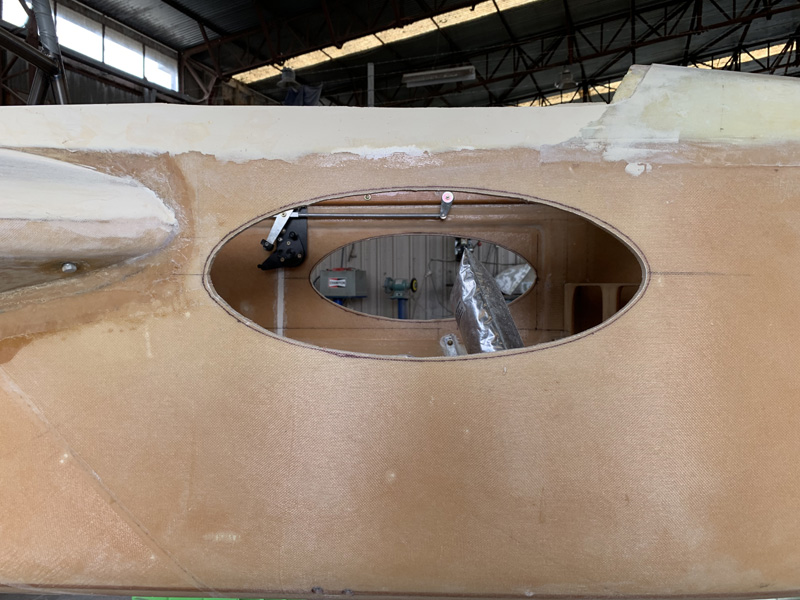
With the holes done I just grabbed the jigsaw and cut between them allowing for a couple of tenths that I would do slowly with the window in hand.

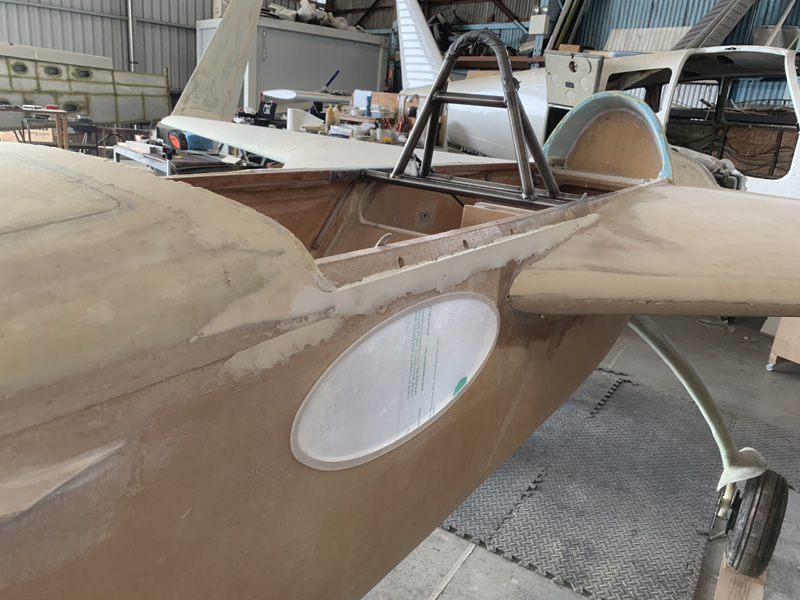
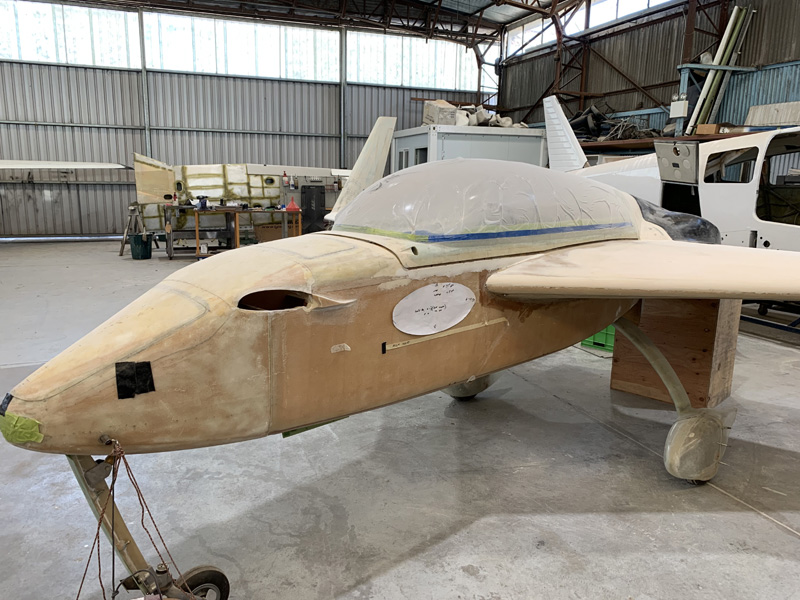
Wow I have cut big holes in my plane! NOW it is individualized. I’ve seen other windows but never an ellipse.

It took another hour to get the window to a press fit from the outside.

It just sits there held by the shape. However the lip goes on the inside of course. This means I need to transfer this fit to the other side of the wall and draw around the outside of the perspex on the inside of the cockpit ready for more cutting.

Lots still to do. This is a great start, I can’t wait to get into it tomorrow. This mod shouldn’t take too long and for once I get to see the resulting ‘look’ in the early stages.


Side Window Planning

Date:  03-01-2019
Number of Hours:  12
Manual Reference:  no ref

This is the longest planned mod of the build. I was going to add pilot side windows to my flying Long-EZ, VH-JZE some 12 years ago. When I first flew a Long-EZ I was very disappointed with the view despite it being said to be excellent.

I had come from an open frame Gyrocopter which is a totally unobstructed vision except for a tiny panel pod in front. You could even took up through the rotors. Before that I flew sailplanes, mainly an LS3a which has an amazing area of view. After over 1000 hours in my Long-EZ I still can’t see what I am flying directly over without banking the plane. It turns out no matter how many hours you have , the field of view is the same as the first flight. At night I found I wanted to use GPS to ensure I was over an airfield and then checking with high angles of bank.

Pilot Side windows are the solution.

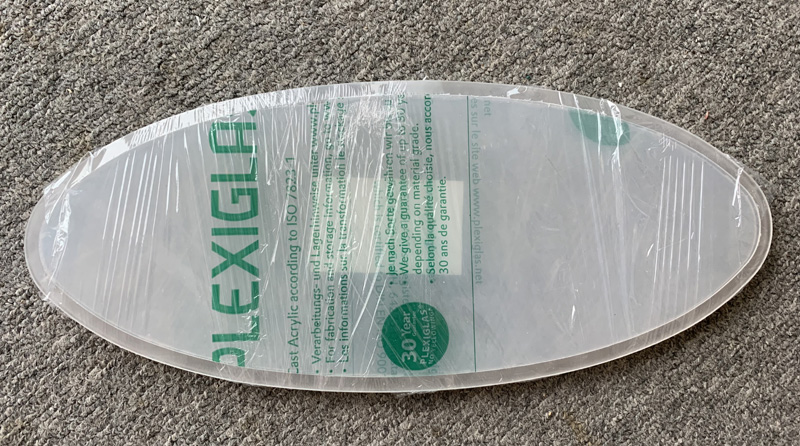
As I eventually started this new build, December 2011, I have saved this modification for now but it was always planned from Day 1. Today I picked up the perspex window CNC cut to my specs. Woohoo!!

This is the maximum possible view area from inside the cockpit.

Here’s what it would look on the outside. Super ugly!

This shape for a window makes sense but Klaus Saviers fantastic Long-EZ has windows identical to this and I don’t want to be a copycat.

Yep, looks great to me but totally impractical as it compromises the view.

This shape is a bit clumsy but it works.  A consideration is that the throttle on the right and the control stick on the left are in the way so that I don’t really need the corners in a rectangle on the lower front. I don’t need them either on the lower rear or top rear. I can compromise a little for the top front if I make the window slightly bigger than I need. This means the useful view is similar to the rectangle view.

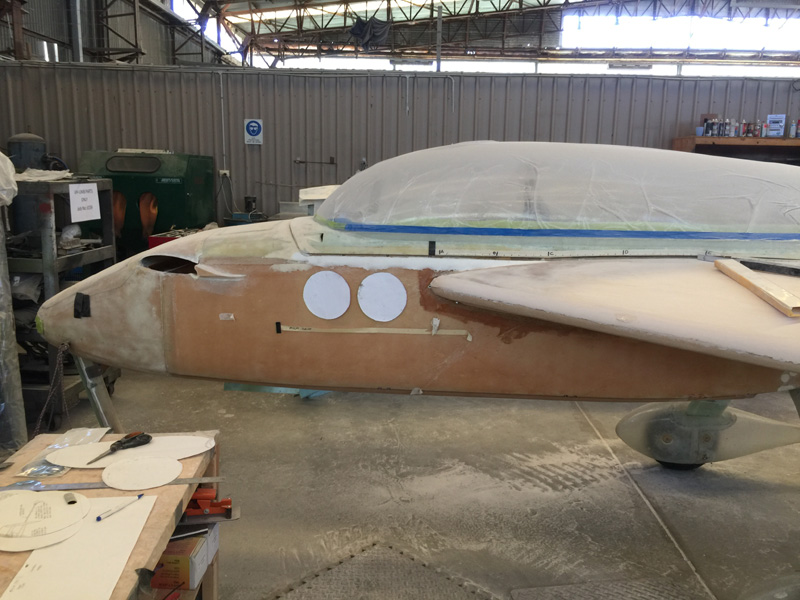
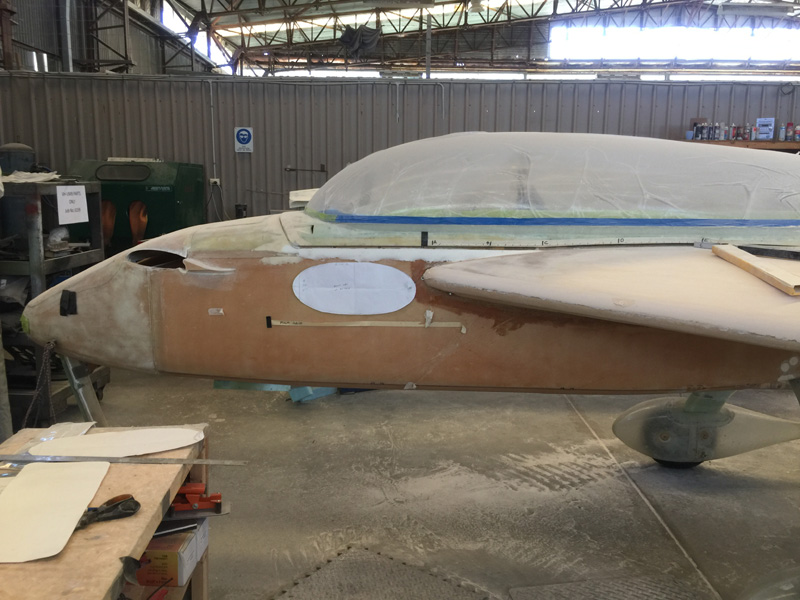
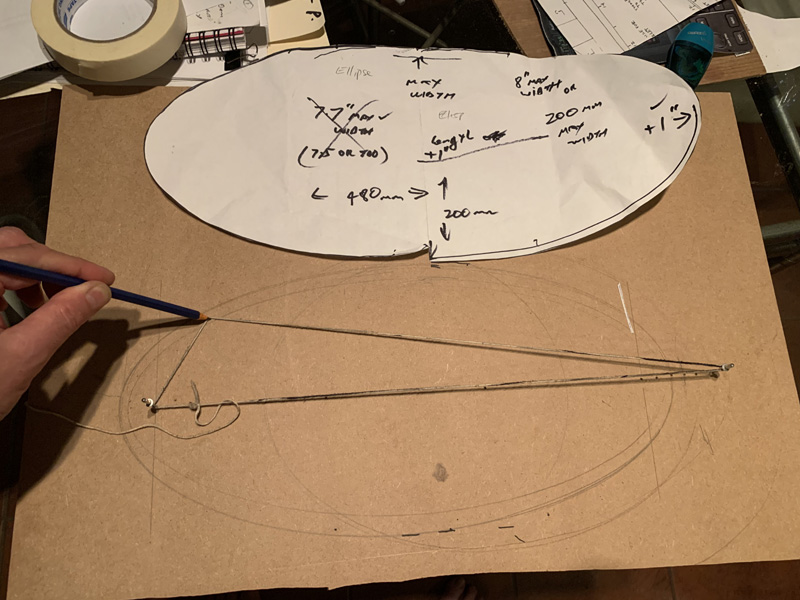
I eventually decided on a geometrically correct ellipse 200mm wide by 480mm long which is a lot nicer than the previous picture shape. This is an elegant design that works with the rest on the plane. I hope you agree. The lost corners aren’t really lost given the size of the window itself.

I just couldn’t get it working in my CAD software given I am less than a beginner. However two nails, a bit of string and a pencil also allow the drawing of an ellipse. When I had this on paper I just marked on it the dimensions I wanted and I then had a ‘drawing’ good enough to get the shape cut professionally.

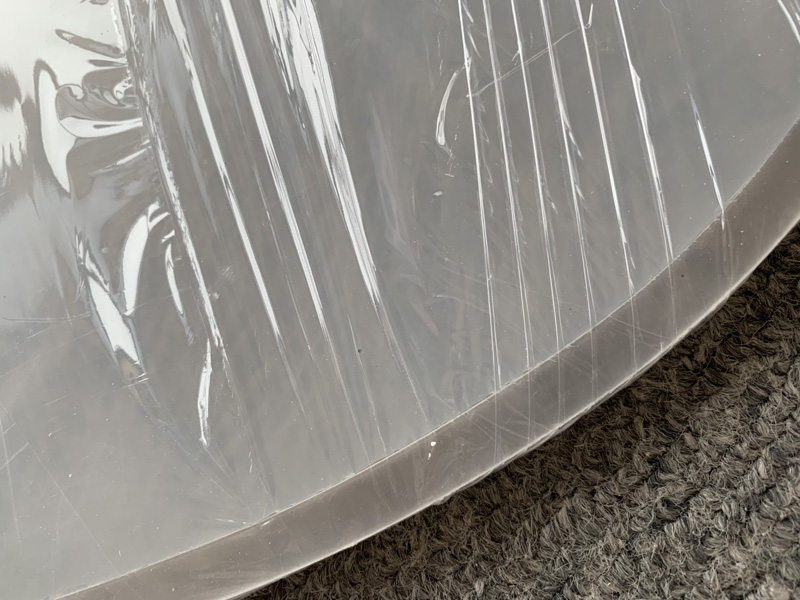
Armed with my drawing and a pile of cash I eventually had the two windows cut out in 6mm thick acrylic. It is known as perspex commercially of course.

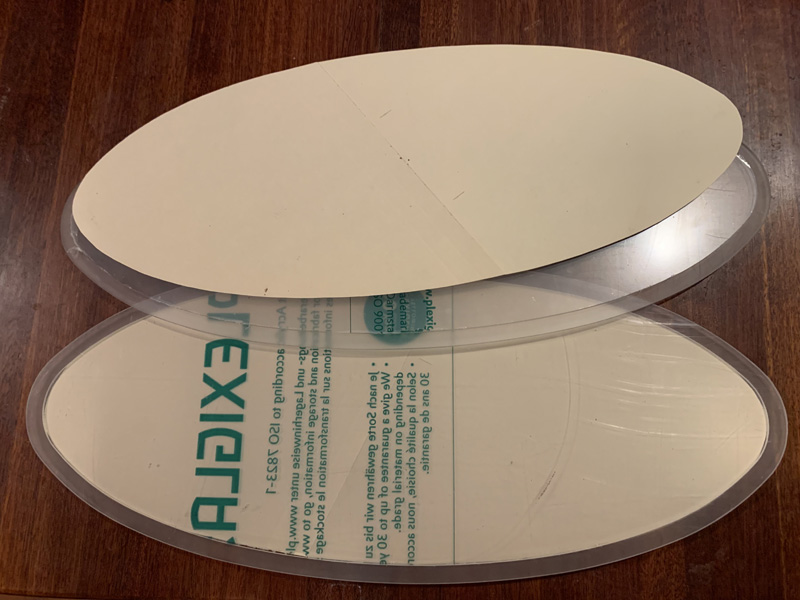
Paying for it to be cut was all about getting a 10mm lip cut down 3mm into the window. Yes I know its a plane build in inches and tenths of an inch. Given this is Australia, a decimal place, I gave my numbers to the window suppliers in millimeters. I will resume my imperial inches later if thats OK with you?

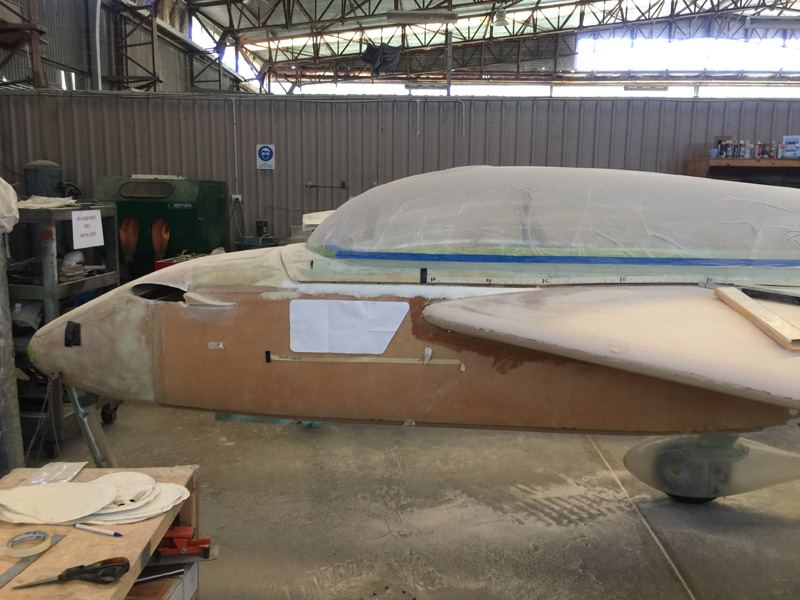
Today I’ve made a couple of manila templates 10mm less all around than the perspex. I’ll use these as my templates for cutting into the fuselage wall.

CategoryLogsHours
All157617079
Uncategorized135
Ch 3 Education220
Ch 4 Fuselage Bulkheads25231
Ch 5 Fuselage Sides32283
Ch 6 Fuselage Assembly30270
Ch 7 Fuselage Exterior14140
Ch 8 Roll Over/Seat Belts990
Ch 9 Main Gear/Landing Brake71642
Ch 10 Canard28287
Ch 11 Elevators36298
Ch 12 Canard Installation12102
Ch 13 Nose and Nose Gear1291097
Ch 14 CenterSection Spar57525
Ch 15 Firewall and Accessories448
Ch 16 Control System27237
Ch 17 Roll/Pitch Trim System654
Ch 18 Canopy70502
Ch 19 Wings, Alierons1271090
Ch 20 Winglets/Rudders71528
Ch 21 Strakes - Fuel/Baggage65437
Ch 22 Electrical System591031
Ch 23 Engine Installation961152
Ch 24 Covers/Fairings/Consoles25202
Ch 25 Finishing561084
Ch 26 Upholstry340
Fuel System46310
Rollover1050
Cabin heating System60331
The Ferry Tank335
Blog2694182
Build Mods2252513
Nose Gear Doors856
Wheel Pants/Gear Leg Fairing40473
Oxygen System762
Roll and Pitch Trim964
Winglet Intersection Fairings445
Baggage Pods11104
Pilot Side Windows437
RAM Air & Hellhole Cover15177
Main Gear Beef Up322
Post Cure124
Fire Extinguisher16
Wing Fences13
EVS (Enhanced Visual System)130
Hinge Upgrade115
Cowl Keeper110
Rudder Gust Locks19
Cooling20607
Taxi Tests42
Flying10

Complete the Test Flight Program

2025/6/30 10:26:01

Round Australia in Four Flights

2026/4/1 10:26:01

Round the World Departure

2026/8/22 10:26:01

Rough River Flyin, Sept 23, 2026

2026/9/23 10:26:01

© Copyright 2025 Dave Berenholtz