| Date: 11-10-2014 | |
| Number of Hours: 10 | |
| Manual Reference: 10-9 |
Today was just the six 100H Divinycell hardpoints made and installed. I spent a few hours yesterday with the torque tubes checking and rechecking that I had the hardpoint locations 100% correct. Yes they do match with the correct B.L. and line up with the elevator hinge locations.
I started out routing and filing the first of the six slots. These go all the way to the bottom skin. I’d looked at numerous websites and quizzed another builder, Wade Parton, who is making a great EZ and has a website I often visit for help. http://www.longezpush.com/the-build/by-chapter/ As he did, I made a mock-up insert out of blue foam. The real ones are that yellow H100 stuff in the first pic and I made them very accurately, unlike my mock up, and had each of them just a nice fit with a tiny bit of wiggle room for the micro.
When I was happy with them all as in pic 2, I trimmed each piece to just about the surface on my bandsaw and then mixed some slurry. The bandsaw was great for cutting out the shapes too. I coated the insides of the slots where there was no foam with pure epoxy and the rest a thick slurry. Then I coated the insert pieces first with pure epoxy as there are really no cells to fill and then more slurry. I’d marked where they sit dry so I could ensure they would seat correctly with the micro in place.
I’ve left to tops slightly proud and when cured I’ll very carefully trim down to the profile. Yes I could have gone below the surface and just filled with micro, easier, but hey I’m trying to keep up the standard even when no one will see all this later. That’s not the point. …..ahh yes and this took from morning until about 5pm.

Careful slots
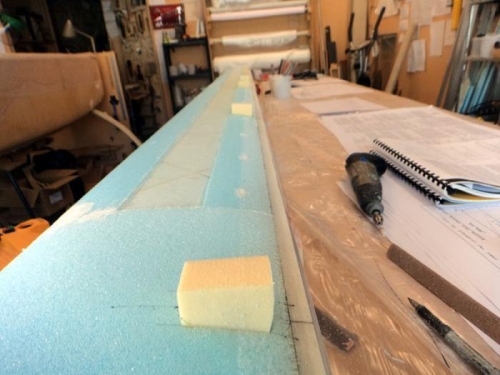
Trial fit

All six are microed in place