• Home
  • Flying
    • First Flight
  • Build by Chapter
    • Ch 3 Education
    • Ch 4 Fuselage Bulkheads
    • Ch 5 Fuselage Sides
    • Ch 6 Fuselage Assembly
    • Ch 7 Fuselage Exterior
    • Ch 8 Roll Over/Seat Belts
    • Ch 9 Main Gear/Landing Brake
    • Ch 10 Canard
    • Ch 11 Elevators
    • Ch 12 Canard Installation
    • Ch 13 Nose and Nose Gear
    • Ch 14 CenterSection Spar
    • Ch 15 Firewall and Accessories
    • Ch 16 Control System
    • Ch 17 Roll/Pitch Trim System
    • Ch 18 Canopy
    • Ch 19 Wings, Alierons
    • Ch 20 Winglets/Rudders
    • Ch 21 Strakes – Fuel/Baggage
    • Ch 22 Electrical System
    • Ch 23 Engine Installation
    • Ch 24 Covers/Consoles
    • Ch 25 Finishing
    • Ch 26 Upholstry
  • Build Mods
    • Liquid Cooling, Numbers, Weights and Flow
    • Cooling
      • Solving Ground Cooling 1
      • Solving Ground Cooling 2
      • Solving Ground Cooling 3
      • Solving Ground Cooling 4
      • Solving Ground Cooling 5
      • Solving Ground Cooling 6
      • Solving Ground Cooling7 – Test Data
      • Solving Ground Cooling 8 – Flap Building
      • Solving Ground Cooling 9 – Hinges
      • Solving Ground Cooling 10 – Lower Flaps
      • Solving Ground Cooling 11 – Upper Flaps
      • Solving Ground Cooling 12 – Completed
      • Cooling the Beast 1
      • Cooling the Beast 2 – Lower Cowl Expansion
      • Cooling the Beast 3 – KW Oil Cooler Diffuser
    • EVS (Enhanced Vision System)
    • Cowl Keeper
    • Rudder Gust Locks
    • Wing Fences
    • Post Cure
    • Hinge Upgrade
    • RAM Air & Hellhole Cover
    • Main Gear Beef Up
    • Pilot Side Windows
    • Baggage Pods
    • Winglet Intersection Fairings
    • Titanium Rollover
    • Nose Gear Doors
    • Wheel Pants/Gear Leg Fairing
    • Cabin heating System
    • Fuel System
    • Roll and Pitch Trim
    • Oxygen System
    • The Ferry Tank
    • Cruise Angle Indicator
    • Fire Extinguisher Install
  • Round the World
    • RTW Route East #12 rev1
    • Survival Equipment
    • Training Flights
  • Other Stuff
    • Blog
    • Around the World: RAAUS Sport Pilot Issue 110
    • Taxi Tests
    • Summary Feb ’24 from an SAAA Meeting
    • AOPA Pilot 27th Sept 2019
    • Build Tests
    • Flying Stories
      • A Long Easy Dream ’06
      • Townsville ’07
      • Cairns ’08
      • Albany ’08
      • East Coast ’08
      • Brisbane ’09
      • Cairns ’10
      • Perth ’10
    • Non Build Mods
      • F16 Scoop for JZE
      • Ram Air Box for JZE
      • Strange Tips
    • Milestones
    • Links
  • Contact

Blog

Home
Build Mods
Baggage Pods
Baggage Pod Hard Points

Baggage Pod Hard Points

6 years ago
Dave Berenholtz
Baggage Pods, Build Mods
Date:  02-09-2019
Number of Hours:  11
Manual Reference:  no ref

With the cuffs in place the next step is to secure them with six hard points per side. While there are quite a few steps, it is a straightforward process.

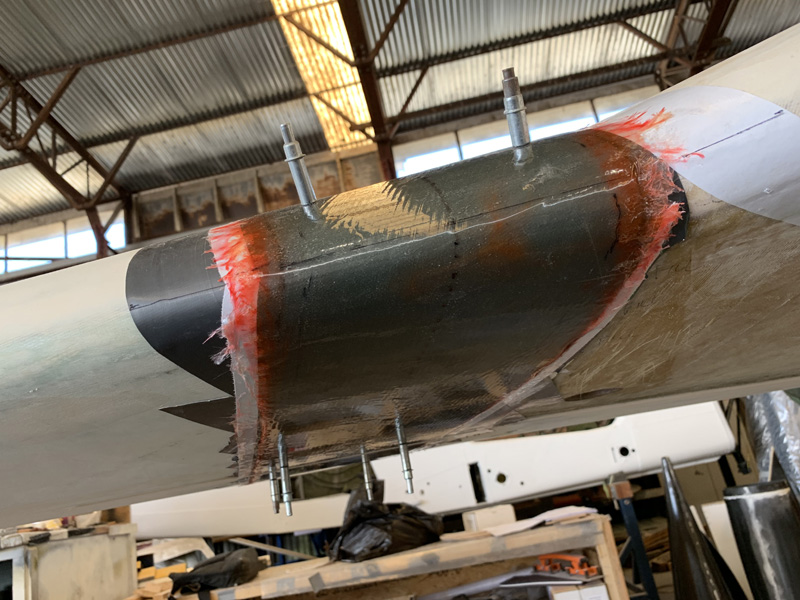
I measured and re-measured where these hard points would go. The underneath set is just in front of the wing spar and then another two 4″ back from the pod pylon. I finally took the step to drill the 3/32″ holes and then added clicos to ensure I had it secure. This took half a day, maybe other people would take half an hour. Its not every day I drill into my wings.

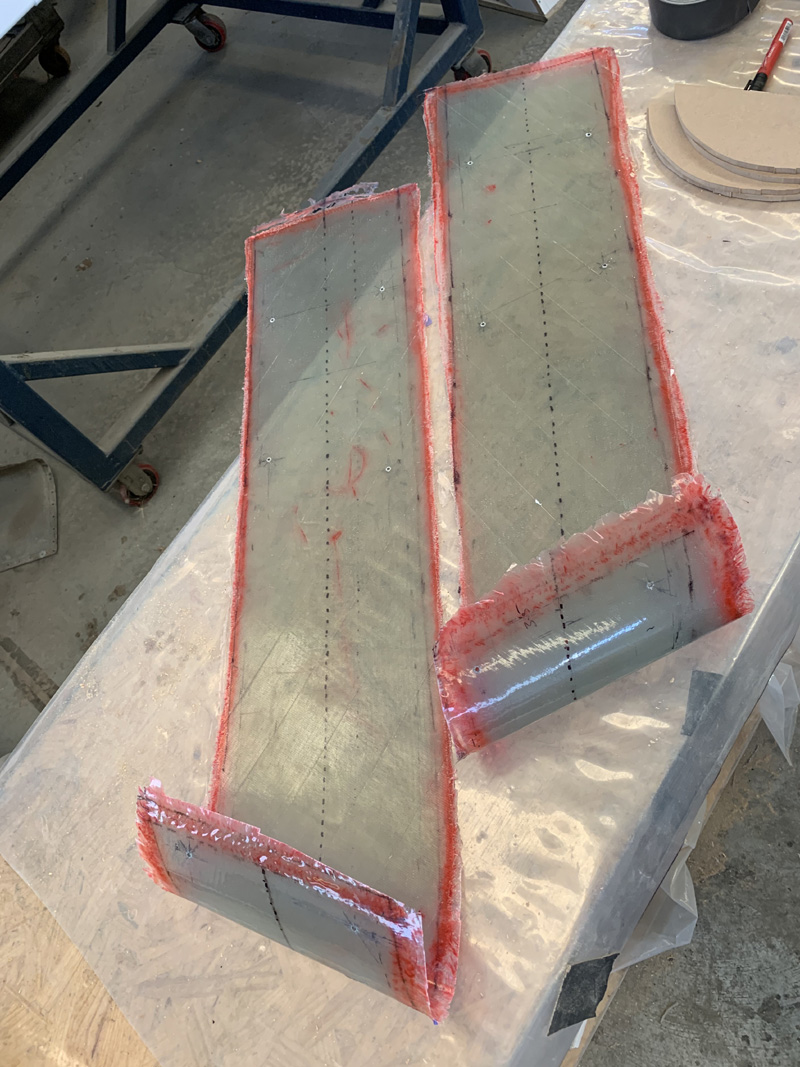
Next up was to pop off the cuff layup. It was pretty easy proving again that some shinny tape with no other prep works a treat for release.

I then got all the tapes off, Did a slight trim of the residue and again secured the cuff with clicos. Given the thickness of the release tape I wanted to see if the cuffs were sloppy. Nope, still a tight fit.

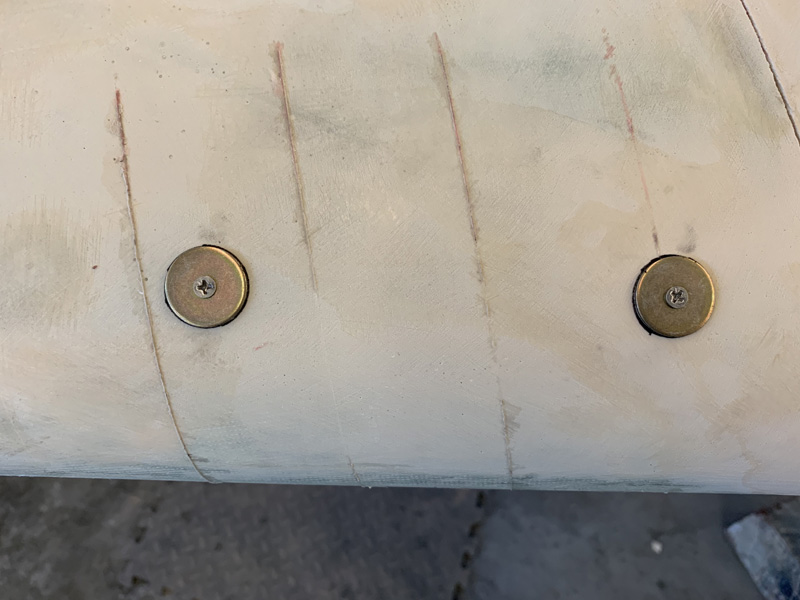
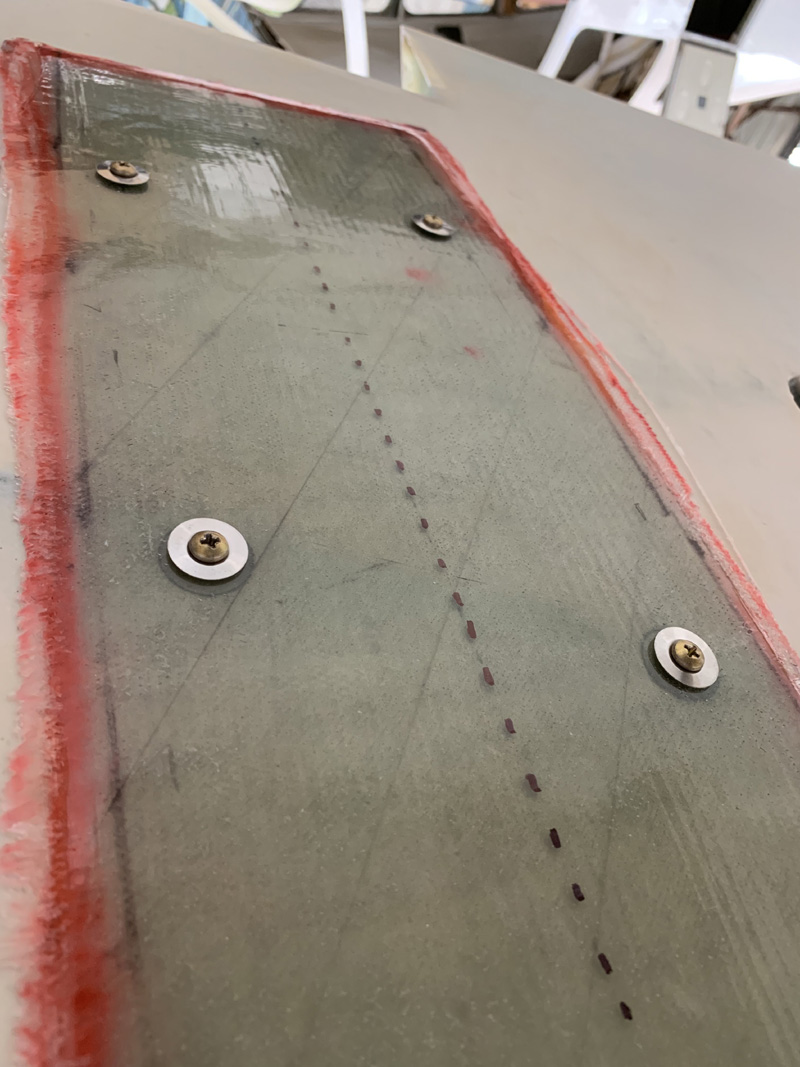
Next up I removed the cuffs again and used 3/32″ diameter counter sunk screws to secure the AN960 washer to the wing. The idea is that the countersink area centers the washers. I then drew around the washers with a fine tip Sharpie pen. This process is for later lining up to get the hardpoints very close to perfectly centered.

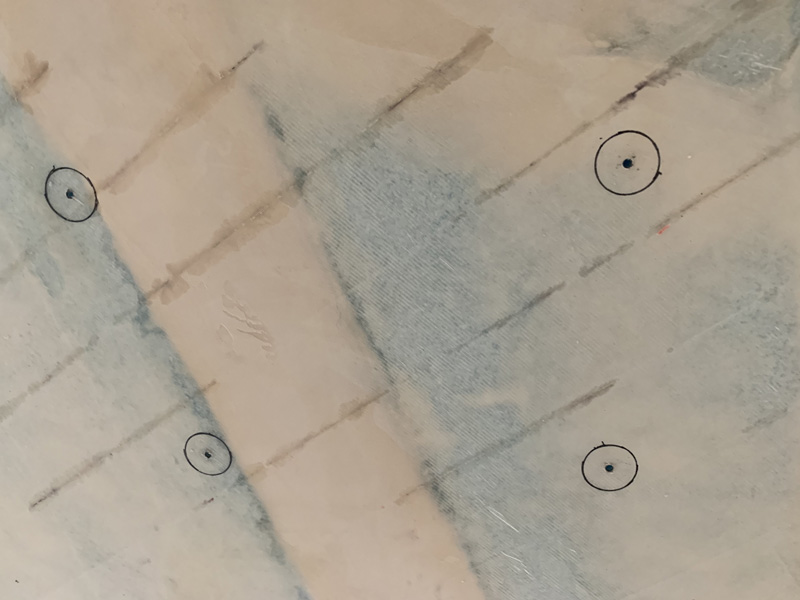
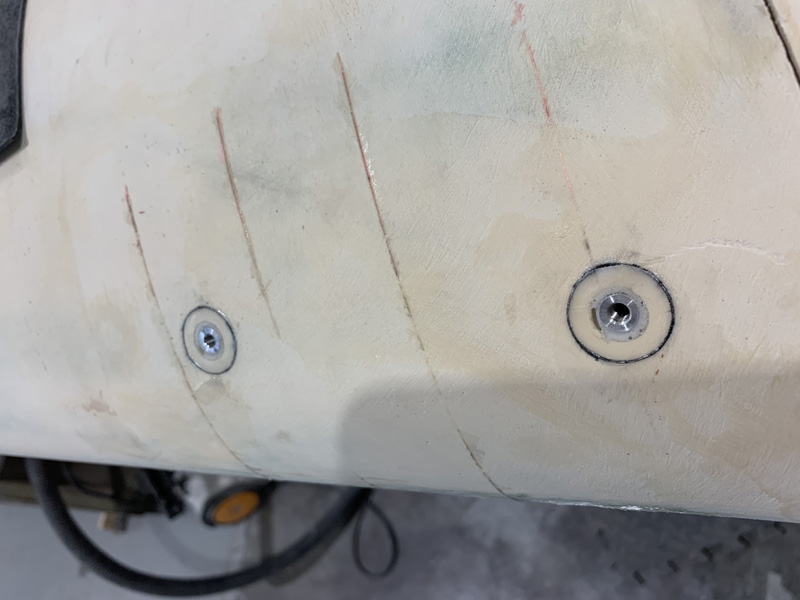
Here’s the bottom of the wing after I removed the washers and screws. Now we have circles centered around the holes that are in the cuff transferred to the wing.

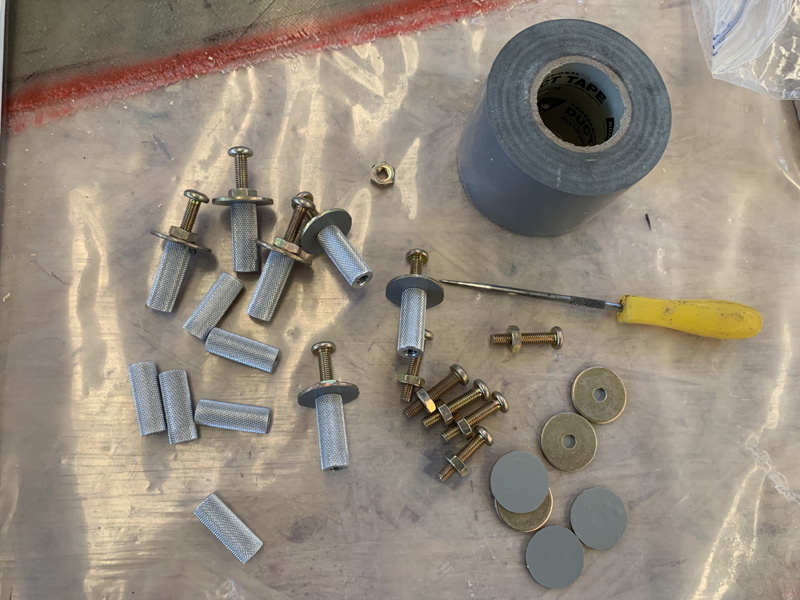
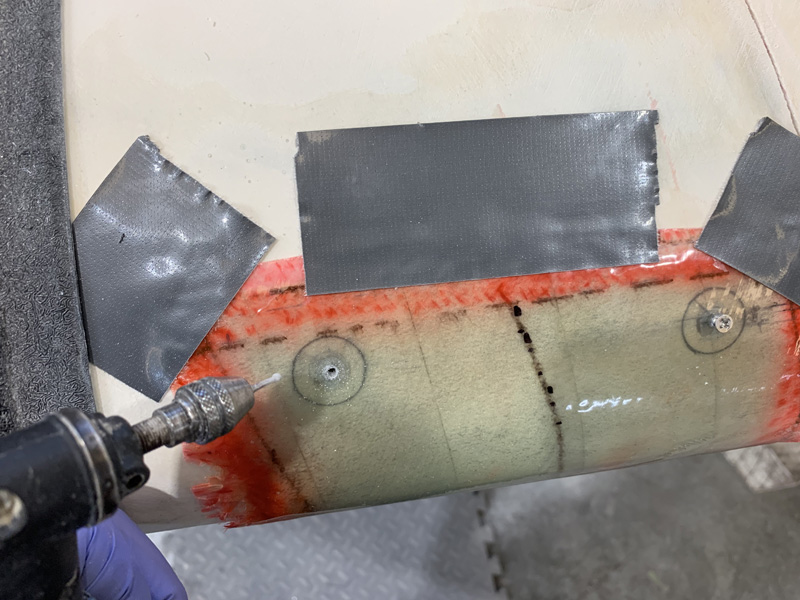
I’m using 1″ long aluminium hardpoints. To install them its an assembly of a washer with grey duct tape for release trimmed on one side of the washer, a screw as a handle and a lock nut.

I opened up the 3/32″ holes in the wing to 7/16″. I used a drill with a crooked bit of wire about 3/8″ at right angles so I could clear some blue foam just under the skin making a mushroom shaped cavity.

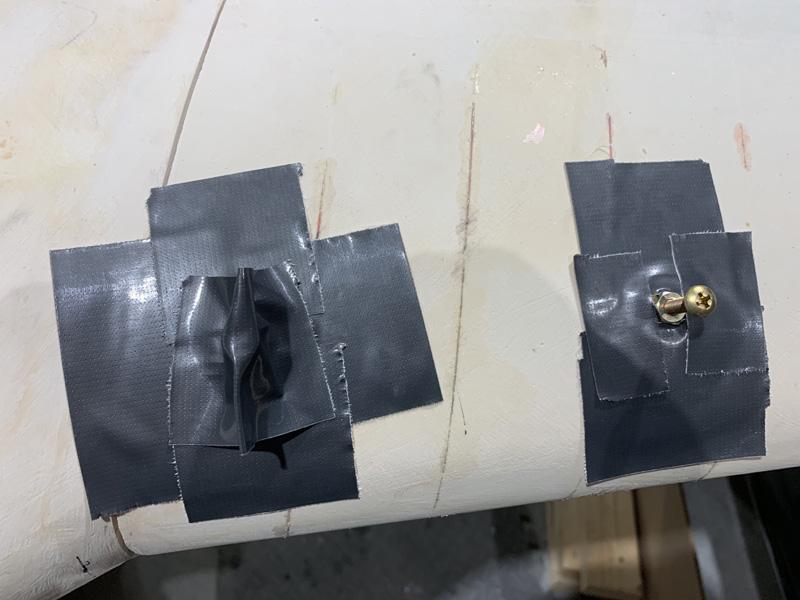
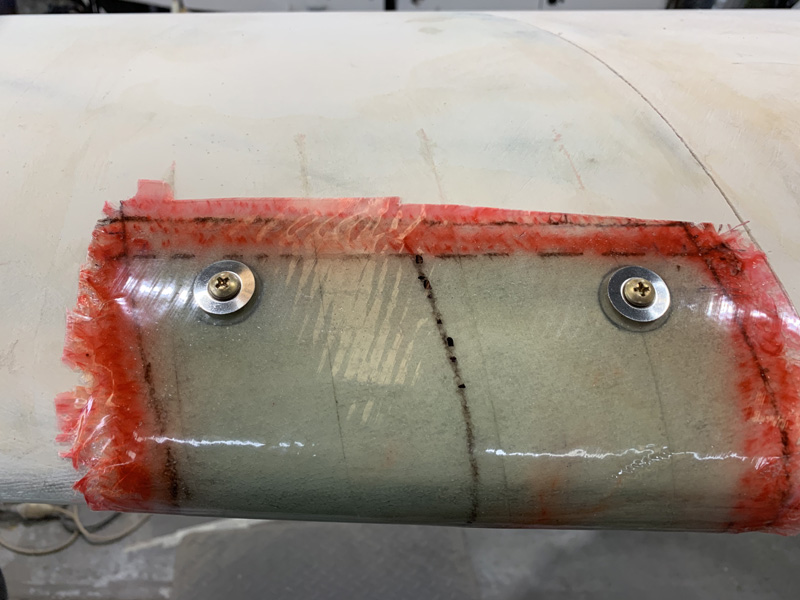
I then made a mixture to fill the cavities for potting the hardpoints. The mix was 25 grams of mixed epoxy, 3 grams of flox and 1 gram on micro. This makes a nice thick paste for the job and worked well even though 4 of the 6 hardpoints per wing are upside down. Of course I primed the hardpoints with pure epoxy and then added some of the mixture. I also primed the holes with epoxy before working in the flox paste mixture. The usual things we do.

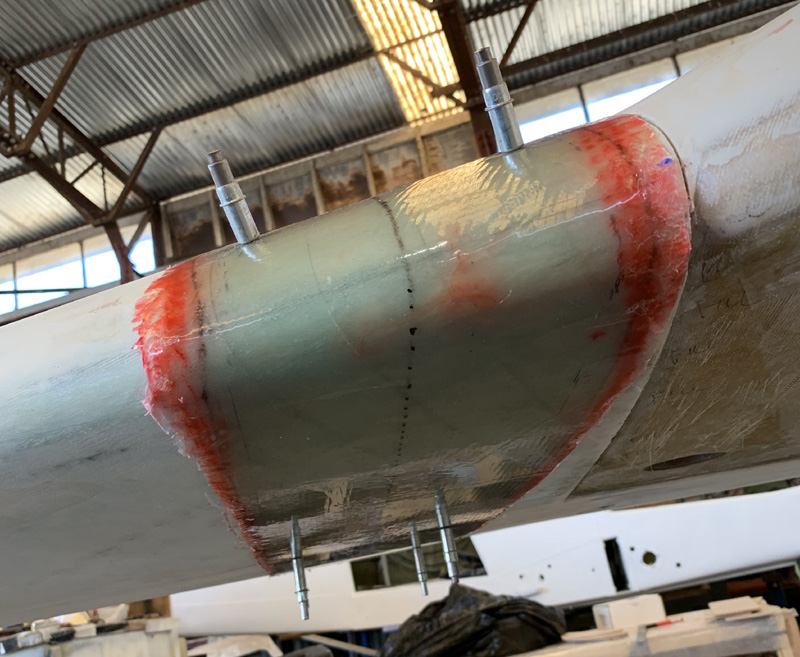
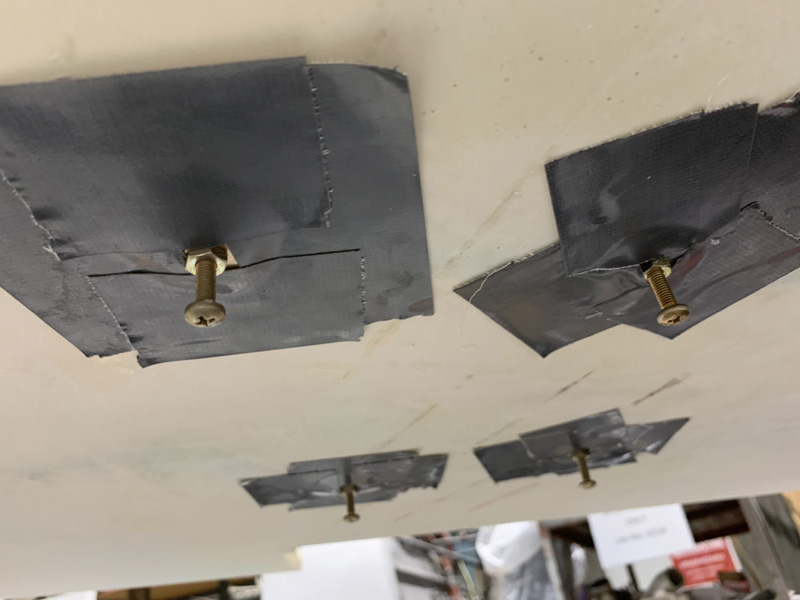
The assembly can move a bit in the hole when wet and thats where the drawn circlesΒ  allow you to center them very well. I used tape to secure for the cure. As you can see after the cure and removing the tape we have our hardpoints centered in the circles. They are also at right angles to the surface. Perfect. This was all in the pod install instructions and it works.

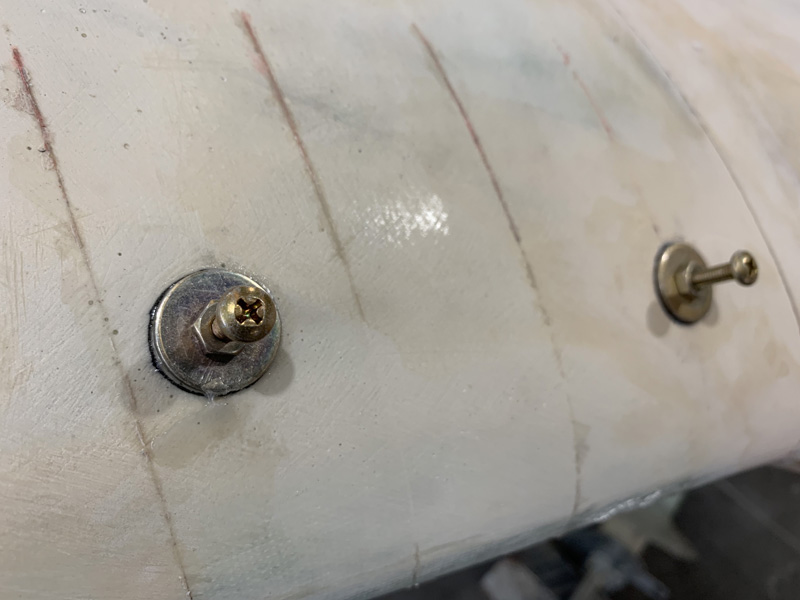
The bolts came out easily and the washers popped off with a little encouragement. We have hardpoints!

They lined up very closely to the centers of the 3/32″ holes in the 7 ply cuff layup. I just used the dremel to get the centers perfect and then drilled them up to 3/16″

\

Later these will be countersunk and countersunk screws used. For now I’m happy just to add the tinnermans and have the cuff screwed on the wing correctly.

This is under the wing. I’ll trim the cuff after the pylon and pods are fitted. For now I’m happy to move on to fitting the pods themselves to these cuffs.


Previous Post
Baggage Pod Stands
Next Post
Pod Laser Lineup

Leave a Reply Cancel reply

Your email address will not be published. Required fields are marked *

Fill out this field
Fill out this field
Please enter a valid email address.

CategoryLogsHours
All157617079
Uncategorized135
Ch 3 Education220
Ch 4 Fuselage Bulkheads25231
Ch 5 Fuselage Sides32283
Ch 6 Fuselage Assembly30270
Ch 7 Fuselage Exterior14140
Ch 8 Roll Over/Seat Belts990
Ch 9 Main Gear/Landing Brake71642
Ch 10 Canard28287
Ch 11 Elevators36298
Ch 12 Canard Installation12102
Ch 13 Nose and Nose Gear1291097
Ch 14 CenterSection Spar57525
Ch 15 Firewall and Accessories448
Ch 16 Control System27237
Ch 17 Roll/Pitch Trim System654
Ch 18 Canopy70502
Ch 19 Wings, Alierons1271090
Ch 20 Winglets/Rudders71528
Ch 21 Strakes - Fuel/Baggage65437
Ch 22 Electrical System591031
Ch 23 Engine Installation961152
Ch 24 Covers/Fairings/Consoles25202
Ch 25 Finishing561084
Ch 26 Upholstry340
Fuel System46310
Rollover1050
Cabin heating System60331
The Ferry Tank335
Blog2694182
Build Mods2252513
Nose Gear Doors856
Wheel Pants/Gear Leg Fairing40473
Oxygen System762
Roll and Pitch Trim964
Winglet Intersection Fairings445
Baggage Pods11104
Pilot Side Windows437
RAM Air & Hellhole Cover15177
Main Gear Beef Up322
Post Cure124
Fire Extinguisher16
Wing Fences13
EVS (Enhanced Visual System)130
Hinge Upgrade115
Cowl Keeper110
Rudder Gust Locks19
Cooling20607
Taxi Tests42
Flying10

Complete the Test Flight Program

2025/6/30 10:26:01

Round Australia in Four Flights

2026/4/1 10:26:01

Round the World Departure

2026/8/22 10:26:01

Rough River Flyin, Sept 23, 2026

2026/9/23 10:26:01

Β© Copyright 2025 Dave Berenholtz