| Date: 07-28-2016 | |
| Number of Hours: 20 | |
| Manual Reference: 13-11 |
How have I spent so long on this? Its been 9 days of fiddling work. OK with a couple of days doing other stuff. The edges around the hatch cutouts have been taken down to the glass about 0.5″ wide. Then all the foam has been carved back and reduced to a thickness where I can get a smooth transition to these glass edges.That took quite a while going carefully. 60 grit, 80 grit and then 120 grit paper after starting with rasps.
Pic 1 was the starting point after cutting off the top area. Pic 2 shows the checking of thickness in the ‘over the IP’ area. I thought around 10mm would work here. The thickness tool is something I had from the days when I made acoustic guitar tops back in the late 70’s (which I don’t remember of course)
I didn’t want to reduce the IP area too much but of course you don’t want a knife edge here in case of a ‘minor’ accident. I am also mindful of having a bit of thickness to add strength in this area that straps, or makes whole, the sides together at the top.
After glassing the hatches I found after cure that there were lots of bubbles that weren’t there even hours after the layup was done. I guess the pour foam released air during the later part of the cure as it looked fine initially. Given this I have decided to hard shell this underside area of the cutout nose piece, as you see in Pic 3. It might take a couple of micro cures and a lot of sanding. As to the hatches, after I get the connecting pins sorted I’ll re-glass the back area. Its only appearance really of that underside but I do want to maintain a certain standard throughout the build.
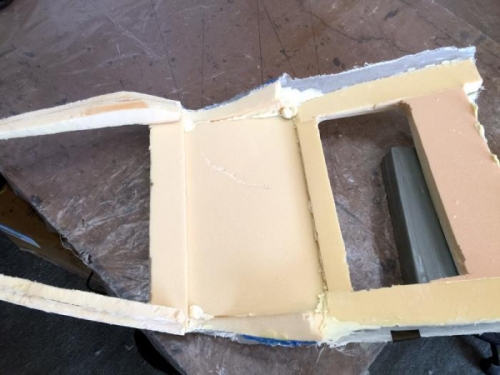
Cutouts ready for adjustments
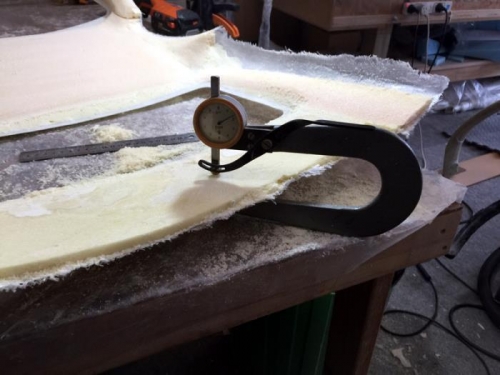
Thickness check
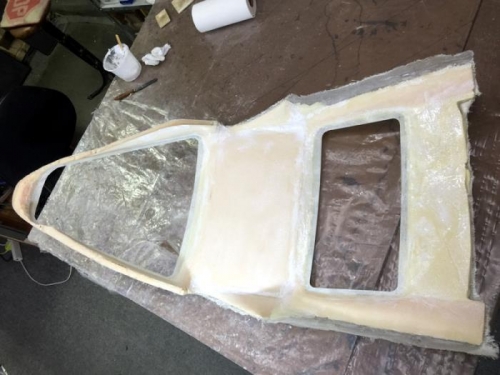
Hardshell micro