| Date: 10-11-2024 | |
| Number of Hours: 15 | |
| Manual Reference: 23 |
Following on from Part 1 of this story, things got worse. I hope there isn’t a Part 3. We first waited for the new flywheel to arrive.
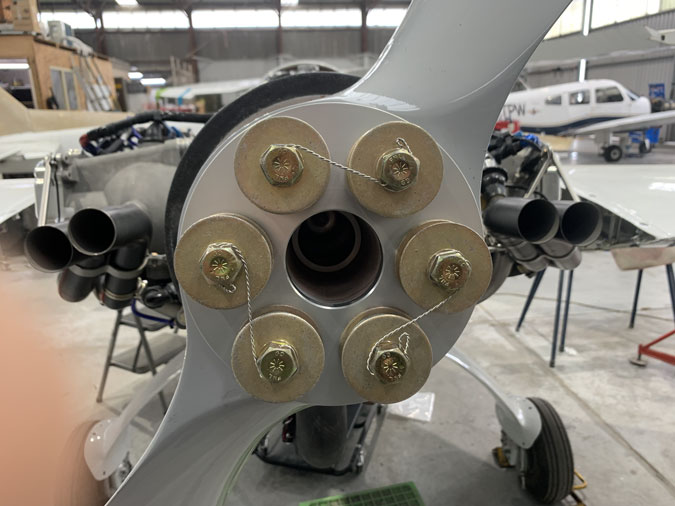
My lock wiring has never been very good. It’s become local sport for the guys to see what I’ve done and then point out the faults, and even give a hint on how I can improve. At least they have stopped cutting them off. This is still not ‘LAME standard’ but it is better than it was. Of course I get to cut them off given the prop and prop extension have to be removed yet again.
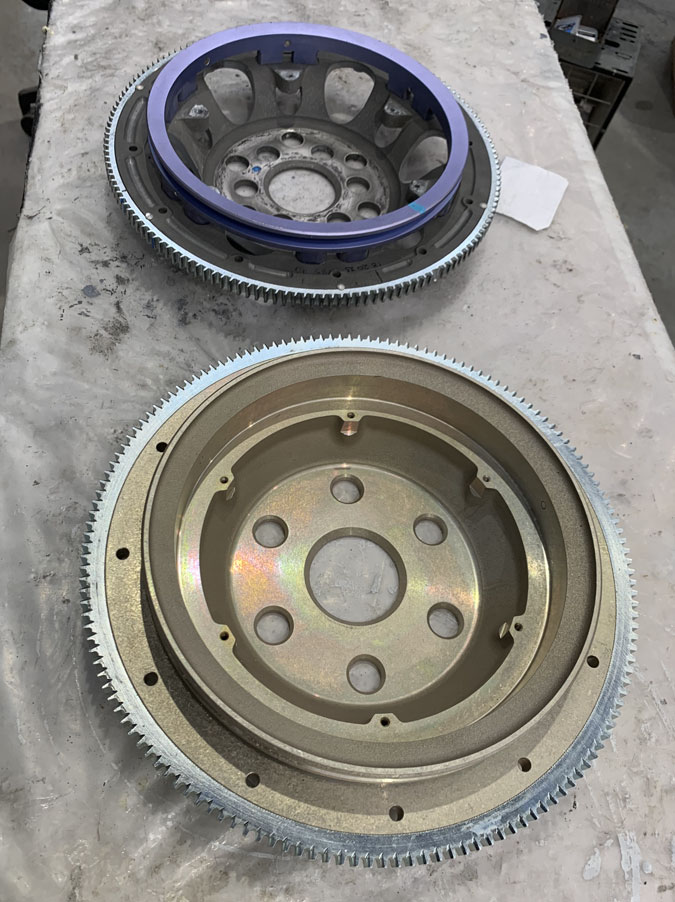
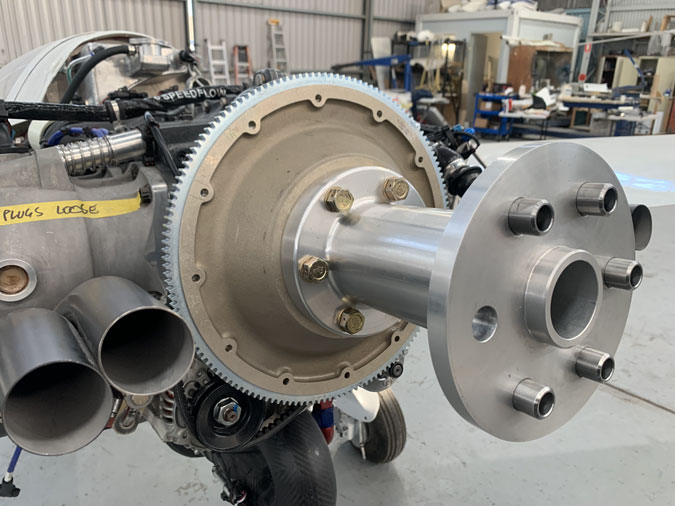
Here’s the new flywheel. It is a bit heavier than the old one,1.9kg vs 3.2kg. I was trying to save weight in case I had a balance issue and needed ballast in the nose but the scales and calculations tell me all is well back there. A bit more mass in the flywheel is a good thing. Although any extra weight is not of course as it takes more horsepower to move it.
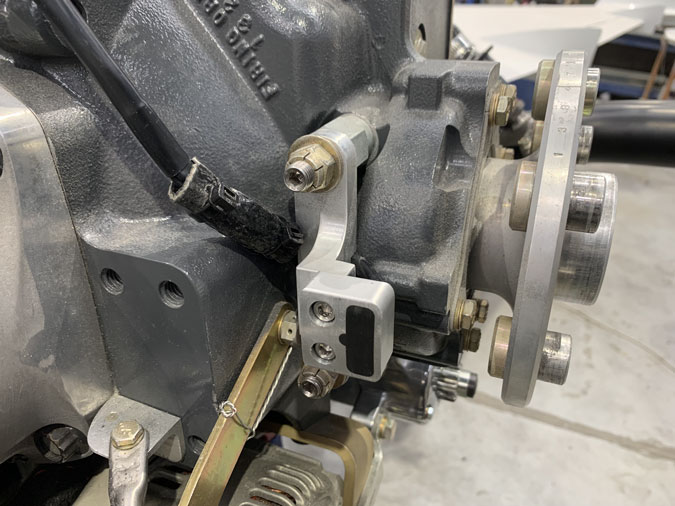
I moved this ignition trigger one stop to line up better with the magnets on the new flywheel.
The magnet to trigger gap is within spec now of about 1/16″. It was wider with the old flywheel and the magnets were not as well centred. We felt this might be the rough running problem and given I needed a new set of teeth it just seemed prudent to ditch the old one for this.
The expense with it being an airplane part and modified with three magnets was eye watering. It was held up in Wildlife and Fisheries customs for nearly a week after getting here. I remain confused about the likely pathogens that live on metal that might be a danger to entry into Australia. I have to pay a fee for it to sit there. No one told me I needed to pay yet more money on top of the freight, duty and GST. So it sat some more until I started spending a couple of hours a day on the phone trying to sort it out. Legal theft? We don’t have much tipping or widespread bribes here, call this what you will.
With the prop back on we first wanted to check everything. We got a pin out drawing for the ignition looms and buzzed the wires to ensure they were correct. We rechecked the ignition CDI blocks to ensure they were not the wrong way around. We rechecked the spark plug leads to ensure we hadn’t gotten that wrong. We have done all this before but something has been wrong and we wanted to eliminate every possibility of a fault we could think of.
We even rechecked the new flywheel position relative to Top Dead Centre (TDC) and the number of degrees before this that the trigger magnets should pass the pickup. This shows on the cockpit engine display as T1,T2 S1 S2. We had the positions from EFII support. This all checked out as correct. We were at least confident that it ‘should’ start ok although I admit to being weary now of my well worn optimism which is has been taking a hit with this engine installation.
Here’s the first start attempt. I couldn’t get it going. However the cranking speed was good so we can confirm that problem is solved.
For the next try I gave it two pumps of the throttle which engages the accelerator pump. I’d just done one pump on the last start attempt. Protocol is to then wait ten seconds and then go for another start.
This is what happened. Probably the loudest backfire I have ever heard close up and a dead stop.
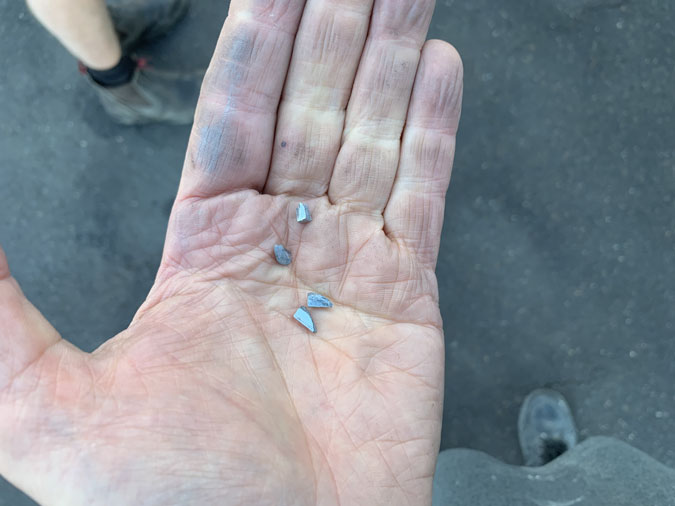
If you can read palms, tell me what this means please.
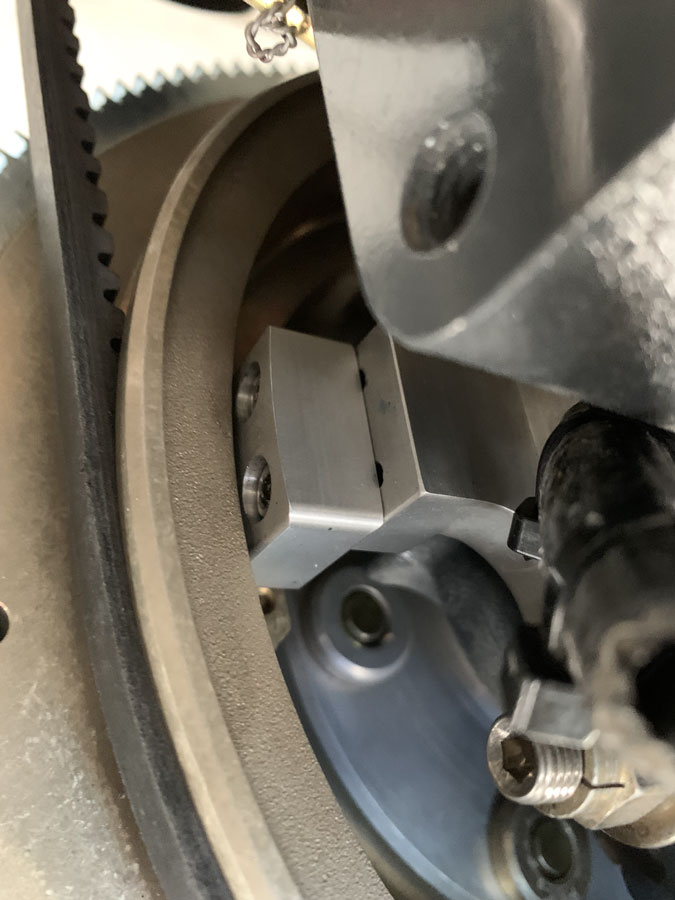
Here’s the result. The gear was stuck out on the brand new starter and six teeth were missing from the previously unused flywheel. Houston, we have a problem…still.
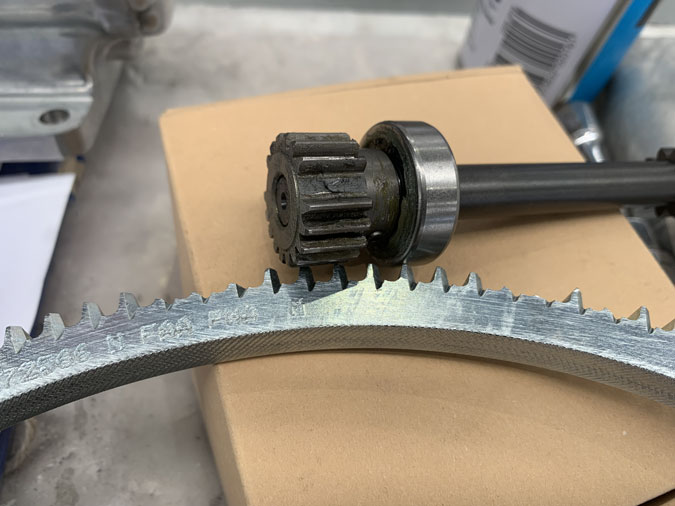
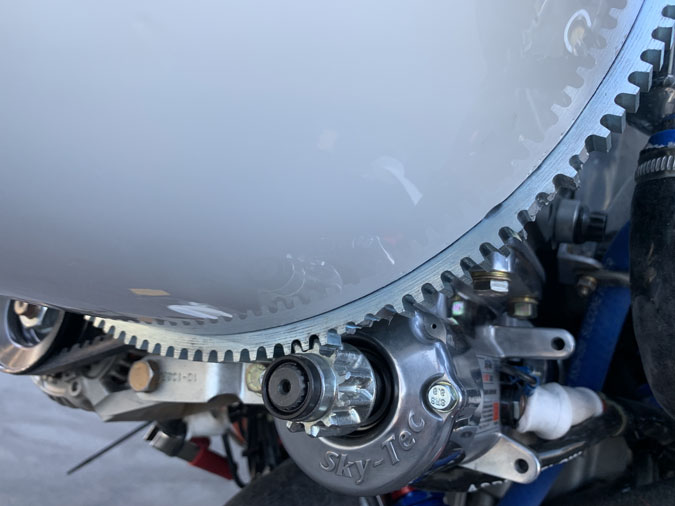
In fact an even bigger problem than I thought. Not only flywheel teeth gone but that event took out the new starter motor as well. Dead as a doornail. You can see above two teeth are out of that internal starter cog. It has a shear pin to prevent this problem, for whatever reason that pin is intact and the starter isn’t.
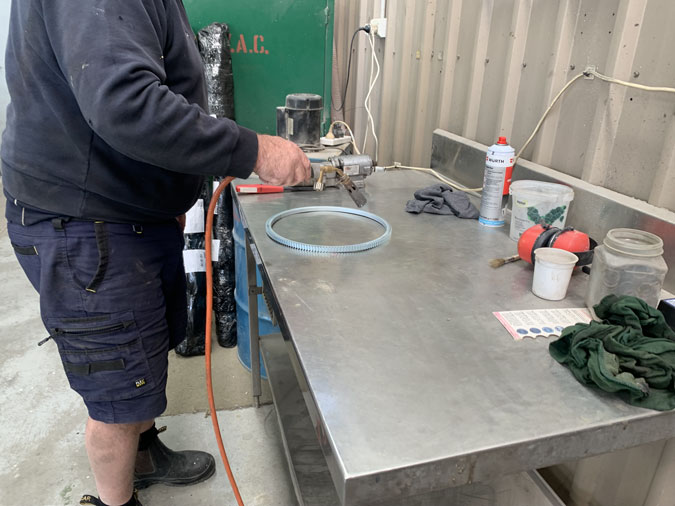
I am extremely fortunate, at least with some things, that the hangar guys took care of the starter and had a new ring in stock. The old one gets ground through almost to the edge and then a hit with a cold chisel gets it off. The new ring is heated up as you see above and just slips over the flywheel. You can have the flywheel in the fridge first if you like. I hadn’t seen this before although it is a standard practice.
Of course I wasn’t going to get off that ‘lightly’.
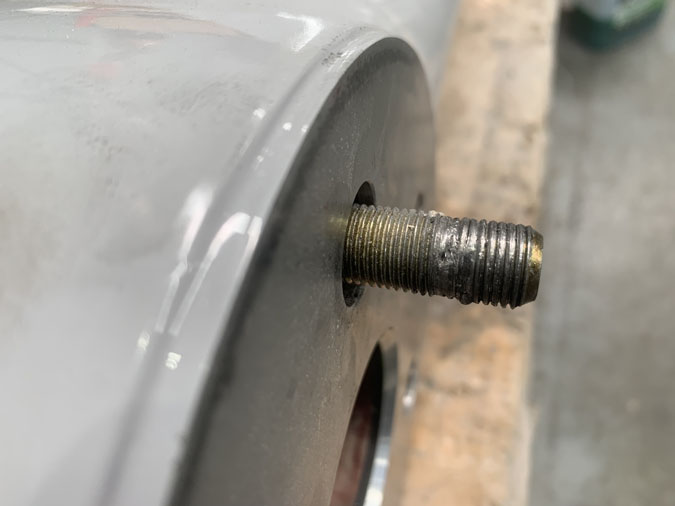
One of the prop bolts galled when trying to get it out. That thing was really stuck in there. It eventually was teased out with a lot of forceful technique. Someone bigger than me did the hard work here.
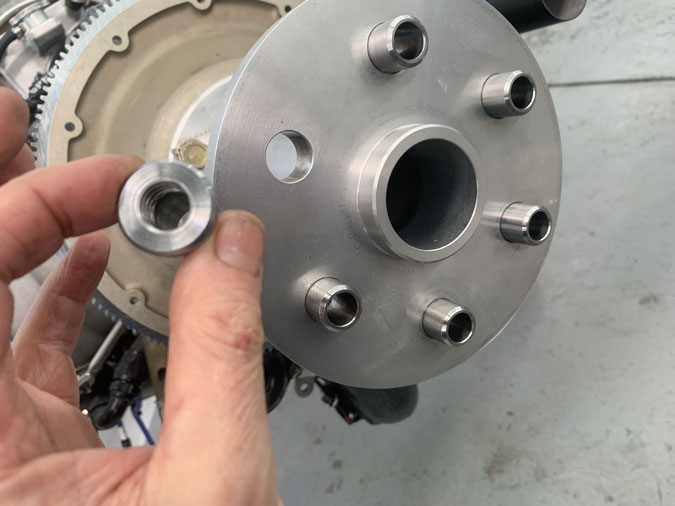
Of course the insert was also toast. I now have the repaired flywheel and starter reinstalled although not torqued up. I didn’t have any spare prop bolts, let alone an inset so these have been ordered and will come from the USA in a week or more, customs permitting.
I was previously meticulous in cleaning the threads and using a little light oil. That didn’t save me. I am getting a 1/2″ UNF tap and die and from now on all bolts and threads will get the run through. I am going to use anti-seize although people say not to. My plane, my call. With 50’lbs of torque and lockwire I consider this as safe as I can get it. I’m not going to have galling again if I can help it.
The fun is not over yet. I bought a borescope as I wanted to check inside the cylinders and for other hard to see places.

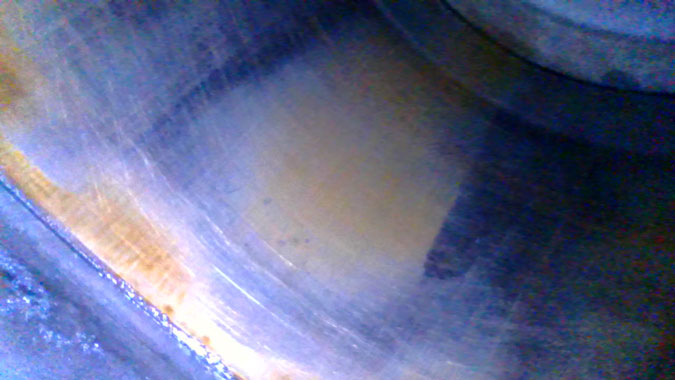
Rust…
More rust.
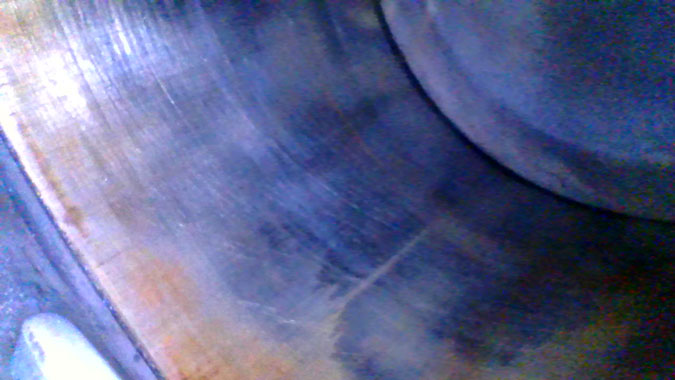
These are cylinder walls covered in rust. This engine was not preserved. It should have been per Lycoming instructions before shipping. The lack of smoke on the very first start should have been a clue. Apparently if preserved per specs, fluid should drip out when you remove spark plugs . This didn’t happen. The engine was delivered with desiccant spark plugs which is to remove moisture. I assumed things were correct.
To be fair I could speculate as that because you are meant to ship things without fluids this was why it was empty. However, I would need a heads up if things were subject to rust with zero protection. I assumed it would have been sprayed or coated internally somehow. The evidence show this engine has been sitting around for a long time indeed. If this was a standard engine, I’d get the cylinders off relatively easily, however we have quite a different beast here and I’m going to push ahead and see what some running does. I am extremely concerned that we might have rusting deeper in the engine. This would likely cost me a bomb and maybe a year.
Meanwhile, I have these parts back on while I wait for prop bolts and the new insert. We can get a strobe timing light on this and check that both ignitions are firing where they should just by cranking the engine over with some plugs out. This might be a job for next week. It is back to the waiting for parts game AND we still need to find out what’s wrong with the timing of this engine ignition.
We have to find something before I will risk another start.
2 Comments. Leave new
Hi Dave.
Dumb question but are you absolutely certain that you have the same engine shown in the pic of the engine during it’s test run, if so it would have oil film all over the cylinders and pistons/rings. I’ve had engines test run and not touched for a couple of years, still have oil film all over.
Did you witness the test? If so then why was it different when you tried.
The large rust seems to be above the top piston ring stroke, however the light rust on the bores has me rather concerned, as you say it could be anywhere, tending to me to indicate rods and crankshaft meaning, possibly shipped with dry engine. Question is why.
Check valve timing and opening distances. you should be able to remove a rocker cover.
Check relationship between crankshaft TDC in relation to any spark/ignition markings.
Seems to me there is more than just spark timing.
What you are likely seeing is the engine backfiring just before TDC or maybe a long way after TDC, both cause kickback and can shred teeth.
Be careful with antiseize, use it sparingly, the bolt, if there’s no locknut can vibrate loose even with a retainer wire. that’s what anitseize is for. You get thread shredding if the bolt or it’s housing are stainless steel.
I’m probably way off mark here.
Cheers
Roger
The tightness of the engine, the lack of wear on ring gear, starter, and the rust in the bores all make one question whether the engine was truly run-in at all before shipment. There should have been at least some residual oil on the cylinder walls. The lack of bespoke preservation itself (failure to follow manufacturer procedures) should be more than enough reason for the maker to take action to make you whole. Best wishes.