| Date: 07-10-2024 | |
| Number of Hours: 3 | |
| Manual Reference: 25 |
Importantly, stick and throttle functions need to be labeled just like instrument panel items. There are a few legal requirements for placards that I’ll show here as well.
Throttle: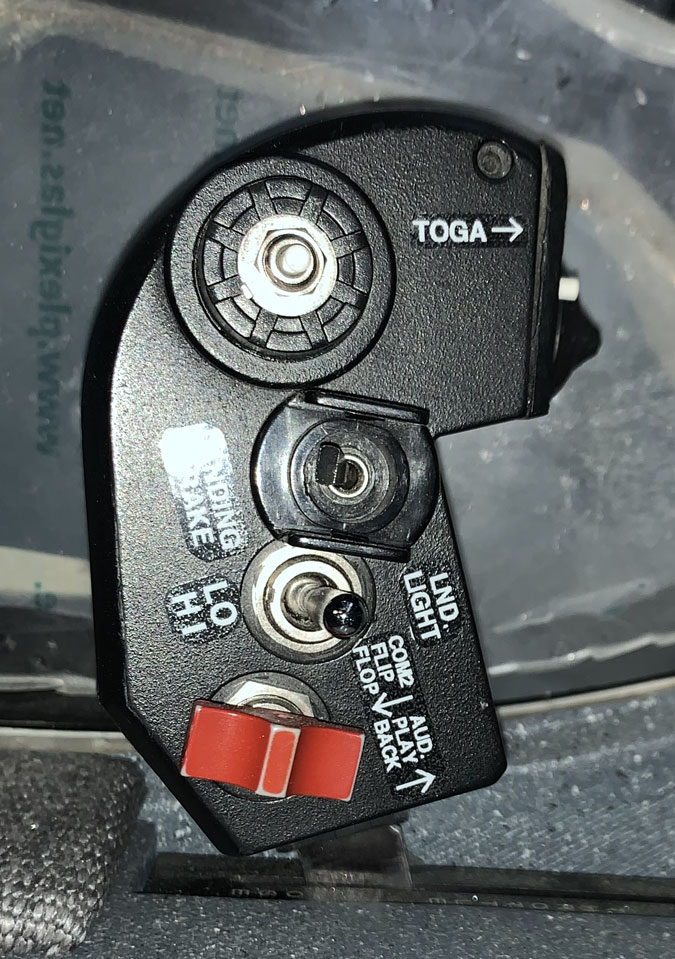
TOGA – takeoff/go around This sequences the Garmin GPS that the intended landing is now going to point to the missed approach. If the auto pilot is on, that of course follows its direction for the missed. The small white button is on the front of the throttle, just right of the picture.
LANDING BRAKE – this has three positions, up, down and it can be paused in its travel for a partial open brake. Indications are on the G3X. The switch operates a linear actuator that opens and closes the brake. On the plans version of a Long-EZ, this is mechanical. There is also an auto function, if the brake is down but I engage full throttle, it will come up and close. The switch then needs to be cycled to go back to normal operations.
LO HI LND LIGHT – the front landing light has a boost where it drains a few more amps but gets brighter. I’d use this for night landing but just the low setting during the day if I want a recognition light.
COM 2 FLIP FLOP AUD.PLAY BACK – Com2 is the G3X com while my main one is on the GTN750. This red toggle has a center and two positions. Pull back and I get the flip/flop on the com. Push forward and it ties in with the audio panel and I can use it to repeat a radio transmission I’ve just received. I don’t know how this will work in practice.
PPT – Push to talk. That’s the small white switch on the raised portion at the bottom of the picture. It doesn’t have a label. I also have one on the stick. The idea is that given I’m right handed if I’m writing down a clearance I can use my left hand for transmitting.

POINT LIGHT This is the 4 way hat top switch at the front of the throttle. This controls the angle of the headlight, up, down, left and right. The light sits on a car mirror mechanism so its easy to relate to what it does,
In a Long-EZ the approach can be quite flat so you’d want the light pointing down towards the runway. Once you land you’d want it pointed more level so that you can see the runway turnoffs and taxiways. In fact, the side to side idea is also for those turnoffs. Night is challenging at unfamiliar airports where all you have are often little lights on the runway and taxiway to guide you and not a lot else.
The white button is the TOGA
STICK
TRIM – This is the 4 way hat top switch on the top. It controls elevator trim up and down and aileron trim left to right. The elevator trim being critical given I have no mechanical trim. This is run with a linear actuator and goes through the Garmin system as well as a part of the Auto pilot system.
I have safeguards in place and it will be tested extensively to ensure I can overcome forces manually should anything go wrong. I do have trim runaway protection but nothing is perfect.
A/P DISC – The RED button. Disconnects the autopilot. Pretty important.
I think if you hold it down you can also disconnect the auto function where even with the AP off, if the Garmin doesn’t like what the plane is doing it will set things back on the straight and level.
INTELI VOICE – This is the green button. Garmin supports voice commands. I press this button and then tell things what to do. It has a limited vocabulary and I have to learn what is useful, if anything.
COM1 FLIP FLOP – This is the light blue button on the left side of the stick and is a simple frequency flip flop for the GTN750 radio. It will get plenty of use between say Melb Center and a CTAF if thats how I set them.
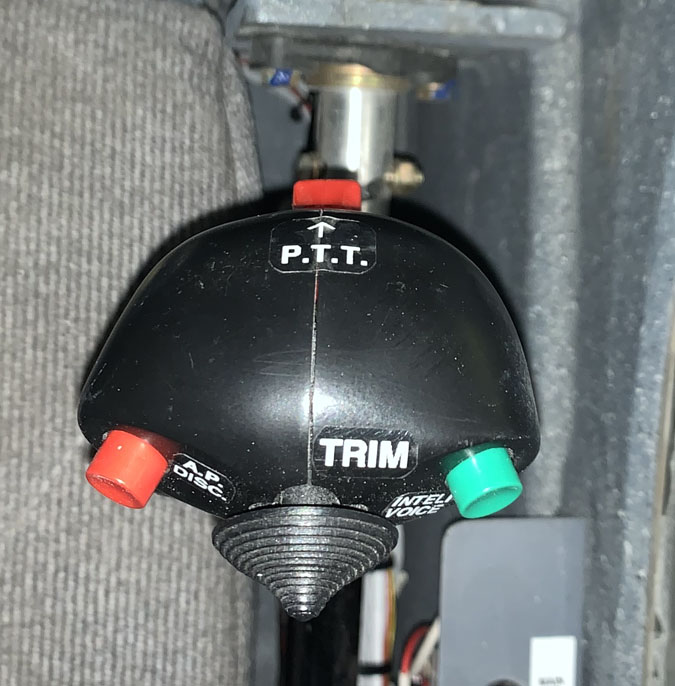
PPT – Push to Talk. A big red button you can see looking down. On the left side in the next photo. Like pulling the trigger to communicate. No, not forward guns or the missile drop.

COM1 CH UP/DN – This is the silver momentary toggle switch. It moves presets on the GTN750 radio up or down.
I don’t know how much I’ll use this. It was too much work to make this function do something else when we revisited it after a couple of years. In the meantime Garmin software updates had made new options possible.
FUSES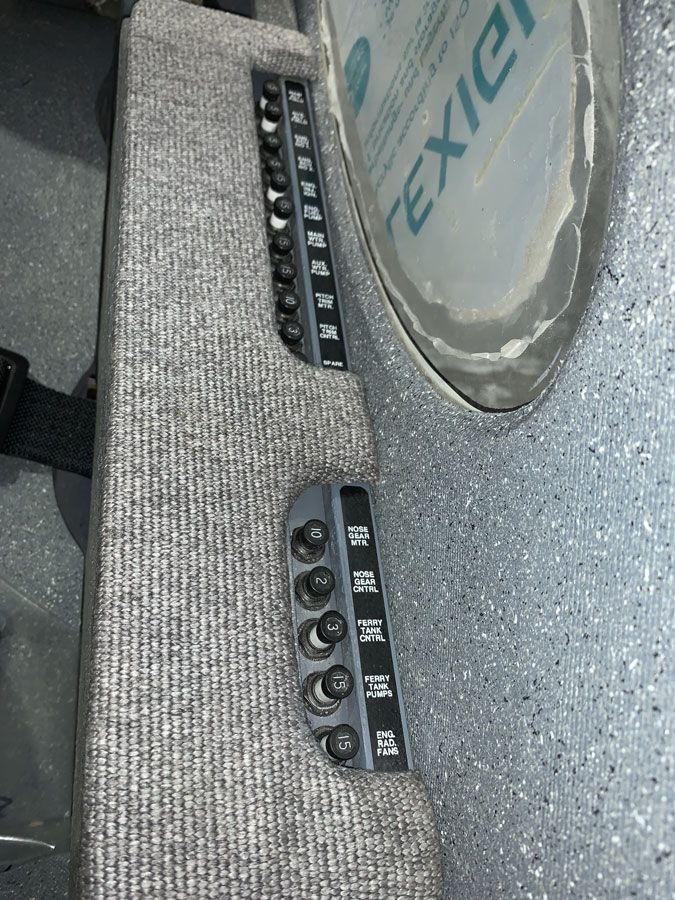
Old school.

There are electronic fuses via the VPX system and through the G3X but these are the traditional Klixon, relating to engine critical functions, pitch trim and the auto pilot. They are reset-able and available to pull if I ever need to inflight.
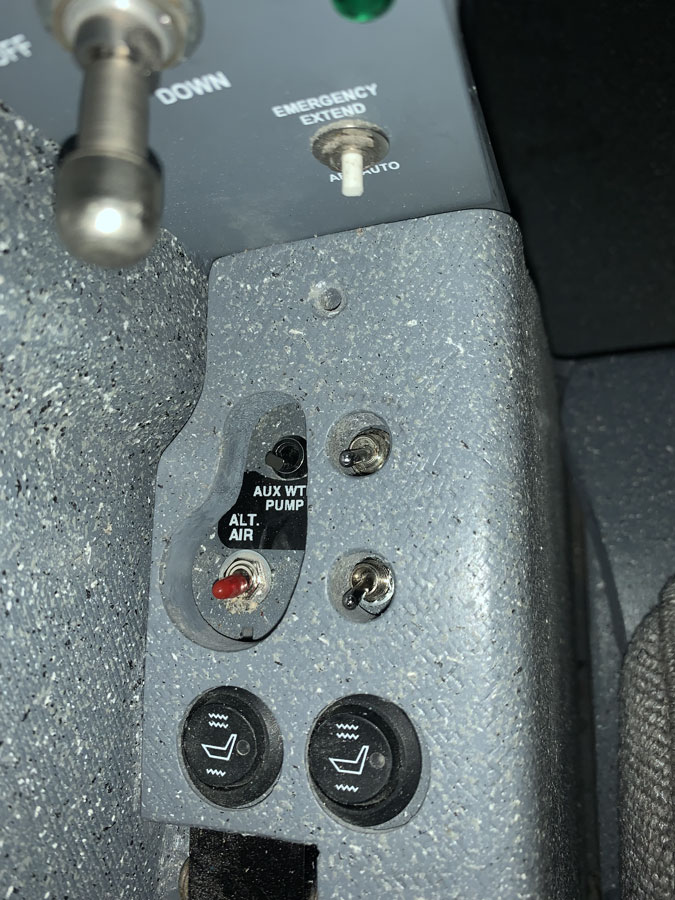
While we are at it, a late addition to the controls:
ALT AIR This operates a slide door opening in the induction pipe, after the air filter in case it is ever blocked so that the engine can get emergency air. Maybe ice, a messy, bird strike or a forgetful pilot leaving the intake air cover on would be situations where this might be used.
AUX WT PUMP I have two coolant (water) pumps plumbed in series. One is always on with the engine power and is speed controlled via a temperature sensor. The other is a back up for coolant boost or if the first pump fails.
Seat Heaters The two switches are for the front and back seat heaters. They have a hi and low setting. The left one is for PIC the right for PAX.
The other two switches are extras, doing nothing and yet to be assigned.
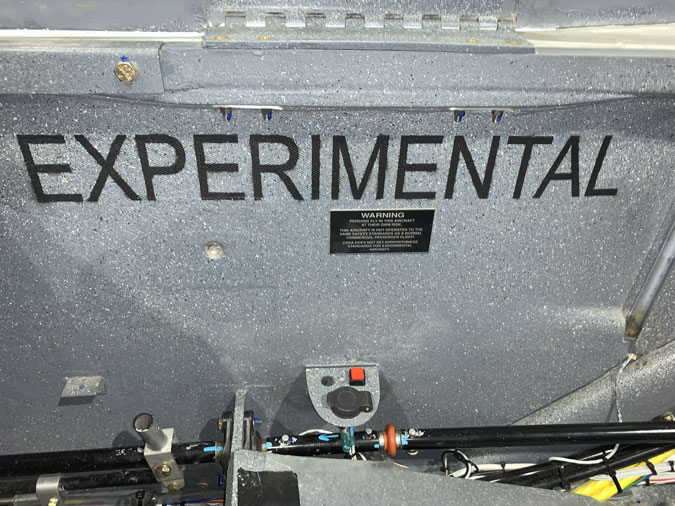
Here is the required EXPERIMENTAL declaration.

The CASA required passenger warning placard. I like to think my standards are even higher than those required for a certified plane. I can think what I like, CASA still requires the warning.

Here’s the ‘data plate’. While other have more information, the regs just require these three items. The serial number is DB001, a bit hard to see in the photo. The steel rego placard is no longer required but I liked it and someone made me one so I added it.